The third chapter in Gothic 1 Remake is perhaps the most challenging. The player must collect five Focus Stones, each hidden in a particularly treacherous manner. One of them is located in the monastery ruins, making it a true survival puzzle.
We’ll give you a step-by-step guide on how to reach these ruins, sneak inside, and retrieve the stone. It won’t happen without a fight, so be prepared with some serious hardware.
Table of Contents
Preparing for the quest in the ruins of the Gothic monastery 1
The Shadow Beast and the troll waiting at the exit are formidable opponents; they certainly won’t forgive mistakes or accidental improvisation. The situation is complicated by logistics: there’s simply nowhere to buy useful gear along the way, so you’ll have to lug all your equipment and consumables straight from camp. There’s no hard level lock for this quest, so you can sneak into the location fairly early if you’re feeling adventurous. However, your health will determine how many times you’ll have to face the loading screen during boss fights.
Best gear and weapons before you go
-
Healing Potions. Our primary tool for emergency healing. The developers didn’t create a hardcore survival mode in Gothic 1 Remake—there’s no need to monitor your hunger or thirst indicators. Your only goal is to keep your health bar above zero. Regular food restores HP too slowly, and adequate first aid kits are critically scarce early in the game. In a tough fight with the Beast, seconds will be worth more than roasted meat.
-
Food on hotkeys. Stew, hearty hams—feel free to fill your hotkey slots. Assign provisions via the “Equip” command to gorge yourself on food during a fight without wasting time opening your inventory.
-
A sharp one-handed sword. Choose a blade with solid base damage. The advantages are obvious: high swing speed, a free second hand for maneuvering, and relatively low character stat requirements. Don’t include the famous Death Sword in your starting plan in the arena—it’s wiser to pick this trophy up after victory.
-
Strength Jewelry. Rings and amulets perfectly compensate for the lack of Strength points for your favorite blade. This will save precious training points in the early stages.
-
Scroll of “Transformation into Bugbear.” This artifact awaits you in a chest near the Furnace. Remember, without this magic, you won’t be able to get past the monastery wall, so take care of the scroll—it’s not just a consumable, it’s your only pass inside.
What level and stats are required for the quest?
You should base your calculations on the strength of the Shadow Beast, as the local predator is more dangerous and vicious than the same Creeper Queen from Chapter 2. As a reminder, players typically dealt with that creature at levels 9–12, with around 45–55 Strength, 200–250 HP, upgraded armor, and a substantial bag of potions and food. The Monastery Ruins storyline begins significantly later, so it’s best to approach this location with a good leveling progression.
These figures are a verified benchmark, scaled based on the iconic battles of Chapter 2, and not an ironclad requirement. If you’re not getting enough pure power, actively compensate with rings and switch to a cautious “hit and bounce” tactic.
Character leveling and builds for the Shadow Beast
Strength and purely magical builds are more powerful in the remake than agility-based builds. Against the agile and agile Beast, this imbalance is immediately noticeable—the monster simply won’t let you aim a bow or crossbow.
Here’s what you need to level up first with trainers:
-
Strength. For this stat, go to Diego in the Old Camp. This stat unlocks access to top-tier melee weapons and increases your damage output. Keep in mind that each new level consistently earns 10 training points for trainers.
-
Roll (dodge). This useful skill is learned from Buster in the New Camp. Without a mastered roll, you’ll have a hard time in melee range—experienced Gothic warriors often rush to Buster for this ability even before starting major quests. In the moments between the Shadow Beast’s furious attacks, a well-timed dodge will save your life far more often than another potion.
A mana build is a viable alternative. The tried-and-true Fire Arrow rune can effectively annihilate enemies up until Chapter 3, and the furry boss’s high mobility won’t be a serious hindrance to magic.
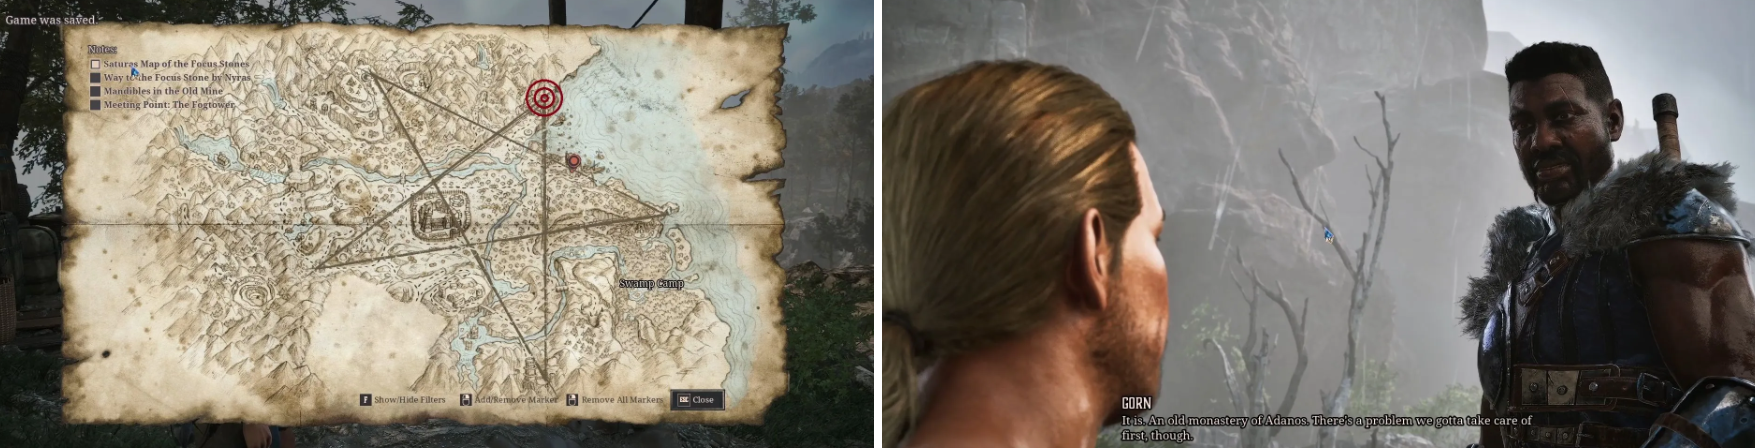
Where can I find the monastery ruins on the Gothic 1 map?
First, head to Gorn. He’s marked on the map with a star in the upper right corner—a red circle, you can’t miss. He stands at the edge of a stone bridge. A few words, and he’ll personally lead you to the cave.
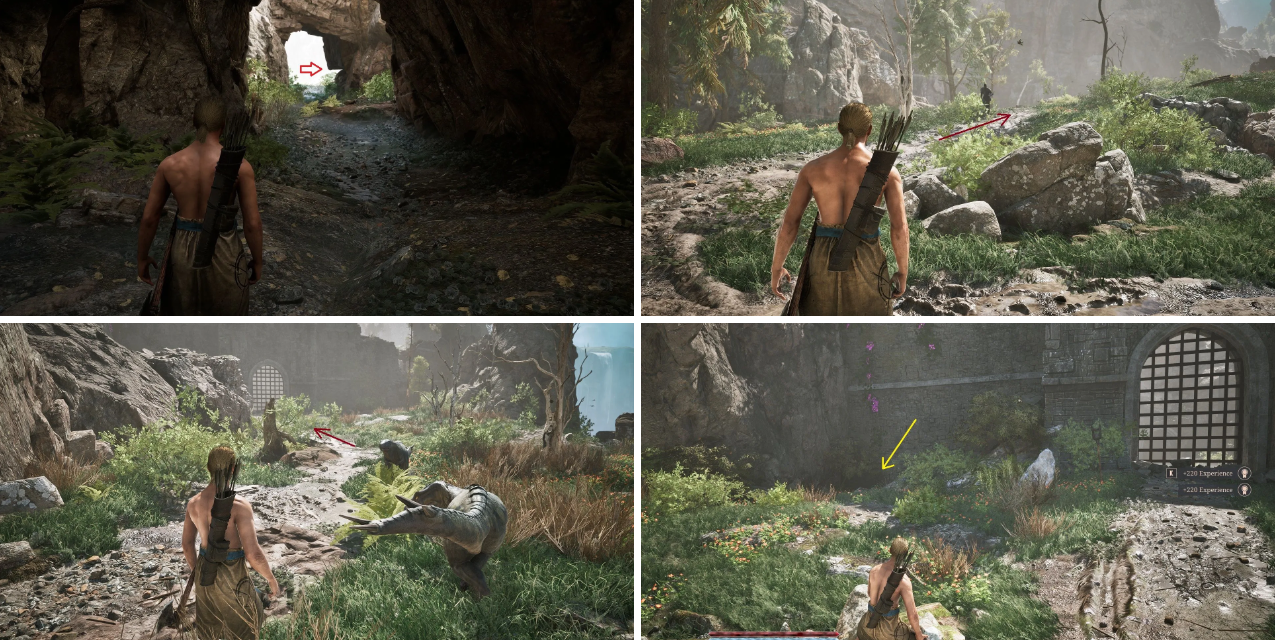
Inside, in the side room, search every corner. The main target is the chest in the corner. It contains the “Bugbug Transformation” scroll. This isn’t just a fun bonus, it’s the key to the monastery.
Gorn, by the way, will come with you. Take advantage of this—let him take the brunt of the damage. Did the enemy notice? Run behind your partner. He’s tough and can handle any small monster.
Exit the cave and take the right path—it leads to the top of the mountain. Return to the bridge where you found Gorn and cross it toward the monastery. Be careful on the other side: Clickers are always on the lookout.
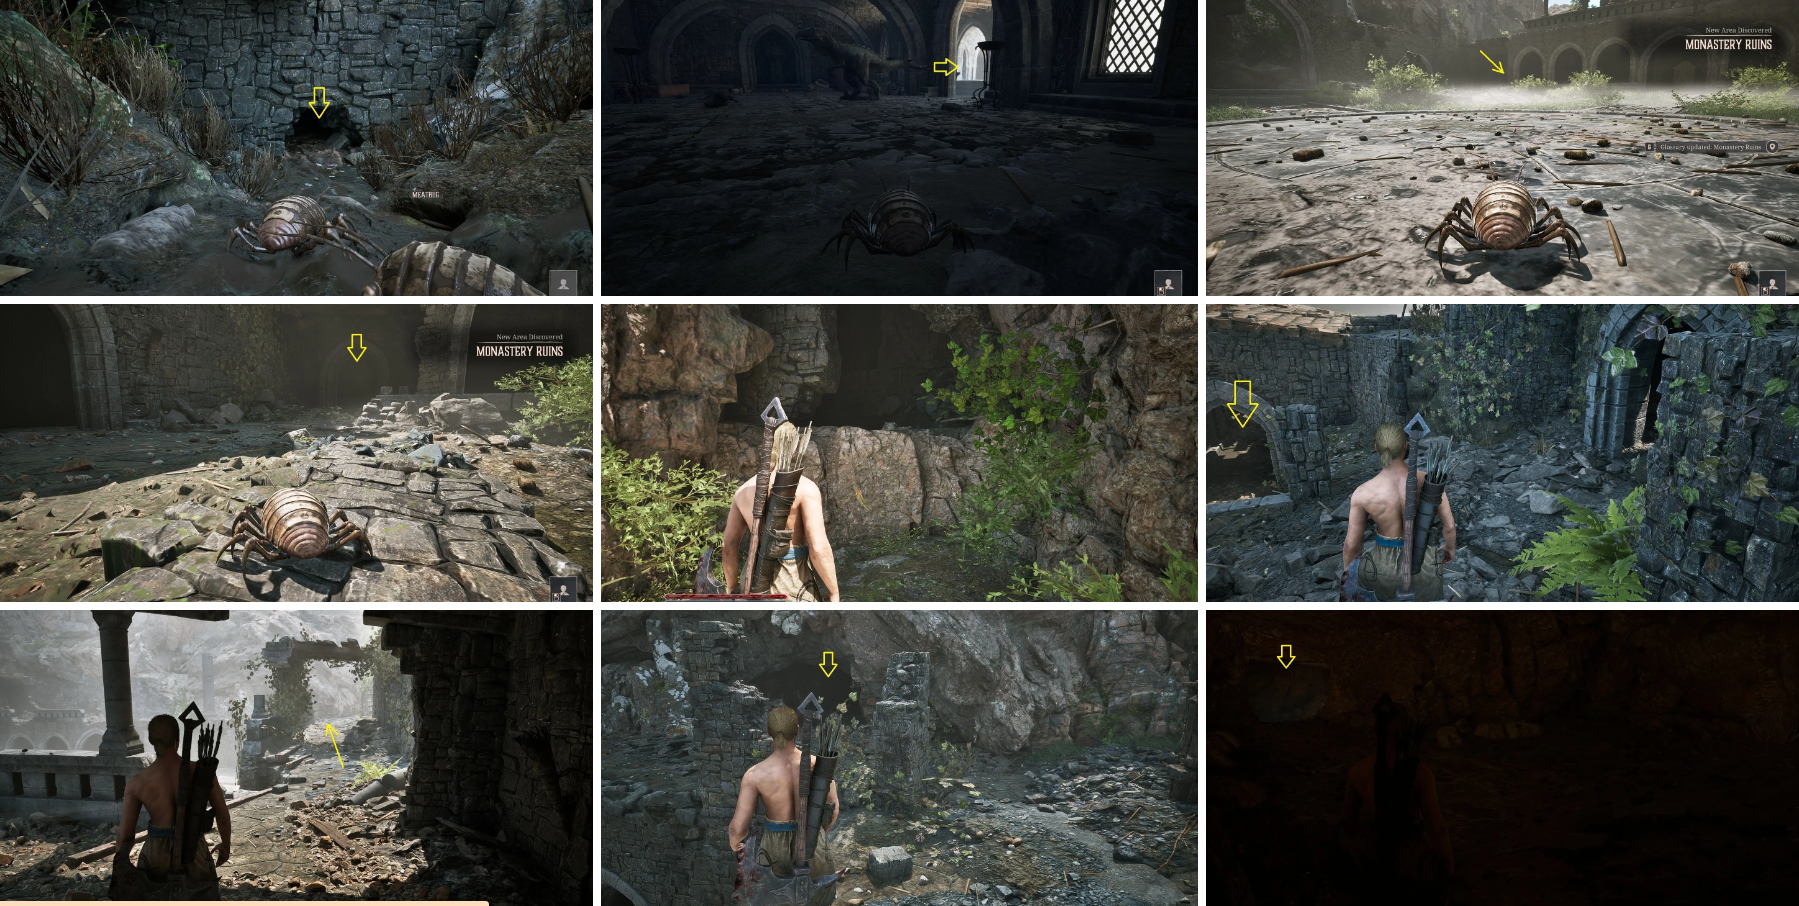
How to open the monastery gates and get to the boss?
Don’t even try to pick the iron gate—it won’t open. Look to the left. See the pink flowers on the wall? Head there. There are Beetles crawling around there. Now’s the perfect time to activate the scroll and transform into one yourself.
Crawl toward the wall—you’ll find a crack. Climb through. Did you pass the Clicker? Excellent. In the center of the courtyard, look for a lever that will open the iron gate from the inside.
Now run to the far right corner of the monastery (see the screenshot above for a reference point). There’s a corridor there, and beyond that, some ledges. Grab onto the wall and climb up.
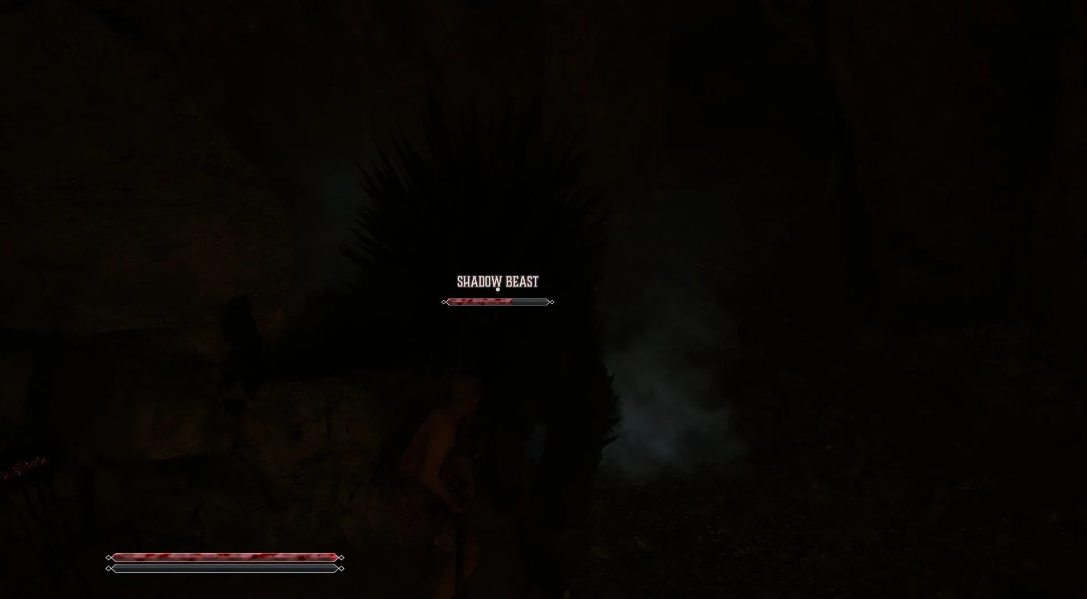
On the top tier of walls, turn right. Continue straight until you reach a cave. Inside, turn left. First, deal with a couple of Clickers. Then the boss awaits you: the Shadow Beast. It won’t be easy.
Shadow Beast Battle Tactics in Gothic 1 Remake
The Shadow Beast is fast—running around it is useless; it’ll catch up with you in no time. But it attacks slowly. There’s a pause between attacks, and that’s your chance: hit and jump away.
One-handed weapons are a priority here. Yes, they deal less damage, but you’ll have time to stab twice instead of once. Don’t use a bow or crossbow. The beast is too agile and won’t let you aim.
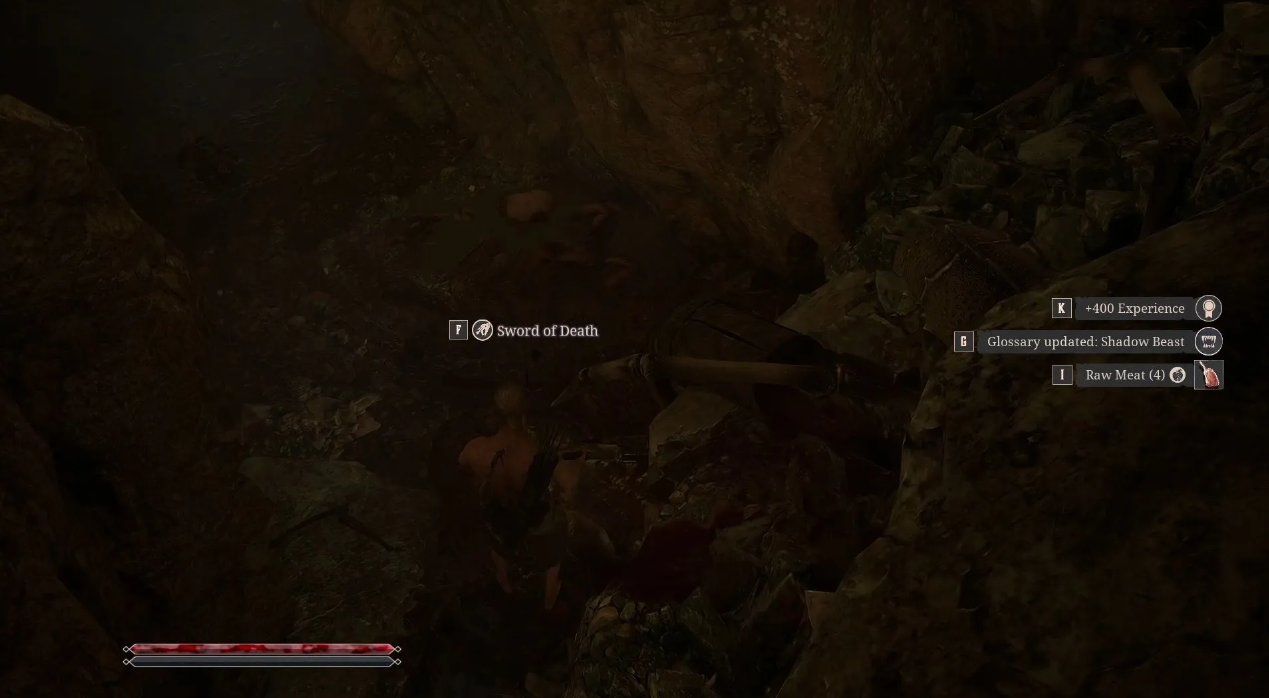
There’s a decent one-handed weapon lying around in the arena—the Death Sword. Theoretically, you could pick it up during the chase. But the risk is enormous: the blade is in a dead end, and reequipping your weapon in combat is almost impossible. If you can’t do it right away, come back for it after you win.
Where to find the Focus Stone and how to defeat the troll?
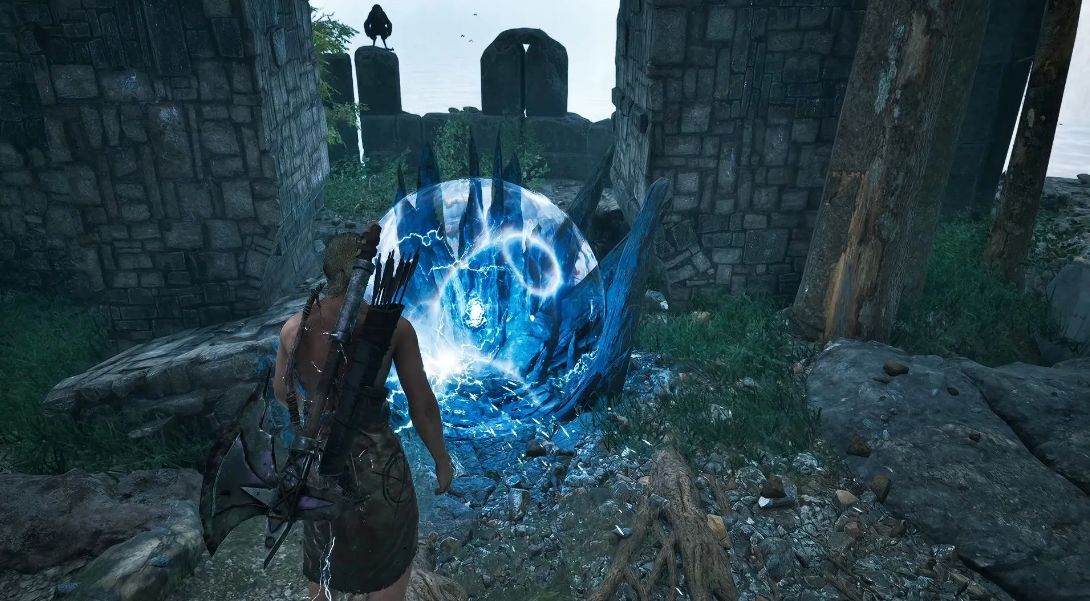
Killed the Beast? Head to the passage behind it. The arena exit will lead you outside. There you’ll find the Focus Stone—it’s hanging in a magical haze. Just interact with it.
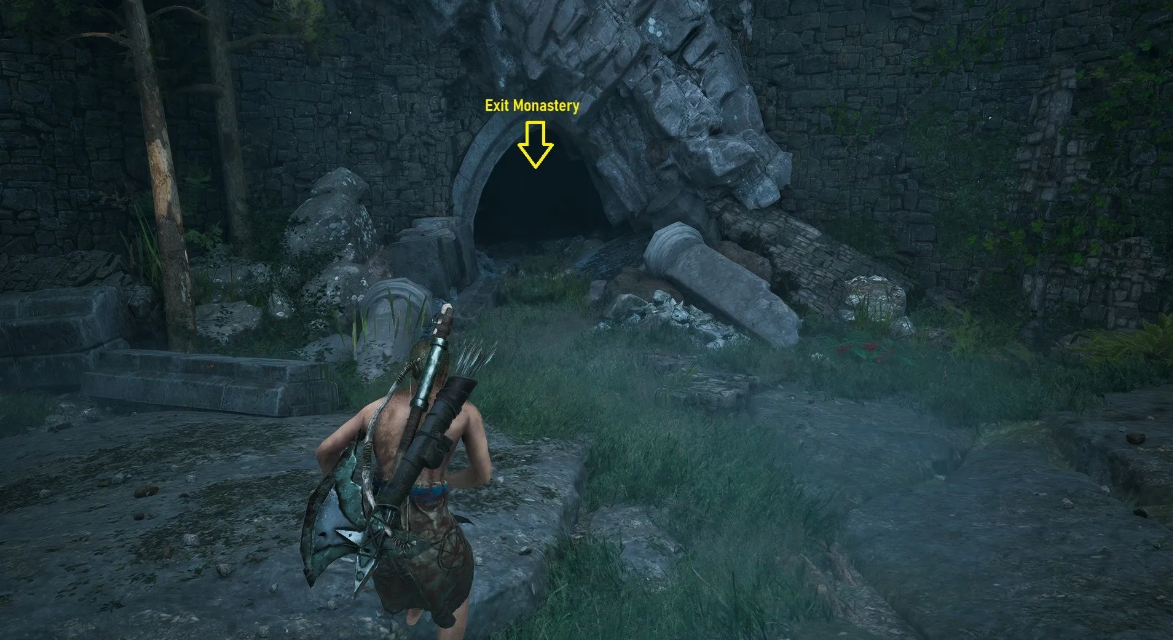
Don’t go back to the exit gate the same way. Look for a small passage in the courtyard. It will lead to an iron grate, and next to it will be a lever—pull it and it will open.
Along the way, check the rooms; they might contain useful items. Once you reach the main courtyard, run straight to the gate to leave the monastery. Hear the sound of footsteps? Don’t look back. A huge troll is behind you.
Beyond the gate, Gorn will initiate a dialogue. Tell him about the Focus Stone. Then it’s the classic: run after Gorn and let him deal with the troll himself. As soon as the Young Troll’s health is low, he’ll take off running. You can catch him or finish him off from afar—the spoils are yours.
Next article: Full Mage Guide — From Novice to Archmage