Without this, her passive skill won’t grant the team a critical damage buff, and she effectively becomes a Stunner with mediocre efficiency. Consequently, every choice—W-Engine, Drive Discs, and substats—must align with this goal. While her signature W-Engine, “The Main Assistant,” resolves this issue almost automatically, alternatives require meticulous stat optimization; otherwise, you’ll likely end up benching the character.
Table of Contents
Best W-Engines for Nicole
“The Main Assistant” — The Gold Standard
Nicole’s signature W-Engine outperforms all others in terms of overall utility. It provides 30 Daze, ignores 15% of the enemy’s Fire RES, offers off-field energy regeneration, and grants a team-wide damage buff after an EX Special Attack. Without it, Nicole loses too much—both in damage output and rotation consistency. If you own this W-Engine, the choice is simple: equip it and forget about it.
“Roaring Furnace” — High Risk, High Reward
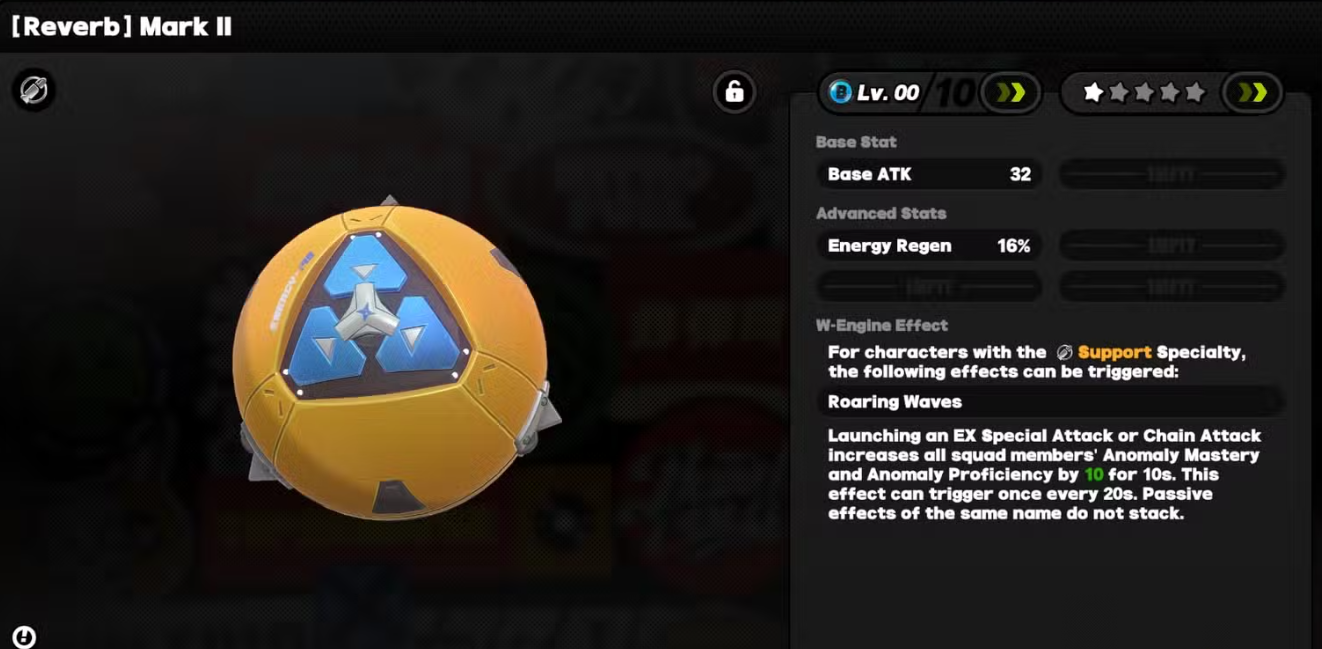
This option grants +28% Daze from EX Special Attacks, Chain Attacks, and Ultimates, along with a team damage buff. However, there is a catch: to unlock its full potential, you must reach 100% crit rate solely through Drive Discs and substats. If you succeed, “Roaring Furnace” delivers more Daze than the signature option, allowing you to reliably keep enemies stunned. If not, it’s better not to take the risk.

Budget Alternatives
“Yesterday’s Call” and “Hellfire Gears” are situational options. The first one provides crit rate and energy, but its main passive (physical damage) is unavailable to Norma, suggesting the developers designed it for a different character. The second is a free craftable option that grants energy and Impact but also requires supplementing crit rate elsewhere. Both are viable if you lack better alternatives, though be prepared for a more tedious grind to find the perfect Drive Discs.
Comparing Amplifiers for Norma: which one to choose and why?
To clearly illustrate the differences, let’s look at the table below:
As you can see, the deciding factor is your willingness to handle the build requirements via Drive Discs. If you are prepared to grind substats endlessly, “Roaring Furnace” will yield higher Daze output. If not, just go with “Main Support” and save yourself the trouble.
Best Drive Discs and Stats
The “Puffer Electro” set (4 pieces) forms the core of the build. It boosts Stun DMG and grants the entire team a Crit DMG buff when the character has 100% Crit Rate. For the second set, “Woodpecker Electro” (2 pieces) is most commonly used to make up for any missing Crit Rate. However, if you’ve already hit that magic 100% mark, swap “Woodpecker” for “Swing Jazz” to gain Energy Regen—this will make your rotation smoother.
Main stats for Drive Discs:
-
Disc 4 — Crit Rate (mandatory)
-
Disc 5 — Fire DMG
-
Disc 6 — Impact
Sub-stat priority:
Crit Rate (up to 100%) > Crit DMG > ATK% > Energy Regen.
Note: If you’re short on Crit Rate, it’s okay to sacrifice Crit DMG or ATK to get there. The priority is hitting 100% Crit Rate; otherwise, the entire build loses its purpose.
Norma Skill Upgrade Priority: What to Level Up First
There is a clear order here, based on how Norma spends most of her time: she enters the field, deploys a turret, performs an Enhanced Special Attack, and then goes off-field. Therefore:
-
Enhanced Special Attack (“Explosive Experiment”) — this is the primary source of Daze and buffs. Upgrade this first.
-
Chain Attack and Ultimate — these provide additional Daze and damage, and also trigger certain Amplifier passive effects. These come second.
-
Basic Attack — upgrading this affects turret damage, but it is a lower priority since Norma’s main role is to inflict Daze rather than deal raw damage.
-
Dodge and utility skills — save these for last; they offer minimal gains.
This approach simplifies material farming: invest in the key skill first, then upgrade the others as resources allow. This is especially important in the early stages when resources are limited.
Step-by-Step Rotation for a Team with Norma
Proper rotation distinguishes a skilled player from someone who is just button-mashing. Norma’s combat rhythm relies on rapidly building up Daze and handing the initiative over to the damage dealer.
Basic Sequence:
-
Entering Combat — immediately switch to Norma and use her Enhanced Special Attack (hold E) to deploy the “En-Nah” turret. The turret will fire periodically and build up Daze.
-
Maintaining Buffs — while the turret is active, Norma can perform 1–2 Basic Attacks to top up her Crit Rate (if needed), but the most important thing is not to stay on the field for more than 3–4 seconds.
-
Switch to the attacker — as soon as the enemy enters the “Stunned” state (or is close to it), immediately switch to Pyros or another main damage dealer and execute an attack combo.
-
Switch back — once the combo is finished and the enemy begins to recover, switch back to Norma to refresh the turret and start a new cycle.
Never keep Norma on the field if the turret is already active; her passive effects and energy regeneration function while she is off-field. Seizing the initiative and handing it over to the damage dealer is your primary objective. If executed correctly, enemies will go down reliably and without unnecessary pauses.
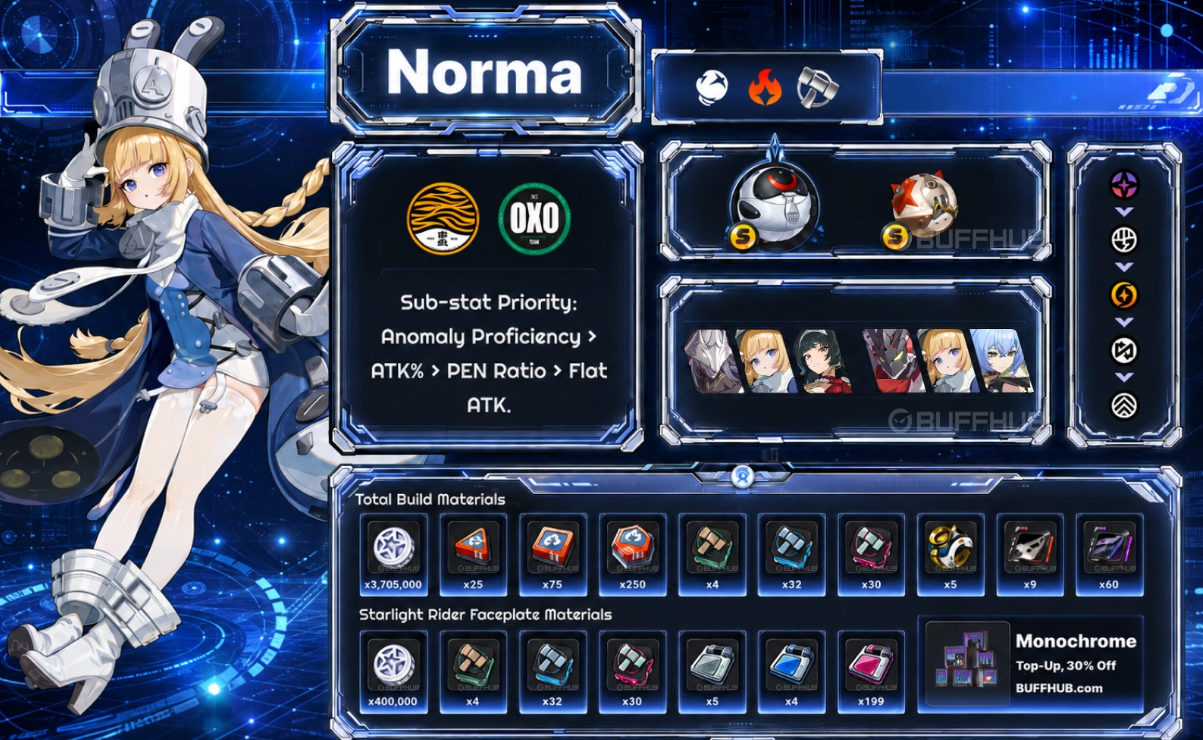
Best Teams for Norma
Norma is a Fire-damage stunner, so her ideal partner is any offensive character. Currently, the top-tier combination is Norma + Pyros + Sunna. Pyros gains a massive boost from the stun effect, while Sunna enhances his attack and critical damage. If you don’t have Sunna, you can use any other buffer or support character, though overall efficiency will be lower.
Alternative options:
-
Norma + Hugo + Ricky (if a healer is needed)
-
Norma + Anton + Grace (Electric build, though with less synergy)
The golden rule: Norma must be paired with a character capable of serving as the main damage dealer who can fully capitalize on stun windows. Without this, her potential is almost entirely wasted.