The freedom of an open world, anime aesthetics, and eccentric characters with elemental powers—Neverness to Everness is all about that. But amidst all this beauty, there are some who can actually pack a punch. Aurelia is one of them. Cheerful, riding a jellyfish, and completely free during the story. She’s charming at first glance, and her skills make her truly worth the investment. She’s also a primary damage dealer with a strong focus on area-of-effect damage.
Table of Contents
Aurelia’s Abilities and the Staccato Mechanic on the Jellyfish
Aurelia is a DPS who deals damage with Psychic. Her signature move is a combat stance while riding a jellyfish. She attacks enemies directly from it and destroys crowds with AoE. There’s a catch, though: she can’t climb or jump over obstacles. In exchange, she gets a higher jump and bonuses to gliding and swimming. It’s all fair game here.
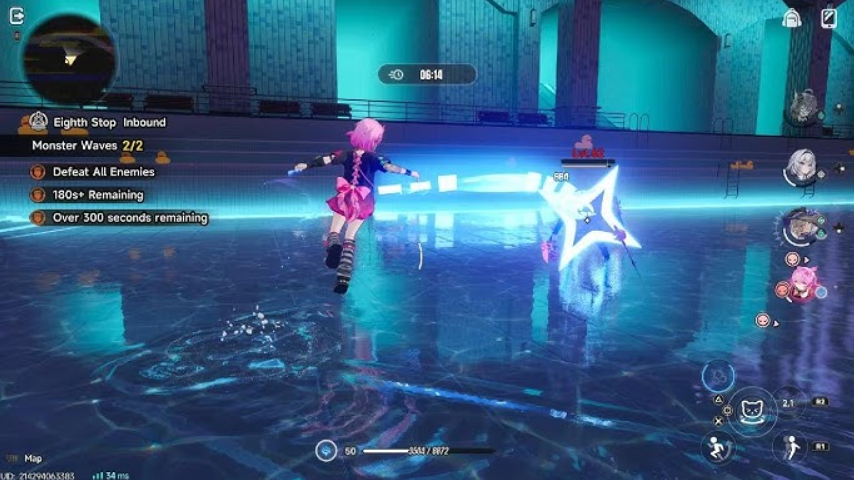
Most importantly: spamming normal attacks is a bad idea. The main damage and access to the arsenal are unlocked through a critical dodge during Staccato. This means you hold down the dodge button, mount the jellyfish, move quickly, and the jellyfish periodically explodes near targets. A successful dodge in this mode releases four explosions at once. This is called “Critical Parry: Syncopation.” It’s worth getting used to—the cycle of “riding → dodge → explosion” will be your main activity.
Description of Aurelia’s Active Skills and Psychic Damage
-
Legato — Four consecutive hits dealing Psychic damage.
-
Staccato (jellyfish mode) — Fast movement, explosions near targets, plus a special dodge with four explosions.
-
Portamento — Fall from the sky. Damage is 1 Psychic, and it depends on the height. Yes, only 1 is more of a feature than damage.
-
Critical Parry: Syncope — Attack after a critical dodge: AoE damage and reduced Breakthrough.
-
Cadence: Aria — Skill: AoE damage with Psychic and enters Cadence (+70% damage to jellyfish explosions, plus an additional AoE around the target).
-
Canon: Chorus — Ultimate: Damages all enemies around, slightly pulling them in.
-
Utility Skill — A simple strike with Psychic damage.
How to Manage Stamina and What to Level Up Aurelia for in NTE
All those maneuvers on the jellyfish drain stamina. Without it, Aurelia is a sad girl without a vehicle. So manage your resources wisely. Ideally, keep her in Staccato mode constantly—that’s where the lion’s share of damage comes in. But be careful: because you have to hold down the dodge button to activate it, Aurelia’s actions become slightly slower. This is important when switching characters in your squad.

Prioritizing Talents and Passive Skills
Passive abilities provide the most significant boost. There are two of them. Then come the basic skills that these passives activate. Then the ultimate. Everything else is up to you. By the way, if you’re unsure between the ultimate and regular attacks, take the ultimate only after your passives and basic skills.
Briefly, by priority:
-
Passives (1 and 2)
-
Basic skills
-
Ultimate
-
Other
Aurelia is a free item—and she’s a great starting DPS. Master her potential, and you’ll be tearing through crowds to the tune of her cheerful jellyfish animation.
Top Arcs for Aurelia: Choosing Between Star Veil and Ready-Ready
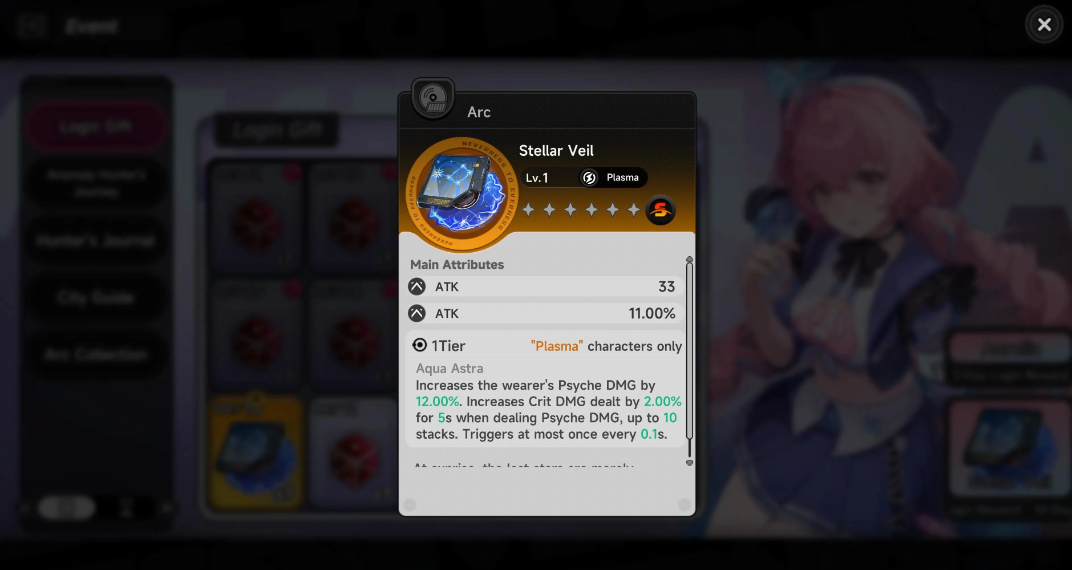
For ten days of daily NTE logins, you’ll receive the Star Veil Arc. It’s designed for Plasma characters—and Aurelia is just that. It’s a good option, but not a top-tier starting item. Let’s look at what really unlocks her potential.
-
Ready-Ready — this one’s easy: a bonus to Critical Parry. And remember, parrying accounts for the lion’s share of damage. Plus, an additional 15% attack. Stacks well.
-
Star Veil — this Arc is literally tailored for Aurelia. It provides a decent boost to Psychic damage and a bonus to critical damage when using Psychic abilities. Leveled up? Then it becomes better than Ready-Ready. Constantly increasing damage is its job.
-
Fluff of Fortitude — another Arc from the Plasma set. It provides a direct 22% damage increase. And this figure increases when the enemy is low on health. Handy for finishing moves.
The Best Psychic Damage Cartridges and Devil’s Blood: Curse
In cartridges, you primarily need the Psychic damage bonus. The best option is Devil’s Blood: Curse. If you don’t have it, take the backup, but strive for it.
-
Devil’s Blood: Curse (primary choice) — increases Psychic damage plus increases overall damage. And here’s the kicker: damage is increased against enemies with Nova or Stain effects. And Aurelia applies these effects in the right team.
-
Lost Radiance (backup choice) — after the ultimate, ignores part of the enemy’s defense. Allows you to hit even harder. Clean, effective, without unnecessary movements.
The Best Packs for Aurelia: F2P and Premium Squad Builds
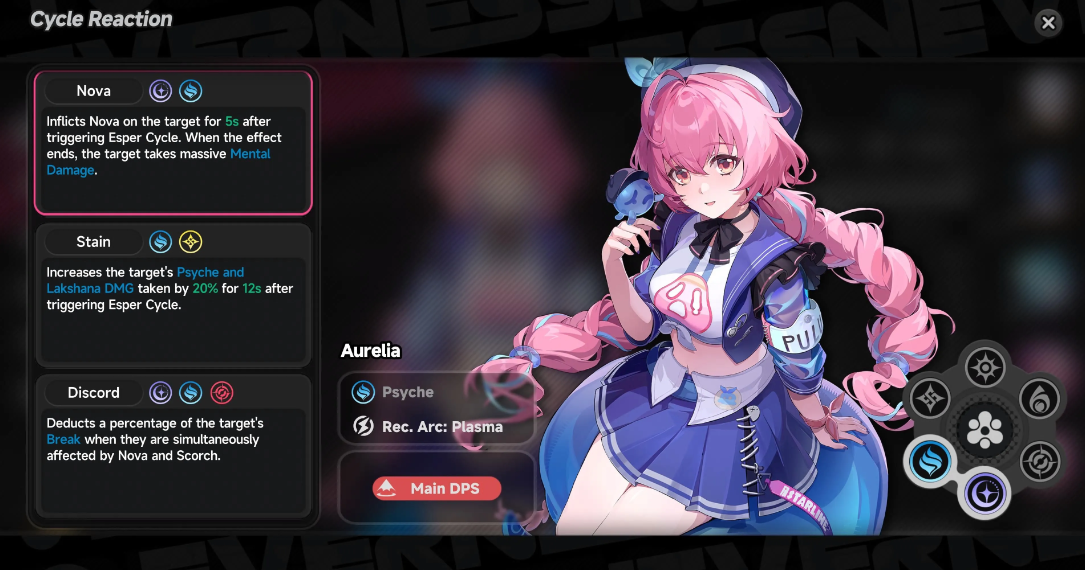
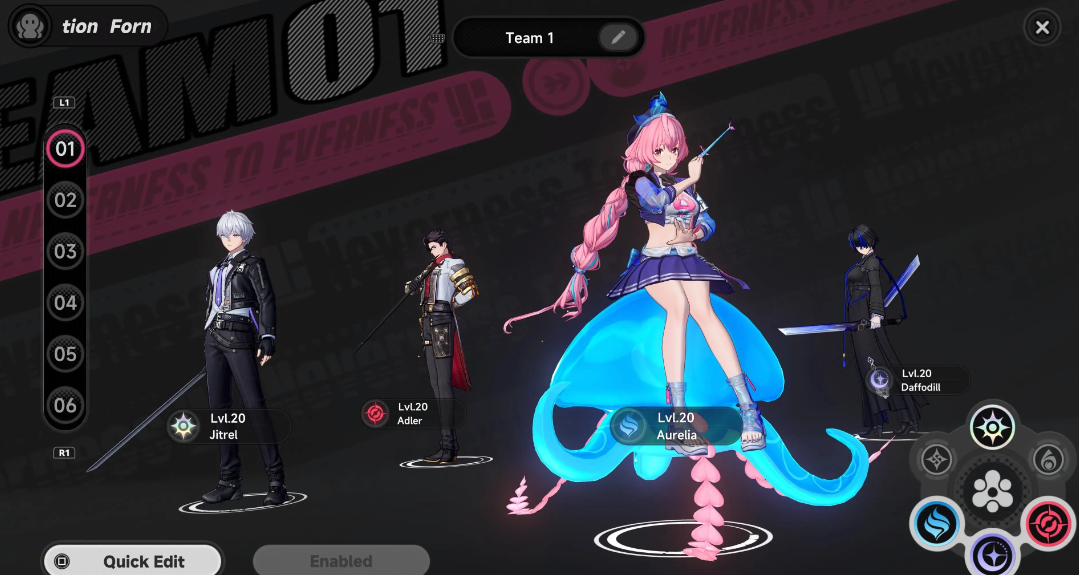
Choosing companions for Aurelia is a delicate matter. It all comes down to budget and luck: you can splurge on S-ranks, or you can get by with free options. The key is for the team to showcase her signature mechanics: Stain, Discord, and Nova. Below are three builds to suit any budget.
-
Alternative (happy medium): Aurelia, Daffodil, Adler, Haniel
-
F2P squad (no investment): Aurelia, Adler, Esper or Zero, plus a free slot
Now, let’s go into more detail about each option.
Premium Build with Hathor and Daffodil for Maximum Nova
If your bank account is healthy, go premium. This deck features several S-ranked characters, giving Aurelia access to all three key effects: Stain, Nova, and Discord. Nova significantly increases the damage of Psychic and Lakshmi. Plus, the target’s Breakthrough meter is reduced by a fixed percentage. Hathor and Jiuyuan don’t last long on the field—they play their turn and leave, giving Aurelia more time for her main attack.
An alternative build requires investing in Daffodil. This is justified: he’s the only Chaos character currently, and his Nova works for both Haniel and Aurelia simultaneously. Adler provides protection, although he can be swapped out for Esper or Zero if desired. The result: monstrous burst damage in a single deck.
As for the free option, it really works. Adler is the main weakener here, plus he distributes shields. Esper or Zero bring up the explosive damage and quickly swap with Adler, giving Aurelia a break to shine. The last slot can be given to any character you choose: a buffer or a secondary damage dealer. The main thing is that they help clear enemy waves.
Aurelia’s Awakening Guide: From Prelude to Staff Slit
This one is pretty straightforward. Most of the tiers make even one or two copies of the character extremely beneficial—especially since you get the first one for free. If you’re considering investing, here’s the optimal order.
-
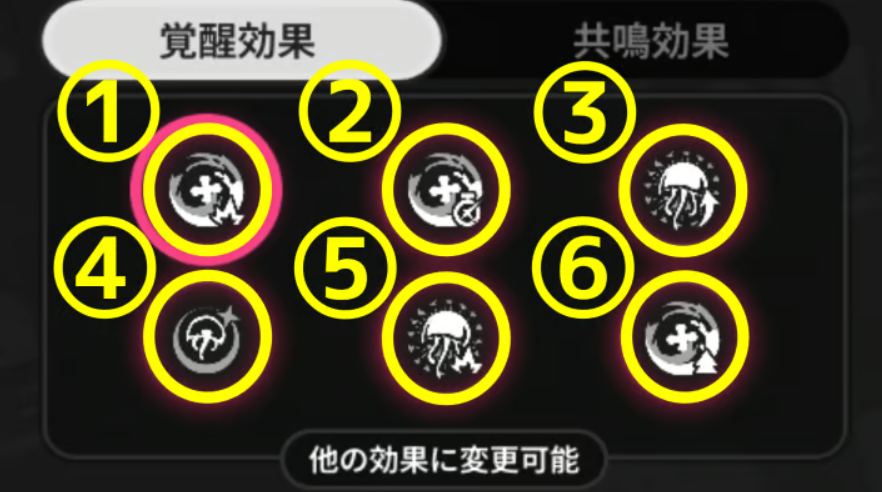
“Futuristic Prelude” — Grants +15% critical strike chance while in Cadence. You’ll be constantly tempted to enter it. The best choice, hands down.
-
“Unique Melody” — After a successful critical dodge, Aurelia either enters Cadence for five seconds or extends it if already in it. Works well with the previous awakening: stay in Cadence longer, resulting in higher DPS.
-
“Trio Respite” — +20% damage while in Cadence when using Canon: Choir. Stacks well with the first two, significantly increasing damage.
-
“Simple Melody” — another 15% crit chance, but this time specifically for “Kanon: Chorus.” Stacks with the bonus from “Trio of Rest.”
-
“Forgotten Fugue” — increases the maximum stacks of “Crescendo” to 20 and immediately grants 10 stacks after “Cadenza: Aria.”
-
“Staff Slit” — defense increases by 20% during the basic attack “Staccato.” Useful, but not a priority.
Main tip: first, level up your crit chance and critical damage – they enhance each other. And since your goal is to constantly be in Cadenza, first increase your crit chance in this state, then increase its duration and take advantage of the bonus from critical dodge (you’ll be doing it often anyway).
Mistakes when Playing Aurelia: How to Avoid Losing DPS in Cadence
Build selection is the first, less obvious, pitfall. Many players immediately pump up their critical damage, completely forgetting about their base critical strike chance. This is fatal for Aurelia (especially in the endgame)—her bursts proc in bursts, and unstable numbers simply ruin her entire burst cycle. The optimal target is maintaining at least 70% critical strike chance while under the Cadence buff. Dropped below that? Prepare for burst damage.
Priority Stats and Crit Cap for Endgame NTE
Stat Priority
The second headache is resource management and the dodge button. A typical scenario: a player drains all their stamina on chaotic sprints around the arena, and the heroine enters the burst window empty. Playing for a breakeven point is absolutely unacceptable here. Always keep a backup for emergency evasion, otherwise you’ll simply fall out of rotation, lose the explosion bonus, and be stuck in your base stance with paltry damage. It’s optimal to enter Staccato in short bursts, controlling your distance.
Here we get to the root of the main mechanical problem. Newbies often use Aurelia as a default AoE spammer with Legato. This is a gross miscalculation. It’s not light hits that deal high damage—the main boost comes from Critical Parry: Syncopation. Missed the best dodge timing in Staccato stance? You automatically lose four Medusa explosions, drain your Breakthrough meter significantly slower, and don’t have time to refresh the key effects of Nova and Stain. On high-level bosses, the DPS difference between a master of Syncopation and a Medusa-riding enthusiast reaches a whopping 35-40%.
Next, let’s talk about positioning. Ability damage doesn’t cover the entire map (miracles don’t happen). Even explosions have a strictly defined radius. Rolled through a crowd instead of holding the center of the position? Missed your ultimate without first aligning? Pressed Cadence before the mobs had a chance to group up? Consider half of your effectiveness wasted. A smart Aurelia main always circles the enemy pack’s epicenter, causing hitboxes to overlap.
And finally, the story revolves around support timing—extended rotations kill all potential. Aurelia hates it when pocket heroes spend too much time tinkering around the field. If allies steal precious seconds, buffs wear off just as you attack. This is especially true in popular Daffodil and Hathor setups. The algorithm must be lightning-fast: jump in, quickly deal status effects and debuffs, and instantly return the main damage dealer to the fight. The longer the core is out, the more the team’s overall damage uptime drops.