“The Dreamer’s Nightmare” is the key challenge of Chapter 5 of Gothic 1 Remake, and arguably the most challenging dungeon in the entire game. The quest begins automatically as soon as you cross the threshold of the Sleeping Temple at the end of the quest “The Chosen Path.” Inside, you’ll find nothing less than five orc shamans scattered throughout the temple, five unique stones that drop from them, and the mysterious sword Urizel, the very reason for this whole ordeal. Once you’ve obtained the blade, return to Xardas.
It sounds like a plan, but in reality, the temple doesn’t forgive recklessness. The danger level here is off the charts—the locals can destroy an unprepared hero in seconds. Therefore, before entering, I strongly recommend stocking up on potions and checking your armor and stats: they should be, if not at maximum, then close to it. Summoning scrolls, by the way, will be a great help in fights with shamans—you can get them from Xardas, and they’ll also help boost your mana reserves. And one more thing: no one’s stopping you from exploring the side branches; chests with useful loot are often hidden there. But be sure to save before each such maneuver—you never know.
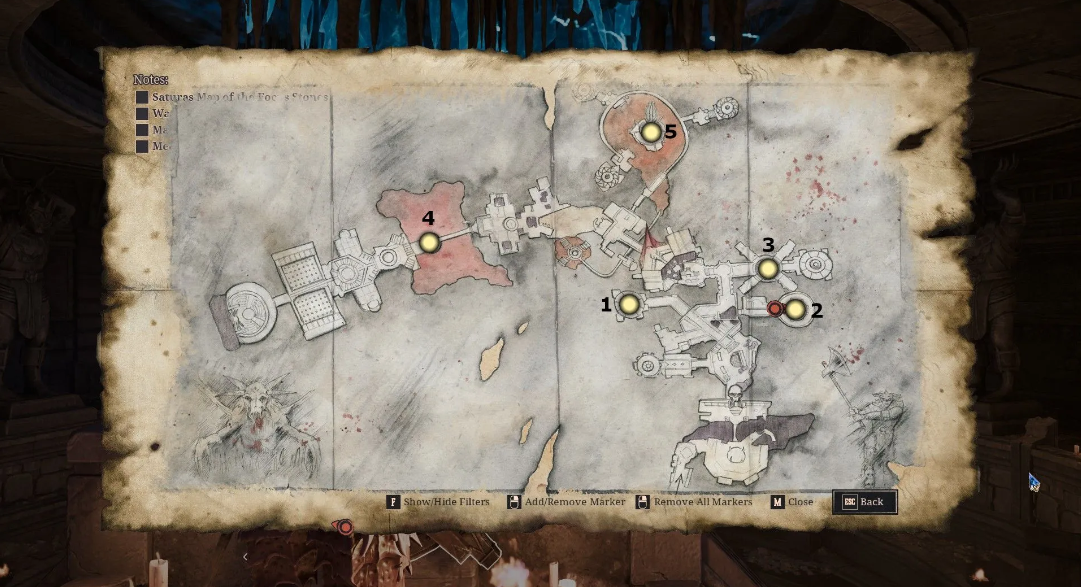
You need to find and defeat all the shamans; each one will drop a namestone. Here’s their list and location on the temple map (the numbers correspond to the order in which they’re played in our guide):
Useful detail: right at the entrance, in the first large hall, you’ll be met by skeletons of various types—warriors, scouts, and a single mage. Clear them out, then turn into the room on the left. There, at the foot of the statue, lies a map of the Sleeping Temple. Take it without looking—it will greatly simplify navigation through this labyrinth.
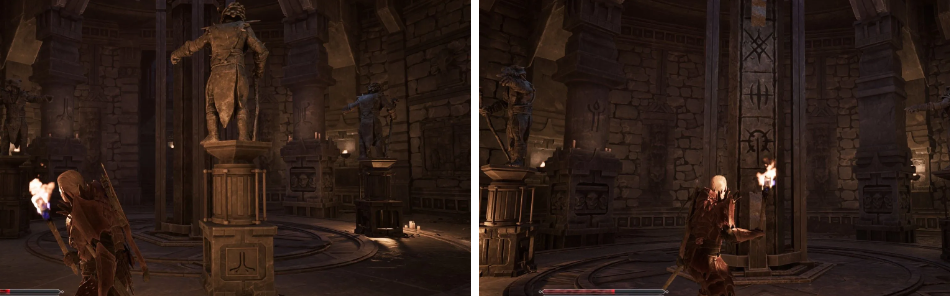
Next, descend the stairs to a room with three statues. Two of them have symbols carved on their bases, and similar symbols are carved on the surrounding columns. Your task: rotate these two statues so that each faces a column with an identical symbol. Rotate the third, empty column until a new column emerges in the center. A combination of three symbols will appear on it—remember them or write them down; they’ll be useful for the next puzzle.
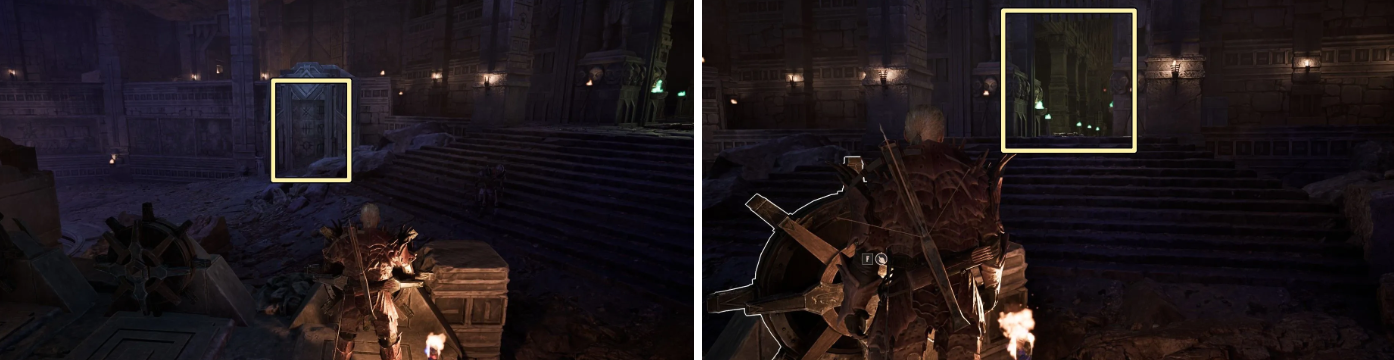
Now return to the room where the skeleton mage was. Opposite you, you’ll see three wheels, each corresponding to a symbol on the nearest column. Spin them until you match the sequence you saw on the raised column. Once you match, the gate will open. Beyond it, another room awaits, and once again, a skeleton mage, who likes to call for reinforcements, awaits. Defeat him and move to the far wall.
There’s a door with a green glowing circle above it. A well-aimed bow or crossbow shot around the circle will open the passage. Inside sits the first shaman, Varrag Hashor. The fight with him will be intense, but after defeating him, you’ll loot the “World Splitter” stone from his body. This is the first of five needed to activate Urizel.
Exit the room and find a crevice in the floor—jump down. There are miners there, so it’s best to eliminate them so they don’t get in the way. Go forward, turn left at the wall, then along the cliff, jump down again, and climb up the ledges. You’ll eventually reach a room with blue lights embedded right in the wall. The stairs on the left will lead you up, through a corridor with lightning bolts, and you’ll reach the next puzzle, which we’ll discuss in Part II.
Table of Contents
How to Solve the Ring Puzzle and Find the Lightbringer Stone?
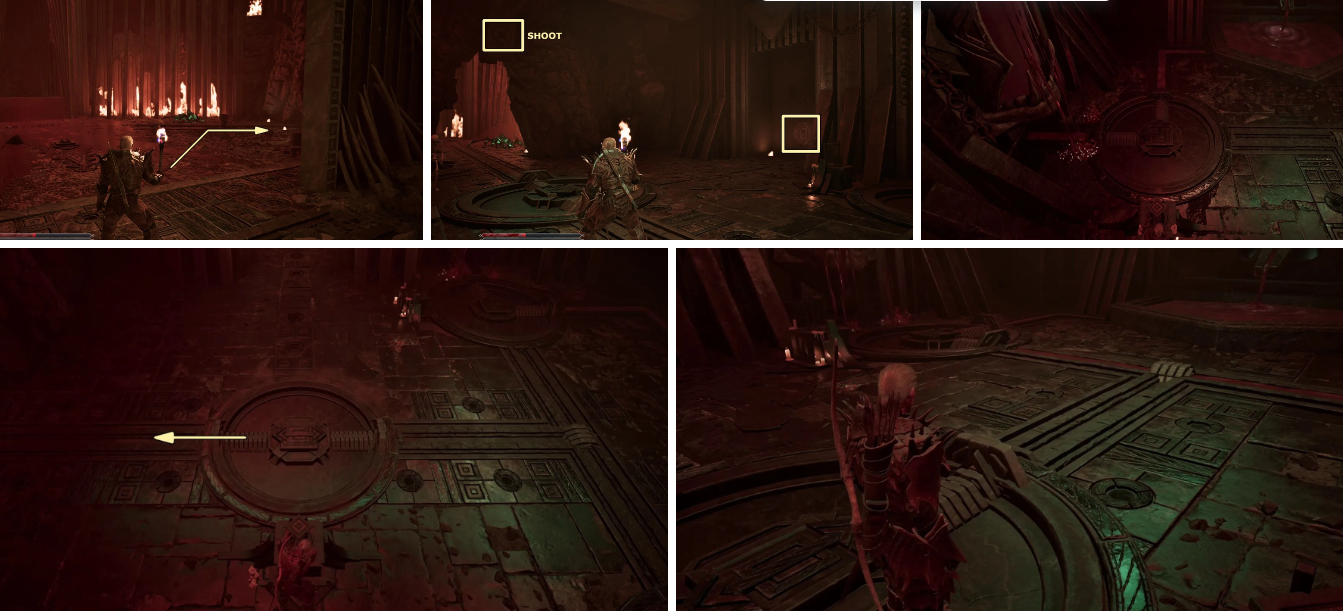
The next challenge involves four wheels scattered throughout the level. One on the upper platform rotates the inner ring, while the three lower ones control the segments of the outer ring. Your task is to align the pattern on the floor so that all the lines form a single image. Refer to the screenshot—it will tell you the correct combination.

As soon as the pattern is aligned correctly, Varrag Kasorg will appear out of nowhere. The fight begins instantly, and you won’t be able to save after the last wheel rotation. So, make a quicksave right before you touch the final mechanism. Defeat the shaman, search him, and you’ll find the Lightbringer, the second stone for Urizel.
Next, go back through the lightning-strewn corridor and forward to the ledge overlooking the very same room with the fissure. Jump down and return to familiar territory.
Where to Find the Orc Lever in the Temple of the Sleeper?
In the room with the crevice, climb the stairs opposite it and jump into the gap. Ahead of you is a locked door—there’s a lever on the right; pull it, and the passage will open. Behind the door is the Temple Guardian, who also needs to be eliminated.
Proceed further; there are three chests here. We’re interested in the middle one—it contains an Orc Lever. Take it and return to the door you just opened. Now turn right: there’s another gate there, also opened by a lever. This will take you back to the hole you jumped through, and from there back to the room with the crevice.
How to Cross the Platforms in the Temple of the Sleeper?
There are three mechanisms near the crevice. The left lever is already inserted, and you’ll insert the Orc Lever into the middle one. The order of actions: first, pull the left one, and the left platform rises. Wait for it to settle slightly, then activate the middle one. The middle platform descends faster, so timing is critical. Once both platforms are at the right height, climb the ladder on the left and jump across to the other side.
Where to Find the Time Shard and Defeat Varrag Unhilkt?
Once across, descend the ladder on the left and clear out the local Guardians. You’ll see a closed door with a red circle above it on the right. A well-aimed throw or a shot around the circle will open the door. Varrag Unhilkt awaits you inside. Defeating him will drop the Time Shard, the third stone.
Exit and move forward to the room with the red barrier and two Miners. These, of course, will also need to be eliminated.
How to Trigger the Blood Fountain in Gothic 1 Remake?
In the room with the barrier, take the right passage. Once inside, turn around and shoot the red circle above the door you entered through. This will open the grate on the side—there’s a lever there. Pull it, and the Blood Fountain will start on the back wall.
When the blood fills the fountain, it will flow across the floor toward two rotating plates. Next to each is a mechanism. Rotate the plates so that the blood flows toward the nearest wall, where the faces are embedded. Once the faces begin bleeding, a third mechanism with a third plate will appear in the center of the room.
Now here’s the tricky part: rotate the third plate so it points outward, away from the room. Then return to the two first steps and direct the blood flow through the third plate—straight into the room with the barrier. The barrier will fall, and you can move on. But more on that in the next part.
How to Remove the Red Barrier and Kill the Fire Demon?
When the blood from both side rooms finally reaches the barrier room, a mechanism next to the puddle will activate. Pull it, and a Fire Demon will appear. This enemy is more formidable than your average skeleton, so be prepared for a tough fight. After it falls, the barrier disappears, leaving the path forward.
But before that, there’s a little trick. In the barrier room, on the opposite side, there’s a red circle. One well-aimed shot, and the spikes at the entrance will stop rising as you pass. Enter, turn toward the door you entered through, and shoot the circle above it again. This will open a grate in the wall and reveal a lever that directs the blood into the main room. That’s it, the system is activated.
Where Is the Lava Machine in the Temple of the Sleeper?
After stepping over the remains of the barrier, move forward, mowing down the Temple Guardians along the way. Soon you’ll reach a room with doors on all sides. We need the left one—go down the stairs and follow the path to a small bridge.
Jump off to the right of it and head right—you’ll find a huge machine with lava bubbling inside. Push the pillar protruding from the mechanism—the lava will recede, opening up new areas. By the way, don’t be lazy and check the chests along the way—they might contain useful scrolls.

How to Get the Banishing Stone From Varrag Arushat?
From the entrance to the room with the machine, turn right and down the ramp. Ignore the small staircase on the right—it’ll lead to a dead end. Instead, head to the underground fork where there are ledges on the right. Climb them and you’ll reach a room with a metal gate and a wheel.
Turn the wheel, and the gate will rise. Behind it are a pair of Guardians; you’ll need to take them out as well. Then return to the wheel, climb the stairs, and follow the corridor to a raised platform with another Guardian. Kill him, and you’ll see a second wheel on the right—it will raise a large gate nearby.
Jump off the raised platform, enter the newly opened passage, and follow the tunnel to the end. Varrag Arushat will be waiting for you there. The fight with him, like with the previous shamans, will require good preparation, but the reward is worth it—you’ll loot the Exile Stone, the fourth in the collection, from his body.
After that, return the same way: through the area with the large gate, then turn left at the stairs we skipped, and you’ll come back to the large machine. From there, follow the familiar route to the bridge, climb it, and return to the room with the doors.
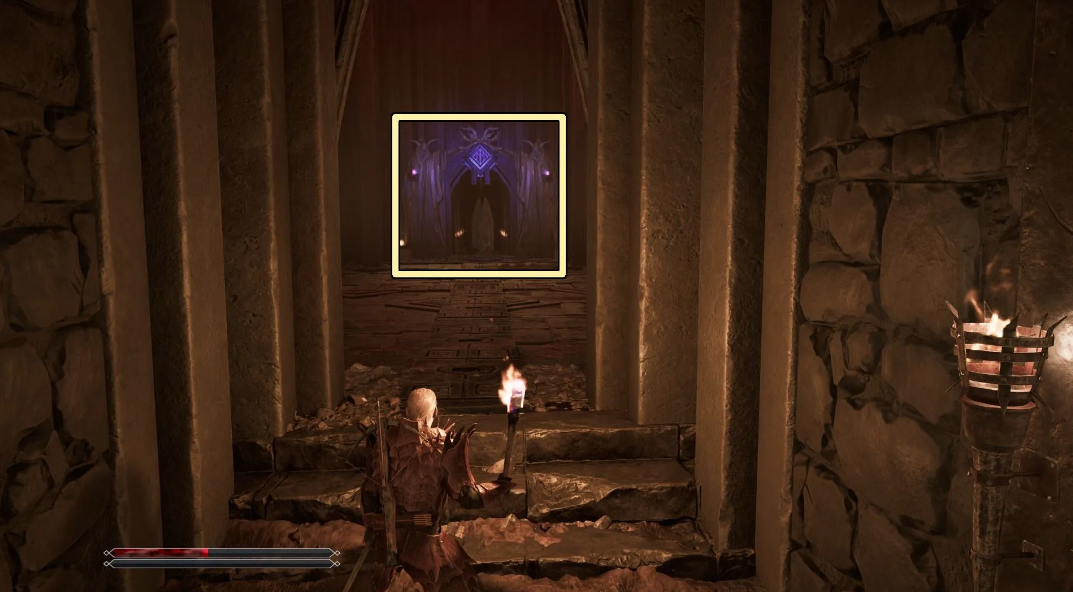
Where Is Varrag Ruushk Hiding and How to Get the Demons Eye
In this same room, look for a door with a purple diamond above it. Go through it and follow the river of lava. Along the way, you’ll encounter three side rooms, each containing a Demon Lord. You need to defeat them—every single one. And for good reason: when you reach the top, the defeated enemies will create a bridge, allowing you to cross to the platform where the final shaman, Varrag Ruushk, is hiding.
The fight with him will be the final chord in this hunt. After defeating him, loot his body and take the Demon’s Eye—the fifth and final stone.
Where to Find the Legendary Sword Urizel and Complete the Quest
Once the enemy is defeated, a strange sword will materialize on the platform. This is Urizel. Take it along with all five stones. The rest is a simple matter: activate the “Teleport to Necromancer” rune and instantly teleport to Xardas’s tower.
Talk to Xardas and give him the sword and stones. The “Dreamer’s Nightmare” quest is officially complete, and the next stage—the main quest called “Urizel”—will open before you. All that remains is to catch your breath and prepare for new challenges.