Baldur’s Gate 3 is not just another CRPG from Larian Studios. This is 100+ hours of conscious choices, where the first act consumes 40-60 hours even for those who know where to go. And this is where players break down most often: non-linearity, more than 200 secrets, eight potential partners, four big bosses and forks, the consequences of which catch up only in the second and third acts. This guide is a complete guide: from the prologue on Nautiloid to the final entrance to the Cursed Lands via Grimforge. Facts, tactics, precise puzzle solutions, achievement conditions — everything you need to make sure you don’t miss anything.
The difference between “passed BG3” and “passed BG3 fully” is about 30 hours of content. The fast route leads in a straight line: the grove, the goblin camp, the pass, Act 2. The slow route connects the Underdark, Grimforge, Adamantine Forge, Ethel’s quests, the Myconids, Zhentarim, the ring of Dark Temptation and a good hundred small plots. The guide is designed for the second way. But if you’re in a hurry, each block can be read as an independent mini-guide to the location — it was broken down with this scenario in mind.
Table of Contents
How to start completing Baldur’s Gate 3: preparation and basic mechanics
Before going into the first act, it’s worth sorting out the foundation. Baldur’s Gate 3 is built on the rules of D&D 5e, and if you haven’t encountered a board game before, the first few hours will be a little confusing. The most questions for beginners are not the plot, but the mechanics: where did these numbers come from, why did the character miss the fat man two meters away, and what does the “hindrance” do in general.
Let’s take it in order. The Baldur’s Gate 3 system is based on three pillars: cubes, classes, and reactions. We’ve mastered them, and then everything will go smoothly.

How the dice system and skill checks work in BG3
All the character does outside of the cutscene is roll a die. In dialogues and traps — d20. In battle, the damage is dealt by different dice depending on the weapon. A short sword rolls 1d6 (from 1 to 6 damage), a two-handed halberd—like weapon throws 2d8 (2-16), and some fireball throws 8d6 altogether – and here it already smells fried.
The skill check is simpler than it seems. The game shows difficulty — DC (Difficulty Class). Conventionally, “DC 15 Conviction” means: throw out 15 or more, taking into account the modifier, and the dialogue will go your way. The modifiers are taken from the stats: charisma 16 is +3 to persuasion, dexterity 14 is +2 to stealth. According to the characteristics, 10 = zero modifier, 12 gives +1, 14 gives +2, 16 gives +3, 18 gives +4. The formula is simple: (value – 10) / 2, rounding down. The whole mechanics of BG3 revolves around these numbers.
Two numbers must be memorized at once. A natural 1 on d20 is a failure with any modifier, and 20 is an automatic success. No exceptions. Therefore, even a hero with 8 charisma sometimes manages to talk the devil away, and a master of persuasion flies off the simplest dialogue. It feels unfair, but that’s the thing about D&D.
In addition to the usual check, there are two more modes — with advantage and with interference. The advantage is that two d20s are thrown, and the best one is taken. There are also two obstacles, but the worst one is taken. It’s not a bonus number, it’s a second chance. Some spells provide an advantage (like “Guiding Blade”), some effects are a hindrance (blinded, poisoned, scared). The difference between a fight with an advantage and one without it is colossal. Learn how to stack buffs, and the passage of Baldur’s Gate 3 will go like rails.
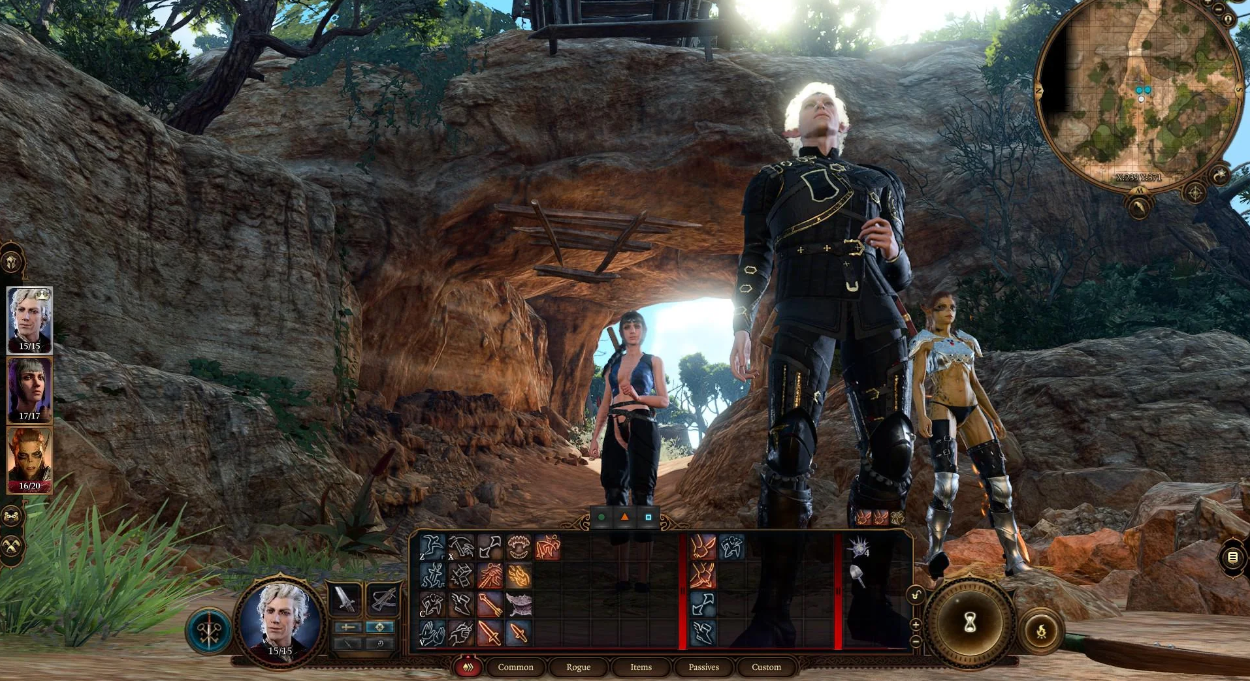
Classes, Races, and Character creation: what to choose for a beginner
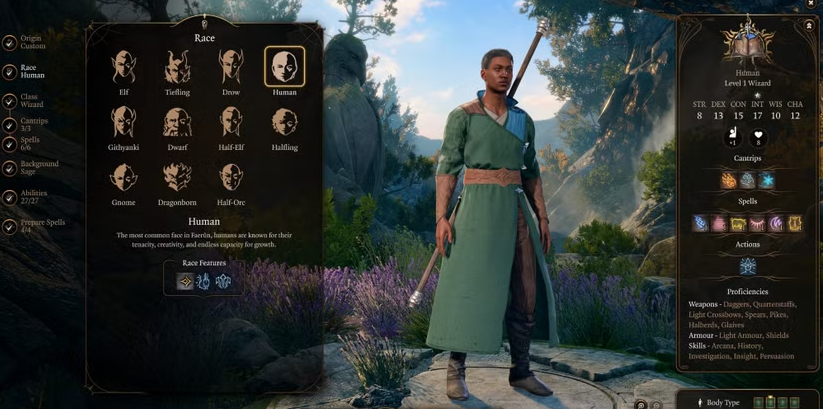
There are twelve classes in the game: Barbarian, Bard, Cleric, Druid, Warrior, Monk, Paladin, Ranger, Rogue, Sorcerer, Warlock, and Wizard. And three more — through subclasses — with unique branches of development. Unaccustomed to it, my eyes run away. Which one should I take first?
Here’s a quick cheat sheet for beginners:
Beginner-Friendly Character Classes
Race affects less than it seems, but it does. Dwarves ignore poisons (and in the first act you will be watered with them), halflings roll a die if a natural 1 falls out, and drinking is generally cheating.: unique replicas with Laezel, Kitrak Voss and the whole storyline about the Astral Plane. If you want drama, take a guitar. If you want a quiet start, get a dwarf. It is worth noting the drow separately: half a dozen dialogues in the goblin camp change with them, but in Grimforge, the Doorgars and other dark elves treat them differently.
According to the characteristics, a simple rule works: the main characteristic of the class is the maximum (16-17), the physique is 14, the rest is based on the residual principle. A wizard needs intelligence, bards and paladins need charisma, barbarians need strength and physique. No secret builds: the game is friendly enough.
One caveat about multiclass (multiclassing). In BG3, it opens from the sixth level and allows you to level up in parallel in two or even three classes. This is not relevant at the first act yet — most people won’t get to Grimforge until the sixth level. But if you are planning a serious build, keep in mind: a single-component warrior of level 12 is stronger than a warrior of 8 + a thief of 4 if you do not know how to use combos. It’s better for beginners to sit in the same class for the first time.
Background provides advantages in verification. Street kid is a bonus to sleight of hand and stealth. The scientist is about history and religion. Hermit — towards magic and medicine. Choose from the following classes: thief + street child, cleric + hermit, ranger + distant wanderer. It sounds obvious, but half of the newbies only find out about it by the middle of the act.
The “Dark Temptation” mode and the conditions for all achievements in one playthrough
The separate backstory of “Dark Urge” is not a class, but a plot frame. Your character is suffering from bouts of bloodlust, and this provides unique cues and scenes. In parallel, Dark Urge opens up conditions under which it is convenient to collect the greediest achievements in one run. The recommended difficulty is “Tactician”: raises the danger of fighting, but does not close the content, as an honor. If you dream of platinum, this is your path.

The main feature of Dark Urge is periodic flashes. In key scenes, the hero can suddenly snap and kill someone important. It’s both exciting and scary: Baldur’s Gate 3 is a one-of-a-kind CRPG where the backstory actively changes the main character on the go. Unusual for the first run, but mandatory for the second.
Key Battle Mechanics: Reactions, rest, inspiration, and approval
Four things that need to be understood right away, otherwise the battles in Baldur’s Gate 3 turn into torment.
Reactions. Each fighter has a reaction available once a turn — a counterattack, a defense spell, a blow from an outgoing opponent. By default, the game includes automatic reactions, but you can switch to manual mode in the settings. For difficult fights, the second option is more useful. Reaction is not just a +1 damage bonus, it is often the salvation of the entire party.
Short and long rest periods. Short — twice between long ones, restores some HP and skills. The long one heals completely, returns the spell slots, and moves the plot forward. Almost all important conversations with your teammates are triggered during a long vacation. Therefore, after each key event — a tent, a bonfire, hugs.
Inspiration. A reward system for wagering backstory. We chose a line in the spirit of our background and got a point of inspiration. Each point is a reroll of any check of the die. Up to four in stock at a time. Saving is sacred.
Approval. Each partner evaluates your actions. We helped the child — Karlach puts a plus. They killed a defenseless man — Will puts a minus sign. High approval unlocks personal quests, novels, and unique dialogues. Low — leads to Astarion leaving at night with his belongings. Keep an eye on the icons in the cutscenes.
Initiative. On the battle screen, the order of moves is determined by the initiative roll — d4 + dexterity modifier. It is important: whoever is higher in the initiative line hits first, and the first hit in BG3 often decides the outcome of the entire battle. Therefore, the dexterity of 16+ for one of the party members is optional, but highly desirable. Especially if you plan to take them by surprise.
Vision, stealth, and surprise. The passage of many battles is facilitated by one fact: if you start a fight from around a corner, the enemy gets in the way on the first move. And if the party is completely in stealth, you generally get a whole round of free attacks. The Rogue, the druid bear, and the Darkblade stealth sorcerer are able to knock out a third of the boss’ HP even before he notices that he is being beaten. Remember: before any major skirmish, there is a stealth button, even if you do not have a class ability.
Prologue: Escape from the Nautiloid ship
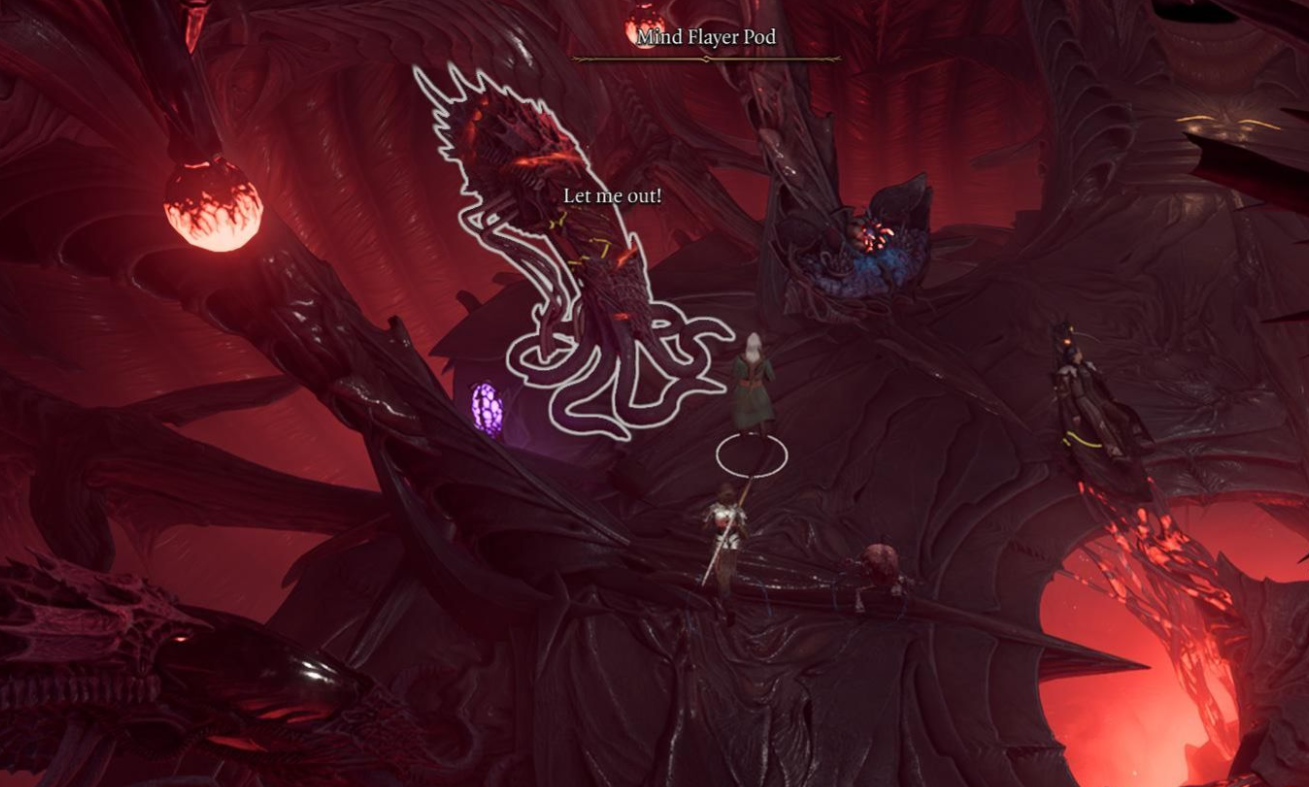
The game starts spectacularly. The Nautiloid illithid ship is hanging in the plane of Hell, devils are flying around, and a parasite has just been planted in the brain of the protagonist. This is the beginning of Baldur’s Gate 3: you are a potential illithid, and the metamorphosis has already begun.
The prologue takes 40-60 minutes of real time and serves a dual purpose. Firstly, it teaches mechanics. Secondly, it gives you your first teammates and your first achievement.
A separate note on the tempo. You shouldn’t rush on a Nautiloid like it’s on fire. There are more loot scattered in the holds and corridors than it seems: scrolls of a Magic Arrow, a Magic Hand, a Fire Projectile, healing potions, and just gold in the boxes. All this will come in handy on the ravaged coast, where you will count every potion for the first half of the day. Look for the corpses of monkeys, imps, intelligence-eaters — there is something on everyone.
Inspection of the crash site and the first illithid parasites
After the introductory cut scene, the character wakes up in the tank. Nearby are the defeated officers. One of them, Myrnat, wears the key to the Shadowheart capsule on his belt, and this key will come in handy in a couple of minutes. Collect everything in a row: weapons, potions, consumables. In the prologue, the loot is modest, but every gold counts.
The first illithid partner, Us (in the original Us), is waiting at the tank in the center of the room. This brain is a symbiote, if extracted correctly, it will later become your companion in the camp and will give you useful tips. A test of intelligence or perception, and you’ll get it. It’s easy to miss, but it’s a pity.
Meeting with Laezel and fighting with imps
Cross the bridge to the next deck, and you’ll see her — a monkey in a cage surrounded by imps. Laezel is fighting one against three, and her first question to you will be: “Why are you still alive?” The tone is set from the threshold.
The fight is simple but rewarding. Three flying imps, one of them carrying a bow. A jump, a back attack, a fireball — everything counts. After the victory, Laezel joins the party. You can’t refuse, and you don’t have to: her abilities will be extremely useful in the prologue and beyond.
On the passage between the decks, in a niche by the pipe, there is another brain — already dead. Approach, and the parasite in your head “feels” a relative. This is the first telepathic scene of Baldur’s Gate 3, and it gives you some experience points. Then up the stairs, past the two captive monkeys, to the main deck.
Slave Control Panel and Shadowheart Rescue
Go upstairs. There’s a monkey’s head in the tank, twitching and talking telepathically. There are three levers for controlling the prisoners nearby. You don’t have to touch them, but one of them—the one with the two runes—opens the Shadowheart capsule, and that’s the fastest way to free it.
The alternative is to take the key from Myrnat and manually open the capsule. Both options are working. If you have a cleric or a bard in your party with a wisdom check, try to recognize the symbols — this gives you additional dialogue. Shadowheart walks on with you in silence. There will be questions for her later.
Captain’s Cabin: Commander Pathetic and the Annoying Devil achievement The
final point of the prologue is the captain’s cabin. An illithid is at the helm, fighting off Commander Pitiful and his demons. You have a window of 15 moves to bring the ship to the portal. But you can play it differently.
Killing a Pitiful person is not an easy task. He has 150 HP, scaly armor, an “Eternal Flame” like a fiery tail, and an entourage of two imps. The tactics are simple: push into the abyss at the first opportunity, strike with cold spells (he resists fire), use Laezel as a distracting tank. If the main character strikes the last blow to the Castle, the Annoying Devil achievement will drop. It’s a shame to miss it.
One more detail: there is a wild boar in a cage on the lower deck. If you let him out, he’ll sprint at the Bull. The boar is a distracting maneuver, and a couple of rounds of freedom of this beast is enough for you to reach the commander in time and give him a critical hit. The boar trick is a classic among BG3 veterans. Few people notice the cage the first time.
After the assault, Laezel takes the helm, the nautiloid dives into the portal — and the fireworks end in a crash on the coast of the Sword. The prologue is over. The ravaged coast begins — the first point of the open world of the first act.
The ravaged coast and the search for the first partners
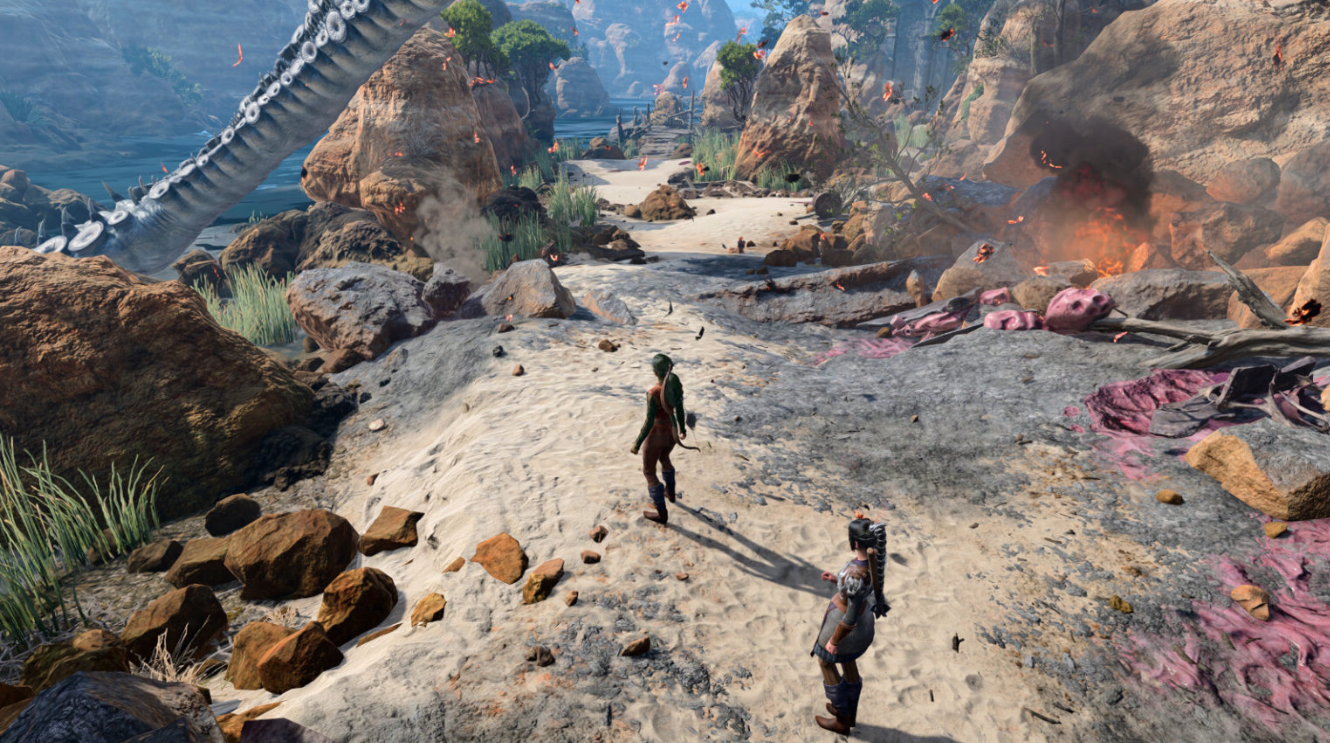
Welcome to freedom. Baldur’s Gate 3 finally reveals its teeth here: a large map, three companions scattered throughout the region, several bandit camps, a Dark Crypt and the first serious forks. There is no linearity anymore. Where to go is up to you to decide, and this is one of the reasons why everyone gets through the first act differently.
It is estimated that 3-5 hours can be spent only on the ravaged shore if everything is meticulously cleaned. I’ve divided the region into logical blocks, so it’s easier not to miss my teammates and not get into a fight beyond the level.
The main advice for this location is to put runestones of quick movement wherever you find them. There are twenty of them in the first act, and each one is marked by a distinctive blue glow. You need to step on the rune once, and it will activate forever. Without this teleport grid, running back and forth across the ravaged shore, grove, and goblin camp is a masochistic activity.
The Wreck, Shadowheart, and the way along the shore
After the crash, the hero wakes up on the sand. The first thing that catches your eye is an ancient door with strange symbols. You can’t open it without a key, but remember the location. The key will be found later, in a Dark Crypt.
Shadowheart lies under a nearby beam. If the prologue is completed normally, she will recognize you by telepathic communication and will join you immediately. If something went wrong, he would be lying unconscious further down the beach, and then a couple of checks would be needed. Take her to the party anyway: a cleric in the team at an early stage is invaluable.
Further north, to the cliffs and groves.
How to recruit Astarion, Gale and Laezel

Three teammates are waiting in the wings on a small patch of the map, and you don’t need to miss anyone. In fact, this is the first “casting” of the team — four slots, with at least six applicants.
Astarion. He goes out to the path near the overturned wagon. He plays the victim, asks for help, and then puts a dagger to the character’s throat. Fail a medical check and he will be sure that he has found an ally in you. Choose a peaceful dialogue, and he will calmly go with you. A rogue elf with two daggers, a krit DPS for the first act. Take it without hesitation.
Gail. It is the most difficult to find — from the light portal in the stone on the slope. With a hand out of nowhere, Gale asks for help to get out, and then a test of strength or charisma is needed. 7. Failed — he disappears, will return later, but the plot is worse. Pulled out, you get a magician with a catastrophe in his head. Gale reveals himself slowly, but he is the best magician in the game.
Laezel. She’s being held in a cage by Tiefling hunters. The cage is suspended from a tree, and you can either convince the Tieflings to let go of the monkey (deception, persuasion, intimidation to choose from), or shoot a bow to break the rope — the cage will fall, Laezel will break free, and the fight will begin. Dexterity test 14 per shot. The fight is a bit short, but you can solve it without a fight.
An important caveat: if you already have a Laezel from the prologue, another Laezel will not appear here — just go to the cage and free the Tieflings from forced hostage. Another interesting point: not far from the cage lies the corpse of a third hunter with a note — it should be picked up, it opens a dialogue with Zevlor in the grove.
All three can be recruited in an hour and a half, if you follow the priorities. Astarion was the first, Shadowheart was given immediately, Gale was the second, Laezel was the third. The best base four for the first levels are Shadowheart (heal), Gale (AOE), Astarion (stealth and crituron), the main character in any class. Laezel is a substitute in heavy fighting.
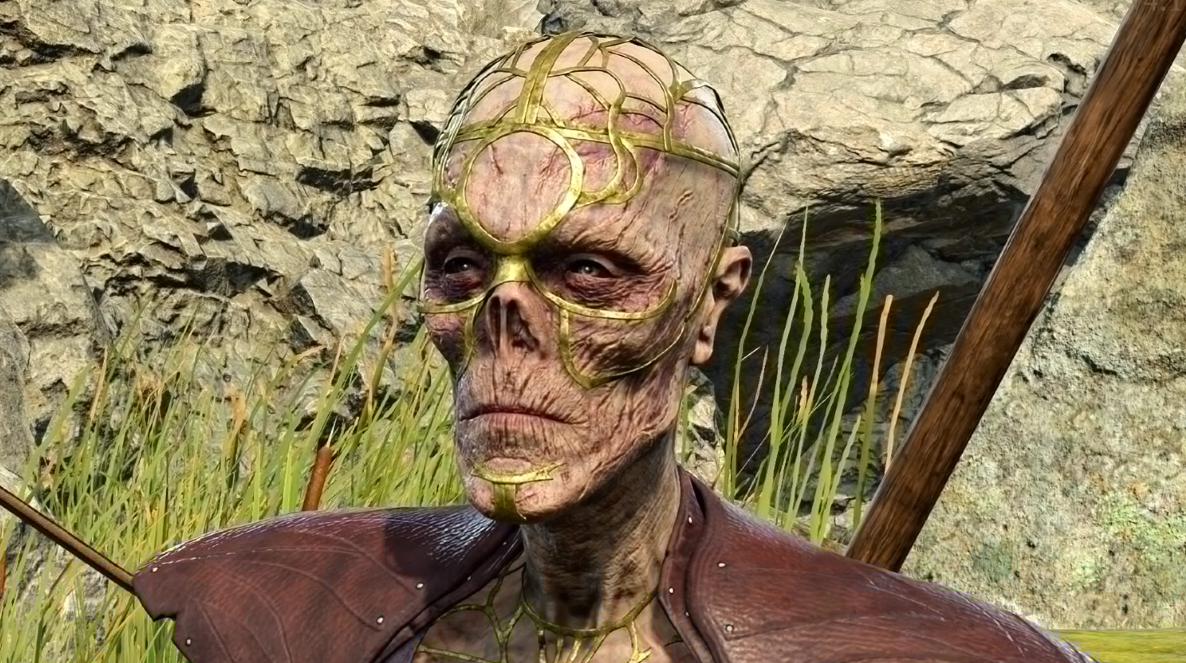
The Dark Crypt and the mystery of the Desiccated
The Dark Crypt is one of the first dungeons of the first act, and it hides a generous reward. The entrance is through a trapdoor on the broken church. There are three ways to get inside: crack the lock (sleight of hand), smash the door by force, or find the key from Gimblebock in the nearby ruins.
Inside there are traps, bandits and the main prize. Gimblebock’s henchmen patrol the crypt. You can cut out everyone, or you can carry out a quiet operation through stealth. The path through the grass along the wall is more convenient.
There are four sarcophagi in the central hall. Three of them are empty, and the fourth one hides a Wizened— Wizened wizard. You raise him with the Amulet of talking to the Dead (he is found right there, on a skeleton with a scribe’s pen), and he offers a deal: to serve in the camp in exchange for freedom. Agree. Desiccated unlocks three services: resurrection of fallen companions (200 gold at a time), class change (100 gold), and hiring new dummy companions. It’s convenient if one of the plot characters got offended and left.
Don’t forget to steal the amulet. There are also good potions and a scroll of a magic arrow on the sarcophagi.
In the far room of the crypt there is a closed door with a stone relief. It opens if you correctly place three skulls on pedestals according to the date of death. Checking the history or religion will tell you the order, the alternative is to read the inscriptions. Behind the door is a small treasure trove with a magic dagger and a “Dream” scroll. There is a locked chest in the treasury, and under it, if the floor is broken, there is another compartment with gold coins. Larian love hiding loot in floors — remember this technique, it will come in handy ten more times during the passage.
Overgrown ruins and a fight with bandits at the chapel
There are ruins of a chapel on the way to the Grove. Bandits led by Gimblebock are holed up there, guarding a stone block on which lies a curious loot. There are three options: believe Gimblebock that there is a dangerous creature inside, and leave, do a sleight of hand and shoot the rope (the block will collapse on the bandits itself), or simply cut out the entire squad. The most profitable option is a rope shot: bandits die from their own trap, and loot is yours without loss of mana.
The lock picks in the first act are worth their weight in gold. There are about ten of them in the ruins at once in different places. Collect it.
The Dying Illithid and Gale’s Choice of Partner
On the path to the grove lies a dying illithid. He tries to influence the hero’s brain, and then the parasite’s first dilemma opens: allow the illithid to use the force or refuse. If I may, the “true soul” branch will open, and special cues related to the Absolute will become available. If you refuse, you will remain “clean”.
For Gale, if he is in the party, there is a special dialogue here: he picks up the illithid’s magic notebook, and this moves his personal quest. Don’t skip it.
On the way from the shore to the grove, you can meet another important character — the devil Raphael. He appears on the playground with a broken statue, introduces himself as the gentleman from the Nine Hells and offers a deal: in exchange for a certain service, he will “cleanse” you of the parasite. It is absolutely impossible to sign a contract HERE. Raphael is not an assistant, he is a top—level fraudster, and the contract stretches through all three acts of Baldur’s Gate 3, breaking the fate of Will, Carl, and the hero himself. Listen, nod, and leave. Raphael will come back later, and by then you will have the leverage.
Not far from the meeting place with Raphael, on a cliff, lies the corpse of an adventurer with a map — it marks the underground shelter of the Zhentarim on the Ascending Road. You must pick up a map: otherwise it will be more difficult to find a shelter.
Emerald Grove: quests, merchants, hiding places
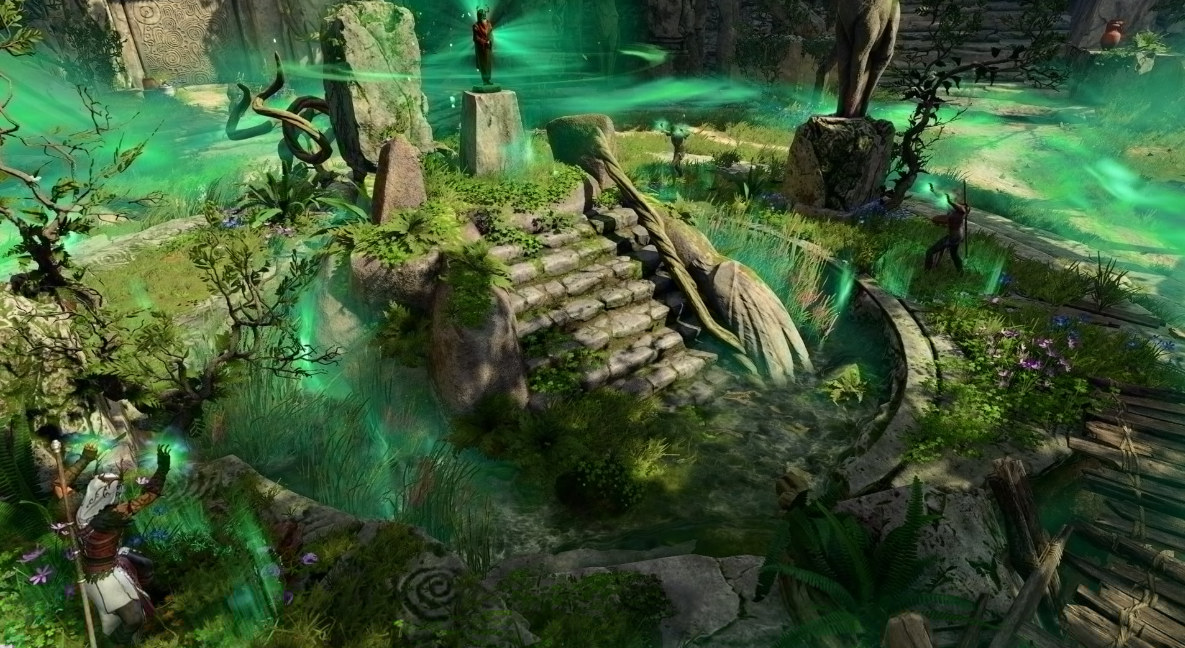
The Emerald Grove is the heart of the first act of Baldur’s Gate 3. Almost everything begins here: a quest about Tiefling refugees, the drama around Halsin, vendors with useful junk, and a moral fork that will catch up with you in 20 hours. If you’re playing for the first time, it’s easy to hang out on the grove for five hours, and that’s okay.
The grove is divided into three layers: the upper one with druids and an Idol, the middle one with a Stone Hall and tieflings, and the lower one with a basement and secrets. Go from top to bottom, otherwise some of the quests will be blocked.
Entrance to the grove and acquaintance with Zevlor
There is a battle going on at the entrance to the Emerald Grove. Tiefling Zevlor fights off a goblin raid with several warriors. Help them, and Zevlor will immediately get into it. If you don’t help, he’ll remember.
Zevlor is the leader of the Tiefling refugees. It’s his team, his people, his responsibility. The dialogue opens the “Save the Refugees” quest, and at the same time provides the first piece of context: the cult of the Absolute threatens the druids, Halsin is missing, archdruid Kaga has started a Rite of exile, and everything is falling apart. Right now, Baldur’s Gate 3 shows that neutrality is not an option. We’ll have to step in.
Zevlor, if you have a long conversation with him, will offer a small financial compensation for the protection of the grove. The amount is 250 gold. The refusal of a reward is remembered and affects the third act. Zevlor also throws up a line of quests: “Kill the goblin leaders”, “Save Halsin”, “Protect the refugees from the raid”. All three cling to a single knot and converge at the goblin camp.
At the entrance to the grove, right at the gate, there is a statue of Silvan. If the druid character prays to her (the “Connection with Nature” spell or just a dialogue), get a small “Blessing of Sylvan” buff — +1 to attack until the next rest. It’s a small thing, but it’s nice.
Key NPCs of the Stone Hall: Arron, Dammon, Octa
The main trading floor of the grove is a covered stone platform right at the entrance. There are three important sellers here. Remember them, especially the average one.
Arron. A general trader, he buys potions, scrolls, bandages. The price tag is average, the range is wide. Take fire resistance potions from him before going to Grimforge.
Dammon. Blacksmith. It is critically important for Karlach — without him, her quest will be stuck in the second act. Dammon will be the one to fix her propulsion system. Buy medium armor from him, but most importantly, don’t kill him. Never.
Oct. Sells alchemy and makes potions. It is needed if you collect herbs and mushrooms along the way. He also has a quest trophy hanging in his pot — if you upgrade your stealth well, you can steal it.
There’s another pickpocket hanging out in the Stone Hall, Miri the Tifling. If you have a cheat with the “Hoaxer” style or high manual dexterity, you can withdraw 30-50 gold from each NPC without consequences.
Separate advice for merchants. All three of them buy loot at an average price, but if you have raised your partner’s approval to “Good” and this partner is thematically close to the merchant (Will to Dammon as a warrior craftsman, Gale to Octa as an alchemist), there is a bonus discount when buying. The system is not obvious, but it really works. And the reverse mechanics: if Laezel is in the party and she is rude to the merchant, the price tag of the entire grove will jump. Gityanka is not the best negotiator.
Another important caveat about the passage of the grove. If you attack at least one druid, the entire grove will declare war on you, and further quests in the location will be blocked. One accidental hit while running— and that’s it. Therefore, turn on the turn-by-turn mode in advance, as soon as you see the red marker next to the druid faction.
The Tieflings’ Hideout and the Pier girl
The refugee shelter is in a cave under a grove. There is a side passage through the ditch. There are children living inside, and they are led by a young Tiefling girl who has already managed to organize a small guild of thieves in the first act.
They say he gives the quest “Questionable connections”: Steal the Idol of Sylvanus from the main hall of the druids. The task is one of the most intense moments of the grove. There are plenty of chances to fail: druids are patrolling the hall, an Idol is in the altar, and one incorrect sleight of hand test will trigger an alarm. The reward is modest, but for the achievement of “Food for the mind” the quest is mandatory.
Tip: put the guard to sleep with the “Sleep” spell, sneak past the patrol, steal the Idol and exit through the back door. It’s the cleanest way.
How to save Arabella and influence the second act
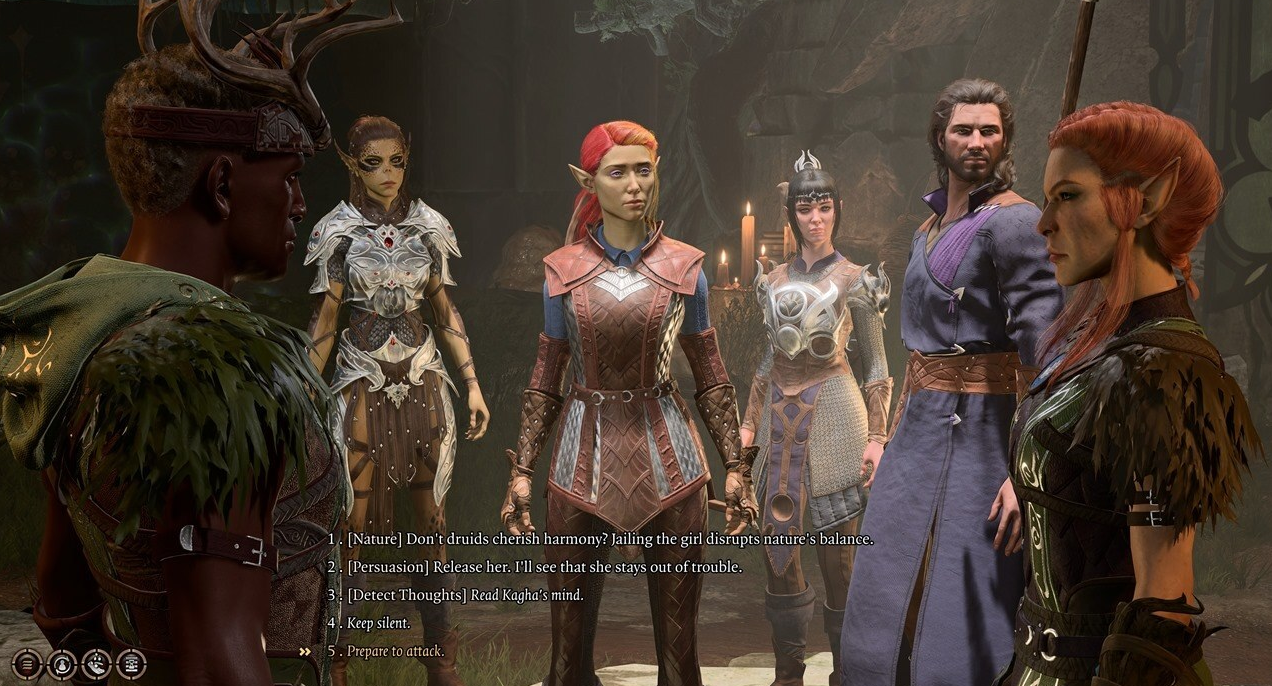
Arabella is a Tiefling girl who climbed into the altar of snakes and stole Sylvan’s Tooth. She’s been caught by the druid Kaga, and she’s about to be executed. The “Save Arabella” quest is one of those moments where the passage of the first act of Baldur’s Gate 3 diverges into two completely different branches.
Step by step. Approach the moment of execution. Either you interfere in the dialogue — and then there are tests of persuasion or intimidation of Kagi — or you stand aside. If you successfully convince (DC 15+), Kaga will let Arabella go, and the girl will survive. Fail the check and the snake will kill her in front of your eyes. The alternative is tough: attack Kagu, but then the grove will declare war on you.
The consequences last until the third act. The rescued Arabella meets later, her parents give her an exclusive quest. The dead one remains in the form of depressing flashbacks, plus you lose a couple of minor lines. The moral here is obvious, but Baldur’s Gate 3 rarely tells you anything directly – the choice is yours.
There is a third, hidden option. If you play as a hero with high magic (druid, mage, bard), you can interfere with Kaga’s ritual and convince her not through force, but through authority. DC is higher here — 18+, but success opens up the most peaceful path: Arabella stays with her parents, Kaga saves face, the snake crawls away. It is for this path that additional payments are made. Halsin and Will have approval points, which is important if you’re aiming for their romantic lines.
Nettie, the Druid Halsin, and the Wyvern’s Venom
Nettie the Druid is on duty in the infirmary and will be the first to notice your parasite. When she sees an illithid tumor, she will offer a “cure” — in fact, a vial of wyvern venom that will kill you at the first transformation. It’s a trap.
The player has two paths. Lie that you’ll take the potion later, and Nettie will calm down, and you’ll leave alive. Or admit that you understand the setup. The second option reveals the details: Nettie acted on Khalsin’s orders, the archdruid disappeared, and the thugs of the Absolute have already captured the ancient temple. Honesty is more profitable here — the quest “Find Halsin” officially starts, and this is the main trigger for going to the goblin camp.
Do not drink the poison under any sauce. They don’t give you an achievement for this, but life ends very quickly.
After talking to Nettie, it’s worth checking into her infirmary. There are several rare potions on the shelf there—a Speed Potion, a Health Elixir, an Antidote. Steal carefully: Nettie returns every few minutes, and if she gets caught, the “Find Halsin” task may fail. The advice is to go to the infirmary at night (after a long rest), then Nettie sleeps in her room, and everything lies unattended.
Another point about Halsin. Right next to the infirmary, in an empty office, lies his personal diary. You don’t have to read it, but it gives you +100 experience points and a little hint: Halsin is a werewolf who can transform into a huge bear. If you save him, this form will play a key role in the final battle at the goblin camp.
Secrets of the Hidden Vault and runes of the moose, bear, eagle and wolf
In the depths of the grove there is a small room with four runes on the walls: a Wolf, a Bear, an Elk and an Eagle. Each rune corresponds to a beast, and if activated in the correct sequence, the wall will move, revealing the Ratha cache. Inside is a rare spear “Sorrow”, a Summer Robe, and a pair of scrolls.
The easiest way is to search the Ratha (he is also dozing by the hearth). There’s a note with a hint on it. Or just poke at the runes at random: if you understand the logic of the wall painting, everything will work out on the first try.
An extinct village and its secrets
The extinct village is the next major point northeast of the Emerald Grove. The plot is the remains of a settlement that was cut down by goblins led by Ragzlin. But there’s a lot more hidden underground here: a basement with a necromancer, a Whispering Abyss, and a whole spider’s nest with a boss.
It’s easy to lose two hours in the village, even just looking around. Let’s take it in order.
An important point in terms of level: by the time the village is Extinct, the party is usually at 3rd, less often at 4th level. If you came here on the second level, go back to the grove and finish pumping, otherwise Medvesych and the Phase Matriarch will decompose you in three moves. The optimum is to go here after recruiting all the partners, clearing the Dark Crypt and minor battles on the shore.
The path through the forest and the nest of the bear
There is a dense forest with swampy pits between the grove and the village. In one of these pits, an owlbear is dozing with a cub. This is one of the iconic moments of the first act — the battle with medvesych is not easy for level 3-4, and some prefer to bypass it.
There are two options. Sneaking through the far edge of the cave is a stealth test, but a real one. Or join the fight. If you’re fighting, hit the mother, not the cub. Medvesych is a high—level creature, he has 71 HP and area hits. Throw him off a cliff with a “Push” magic is the most elegant solution. Inside the cave, on the chest, there is an Embrace of Silvanus (a light forest robe for a druid) and a pickaxe, without which it will be inconvenient to continue in Grimforge.
How to tame a baby bear and get an achievement
After a battle (or a peaceful passage), an orphan cub remains. He can be spared, but this is just the beginning. To get the achievement “I’ll be twice as happy now”, you need to:
-
Do not kill the baby in the cave — just leave.
-
Visit the goblin camp and hear from the goblins how they torture the bear cub in the arena.
-
Save him in the mini-game “Chicken Farming” (more on this below).
-
Return to the camp and pet him at least twice through long rest periods.
If you skip step 2, the bear cub will not appear. The achievement is tightly tied up in the plot, and it’s a shame to miss.
Saving the Dwarf Bark Root and the Mill
The village is empty on the surface — but three goblins are trampling in the mill with a friendly logo, and one of them, Featherk, holds the deep gnome Bark Root. The dwarf is tied to a windmill, they are going to start the wheel and see what happens.
Two levers at the bottom. Left — stop, right — start. If you mix it up, Root’s Bark will crush you, and the quest will fail. Correct order: lock the wings with the left, kill the goblins, free the dwarf. He will join as a temporary ally and tell you about Grimforge, about the Doorgars and where to go for adamantine.
A dialogue with Feather can be conducted through deception — they say, we are our own, the Absolute has sent. The DC is high, but passable.
Pharmacy Basement and Thai Necromancy
The pharmacy in the center of the village outside is a dusty abandoned house. There’s a mystery inside. There is a decorated mirror in the basement, and when the hero approaches it, it starts asking questions.: Who are you, why have you come, and do you serve Thai? Wrong answer — and the mirror will launch skeletons.
The correct lines are four in a row, related to magic, service, and darkness. Plus, you need a dark amethyst (lying in another room in the basement), otherwise the final check will not pass. A secret laboratory opens, and there is The Necromancy of Thaya, the legendary book of the first act. The hero will not be able to read it immediately: the folio is cursed, and the attempt to read revives the Withered One named Ilin Toth. The fight with him is not easy, but feasible: 80 HP, skeletons in support, weaknesses to fire and ray. You win, and one of the strongest books in the game is yours.
There is a balsamic ointment on the table next to it — it will be useful in the Karlach quest.
The Whispering Abyss and the Boss Spider Phase Matriarch

In the north of the village there is a gloomy chasm, a Whispering abyss. A separate quest thread drags you there: the parasite in your head starts whispering about the “matriarch”, and the wisdom check shows you the way down. The descent is dangerous, but below is a nest of spiders and their queen, the Phase Matriarch.
It’s a very high-stakes fight. The matriarch teleports, pours poison, summons cubs, and hits with three attacks at once. The tactics are as follows:
-
Before the battle, place fire bombs on the floor near the egg clutches. The main threat is not the matriarch herself, but her offspring.
-
First move, undermine the masonry with one AOE spell (Fireball, Burning hands) – minus twenty spiders.
-
Use “Tasha’s Laugh” or “Sleep” — matriarchs have an average wisdom score, often falling down.
-
Throw her into the abyss. Yes, seriously. There is a bridge on shaky planks next to her nest. One “Push” in the back — and the boss flies down. The achievement of “Teach your spiders better” for killing just like that.
The Poisoner’s Robe and Spider Boots fall off the corpse — some of the best things in the act for the rogue and the tracker. Plus, the Whispering Abyss leads directly to the Underdark, which greatly saves passage time.
The sunlit marshes and Aunt Ethel
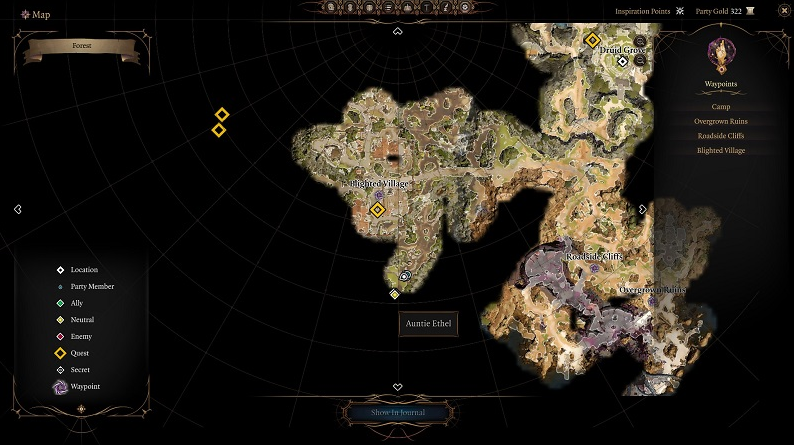
If you walk due west from the grove, you will find yourself in a sunlit swamp. At first glance, there are pretty backwaters, a steaming hut, and a smiling granny at the gate. In fact, it’s one of the nastiest locations in the first act of Baldur’s Gate 3, and Aunt Ethel is to blame for that.
Ethel is a night hag. She collects her victims’ hair, steals their looks, and feeds on their memories. And this is not a retelling from the wiki, but literally what the quest in the swamps does.
The Unmasking of Morok and the Mairina brothers
At the entrance to the swamps, three hunters are arguing with their grandmother at the Crooked Tea House. You will find out: the young Mayrina was abducted by a witch, the brothers came to save her. Grandma swears she hasn’t seen any Mairina.
A test of perception or insight, and you notice that Ethel’s smile is based on snot. The 15+ wisdom check removes the hassle: sparks dance behind the “grandmother”, and the ears are slightly too long. Mairina’s brothers don’t see anything. If you support them, there will be a fight. If you play along with Ethel, she’ll lure you inside.
The best way is to enter the cabin, pretend to be a silly traveler, and get Ethel’s “treatment” for the parasite. Right after, in the dungeon, everything will become clear.
The Crooked Tea House and the unmasking of the witch
Inside the tea room there are three harpies at the pot and a bunch of potions. Ethel will offer the hero to drink a potion, “from the head.” It is dangerous to agree: one of the options is that it will take away your +1 to the characteristic forever (it compensates in the second act, but the sediment remains). The second one is that she will remember and allow me to go to Myrina.
The best solution is to give Ethel a hair, but at the same time bargain with her through a persuasion/intimidation test. If you succeed (DC 18), Ethel will give you the Ugly Grin bonus: +1 to one stat for the entire Baldur’s Gate 3. This is one of the two permanent bonuses to stats in the game. Skipping is a crime.
The overgrown tunnel and the masks of the Whisperer
Ethel is rejected, and she opens a secret passage to the floor. Below is a confusing maze of traps, poisonous vines, and Whisperer masks. Masks are former people who were turned into silent servants by the witch. You CAN’T wear them: one such mask and your character becomes a silent enemy until the end of the battle. Destroy them from afar.
There are three rooms in the maze with magical doors. They open only through levers, and each lever is guarded by harpies. Traversal order: left, middle, right. A supply of poison potions is required.
The battle with Aunt Ethel: tactics and the best outcome
The final arena is a circular room, in the center of the Mayrin, along the edges of the cage. Ethel is waiting for you inside. The battle takes place in three phases.
Phase 1. Ethel as a “grandmother”, 84 HP. It hits weakly, but it creates illusions — there are three copies of it, and they all have the same model. A perception check highlighting the real one will help.
Phase 2. When Ethel loses half her HP, she drops her mask and becomes a hag. The damage doubles, she teleports to Mairina and takes her hostage. Here you need a bonus action “Push” to throw her away from the captive.
Phase 3. The witch is trying to escape. The last blow must be dealt before she disappears, otherwise it will be more difficult to win back the quest with Mairina in the second act.
The best outcome is to let Mayrina go alive and without an egg (don’t listen to the brothers, this is a separate moral setup). Aunt Ethel’s Hat falls for the victory — +1 to intelligence for wizards and magicians.
The Goblin Camp and the three leaders of the Absolute

If the grove is the heart of the first act, then the goblin camp is his fist. All the storylines converge here: Halsin in the warg pit, the druid quest, the search for the lair of the Absolute, Mintar, and the main moral choice of the entire first act of Baldur’s Gate 3.
The location is huge. Outside is a ruined sanctuary with tents, bonfires, and sentries. There are three separate rooms inside: the Torture Room, the Throne Room, and the Selune Temple with a puzzle. Each of the three is the area of responsibility of one of the leaders. And everyone needs to be killed, but not necessarily at the same time.
How to get into the camp: stigma, persuasion or battle
There are a dozen goblins patrolling the outer courtyard. Hitting it head—on is suicide even at 4th level. Three ways:
-
The brand of the Absolute. If the prologue conversation with a dying illithid allows it to affect the brain, a sign of the Absolute will appear on the character’s forehead. The goblins see him and let him pass without question. The easiest way.
-
Persuasion. The guard at the gate accepts the 12+ charisma and lets the “believer” pass. A couple of good lines and you’re inside.
-
Battle. It is better to leave this path for the final, when you will cut the entire base.
The best approach is to enter peacefully, clear out the leaders one by one, and only then provoke a mass brawl.
The mini-game “Chicken racing” and the rescue of medvesych Kroll
Goblins are having fun in the courtyard: they place bets on Chicken farming — kicks on the chicken’s foot. The game is funny, but behind the arena is a cage with a baby Kroll. The one you spared in the cave.
The goblin Crusher keeps the bear in a cage and plans to feed it to the wargs. There are three options: convince him to let go (charm 14+), seduce him with a mini-game with kicks (if you win, he’ll gape and you’ll open the cage), or stab him. The first two options are no fuss. The rescued Kroll runs away to the heroes’ camp — later it will be possible to pet him and get an achievement.
The Broken Sanctuary: The Faithful Gut and the Torture Room
The first of the three targets is the Faithful Gut, priestess of Loviatara. You will find her in the basement of the sanctuary, in the hall with the chained prisoner. The faithful Gut tortures the unfortunate, and the dialogue immediately escalates: either you interfere or you observe.
Two scenarios:
-
Scenario A. Join the cult of Loviatar. You let the Gut hit you with a “Punishment” three times, you lose some HP, but you get a permanent blessing — additional damage when HP is low. The downside is that you’ll have to kill her anyway.
-
Scenario B. There’s a fight right away. Gut — 58 HP, hits with a holy weapon, summons two priests in support. If you are caught off guard without witnesses, the fight is short.
Next to the torture room is the door to the Selune Temple with a closed mechanism.
The Moon Puzzle: the solution in 9 actions
At the entrance to the temple there is a fresco with the Moon and eight stone buttons. Pressing it incorrectly is a magic charge, minus half a group per battle. The correct sequence is short:
-
Press the center button with the image of the full moon.
-
Make a circle clockwise: top, top-right, right, bottom-right.
-
Continue: bottom, bottom-left, left.
-
Finish top-left.
-
The final one is the center again.
Nine actions and the wall slides away. An alternative for the lazy: there’s a hidden lever hidden in the Gut room, behind the altar. Pull — go to the temple without a puzzle. It is found to be an 18+ perception test.
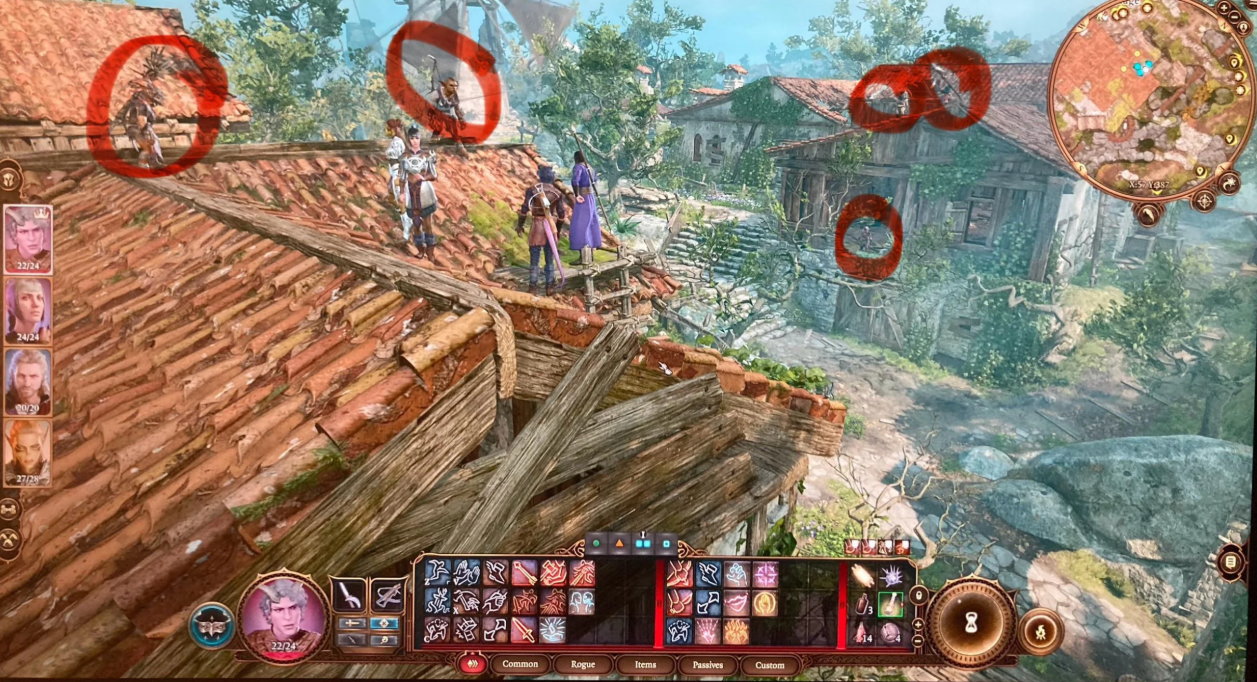
Dror Ragzlin’s Throne Room and Battle Tactics
Dror Ragzlin is the leader of the entire camp, a hobgoblin priest with a two—handed mace. He sits on a throne and worships the corpse of the eater of intelligence. There are six hobgoblin guards, bards, and dogs all around.
Ragzlin’s fighting tactics are crowd control tactics. Plan:
-
Before entering the throne room, send one stealth fighter to occupy the upper balcony. From there, the arrows will hit from above.
-
Open the battle with a “Sleepy cloud” or “Silence” — turn off the bards, they heal Ragzlin.
-
The first move is a fireball in the center of the hall.
-
It’s better to fight Ragzlin in a high-AC melee. He hits for 20+ damage with a single attack.
After Ragzlin’s death, the camp has not been cleared yet — the goblins do not see what happened. We can safely move on.
Mintara and the choice between raiding and defending the grove
Mintara is a drow paladin of the Absolute. He stands at the map and plans a raid on the Emerald Grove. Here, the first act shows the real fang.
Option A. The “good” way. Tell Mintara anything, kill her, save the grove. Then the grove holds a celebration, the tieflings go to act 2, you get all the “good” partners and most of the achievements.
Option B. The “evil” way. Conspire with Mintara, return to the grove and carve it out with the goblins. Mintara becomes a partner. Tieflings are dying. A number of quests are being closed, but exclusive Mintara lines are being opened.
This is the fattest fork in the act. You can’t roll it back. Plan ahead or make two saves.
Halsin’s rescue from the Warg pens
Khalsin is sitting in a bear form in a warg cage. Liberation comes through combat: four wargs + three goblin jailers. Halsin helps from the inside if you open the cage during the fight. In human form, he fully restores HP, joins temporarily, and later becomes a full—fledged partner in the camp (from patch 6 and higher – with all the scenes and even the novel).
Important: you can save Khalsin BEFORE killing the leaders. It is enough to crack the lock of the cage. He will turn into a bear himself and cause such mayhem in the camp that half of the goblins will die before your blows.
The ascending Road and the Karlach quest
The northeastern part of the region is a paved road. This is a looted trade route with a caravan park, a burning Vokin Shelter and a Zhentarim dungeon. According to the plot, the quests of Will and Carl close here and a secondary line about Florrick unfolds.
The density of events is off the charts. It is better to come here after the grove, but before the goblin camp, according to experience, it will be just right.
A looted caravan and a battle with gnolls
The remains of a caravan lie at the crossroads of the road. There is carnage all around: a dozen gnolls and their leader Flind are tormenting the guards. Only one survived, Zorru, who hid behind a rock. He’s calling for help.
The fight is tough. Flind is a high—level creature that hits 25+. Tactics:
-
Use charisma or intimidation — gnolls have low wisdom, half of them can be forced to turn against their own.
-
Blow up the oil barrel at Flind. There are several explosive barrels in the caravan park.
-
Finish Flind off en masse — he is being treated by fallen gnolls.
The reward is the key to the Zhentarim trading dungeon and a thank you to Zorr.
How to find and protect Karlach from the “paladins of Tyr”
A little further down the path, a tieflinger comes at you with a red-hot mechanism in his chest and two two-handed guns. This is Karlach. It looks intimidating, but in the very first dialogue it turns out that she is being chased by mercenaries disguised as Tyr’s paladins. They lied to Will that Carlach was an escaped demon.
There is a double passage here. If Will is in the party, he can try to kill her — he has a quest on her head. Persuade him to listen: a verification of conviction or a past high approval. Karlach will tell his story, Will will get angry at the customers, and the two of them will join the party at once.
Mercenaries are not paladins. These are the “Paladins of Tyre” in quotation marks, the Zariel gang. Kill them all. The leader, Anders, has a key note revealing the conspiracy.
In order not to lose Karlach, immediately after the meeting, take her to Dammon in the Emerald Grove. He is the only one who can fix her hellish engine, otherwise she will burn herself from her heat by the end of the act.
Vokin Orphanage: Saving Florrick and Will’s Quest
To the north is the Vokin Orphanage, a Flamingian clerical home. It’s burning. Inside is Priestess Florrick, Officer Flaming Fist from Baldur’s Gate, surrounded by mercenaries.
Task: get inside, extinguish the fire (barrels of water around the perimeter), protect Florrick. Her story about the Grand Duke of Ravengard drives Will’s quest directly — Ravengard is his father. Florrick opens access to the Zhentarim headquarters and to Benrin, a contact in the underground underground.
In the chest behind the altar is Benrin’s helmet with a unique property. In the basement is the legendary two—handed Skull Wedges. Don’t forget.
Zhentarim Underground Shelter and Oscar the Artist
The entrance to the shelter is through a trapdoor in a ruined stable. The password is “Children of masks” or lock picking. Inside is the Zhentarim trading network: buyers, suppliers, skeleton keys, night elixirs. It’s worth going in for the sake of one Braylin — he has a mantle of a healer for Shadowheart.
The artist Oscar is crying in the corner: the Zhentarim gang forced him to paint counterfeit portraits. Saving him is a separate little quest with two endings. The second time Oscar will pop up in the third act is already at Baldur’s Gate, if he is released now.
The Underdark: The Mycenaean Colony and the Dark Ways
From the Emerald Grove or the Extinct Village, Baldur’s Gate 3 leads down into the Underdark. This is a huge dark zone with its own ecosystem: a colony of Myconids, doorgars, a lich in a tower and a scattering of hiding places.
If you played the classics, the Underdark in BG3 looks more modest: not the entire tunnel network, just a fragment from the hollow to Grimforge. But even so, 8-10 hours of passage is guaranteed.
Three Ways to Get into the Underdark from Act 1
No path is closed forever — choose the most convenient one.
-
Through the Whispering Abyss in an Extinct Village. After killing the Phase Matriarch, a tunnel opens at the bottom of the nest directly into the Underdark. The fastest and most dangerous way.
-
Through the Selune Temple in the goblin camp. After the moon puzzle, there is a lever in the back of the temple that opens the elevator down into the Dark Paths.
-
Through the swamps. Aunt Ethel’s crooked tea house has a secret passage through the basement, and it intersects with Dark Paths.
The fourth option, the Well of Chasms near the ravaged shore, opens only in the opposite direction, from the Underdark to the top.
Vladyka Gloth, Blorg and Omelum: Mykonid Quests
The colony of the Mykonids is a mushroom city with its own hierarchy. Vladyka Glot is the ruler, Blorg is his assistant, Omelum is a wise philosopher. All three give quests.
A sip. He asks to take revenge on the Doormen for the attack. The task of “Getting rid of the Fish—loving” is to kill the leader of the Doorgars at the pier. For this, Myconides gives you an exclusive staff.
Blorg. He sends Sarth, the grioanic doctor, to the Terrible Hollow. Along the way, you can buy a Sussura Flower from Blorg, a legendary reagent and a reason for another quest.
Mistletoe. The scientist is Leonid, a member of the “Community of the Brilliant.” He knows everything about illithids and can give the character a special rite of protection from the parasite for one long rest. The only way in the first act to safely explore the connection with the larva.
The Terrible Hollow, the Flower of Sussura and the Mushroom Picker’s quest
To the west of the colony is a terrible hollow with lilac mushrooms and Baelen, a mushroom picker who was stuck under a landslide. The quest is simple: to save. The problem is that Derrit is wandering around, who wants Baelen to die for the sake of the inheritance.
The solution is to jump over the explosive good mushrooms, give Baelen the displacement potion and bring him back in one piece. Derritt can attack after that, then fight. For a successful rescue, you will receive a rare Magic Dispelling scroll and access to the Sussura Flower as a consumable.
The magic Tower of Lorroakan and the robot Bernard
In the depths of the Underdark there is a ruined Magic Tower. The mechanical man Bernard, assistant to the magician Lorroakan, who has remained in office for a thousand years, wanders inside. Bernard is obsessed with the play Orpheus, Prince of the Comet and demands that the correct lines be read to him.
The sequence of correct answers:
-
“Where do you get faith from?”
-
“Or a friend?”
-
“Speak boldly — there is silence in the dark”
-
The final line through a check of performance or charisma.
If you make a mistake, Bernard will attack: 88 HP, magic projectiles, protective shell. If you win, you get his mechanical key and free access to the treasure trove with a lightning generator.
Timmask spores and another language, the Language of Madness, are crawling in the basement of the tower. Under no circumstances should you pick it up. He is cursed and will remove wisdom forever.
The dilapidated village of the Dvergars and the ship to Grimforge
The final point of the Underdark is the dock of the Dvergars. There is a ship here that leads to Grimforge. To get on board, either pay the dwarves 500 gold, or slaughter the entire village (hello, Glot’s quest). The second option is both faster and more profitable: the Dworgars carry with them a good collection of scrolls and mithral ore.
Grimforge and the Adamantine Forge
Grimforge is the last location of the first act of Baldur’s Gate 3 and one of the most difficult in terms of difficulty. An abandoned Dvergar forge, fiery magma chambers, a lava elemental, a robot boss, and a fork in the road between the two outcomes of the Save the Weapon Master quest. It takes 6-8 hours to complete the Grimforge, and it’s a bad idea to rush here.
The structure of the location is divided into four layers: the pier, the underground barracks, the foundry and the Adamantine forge. The passage between layers is often blocked by traps, so keep your magic detection charms ready.
The battle for the pier and negotiations with the dwarf Morghal
You arrive by ship at the stone pier. There is a conflict on the dock: the Dvergars, under the command of Morghal, are holding dwarf prisoners hostage. Options:
-
Convince Morghal of your loyalty to the Absolute (DC 18). If it passes, the Doorgars will let you through without a fight.
-
Lie about the alliance with Nere. Morghal will be interested, but will require proof.
-
Attack head-on. The Doorgars are releasing crossbowmen from the cliffs, the battle is exhausting.
The best way is through lies. Morghal will send you deep to Nera, and this will close the mission “Save Philomena”.
Philomina’s rescue and the explosion of the blockage for the Faithful Nera
Philomina is Bark Root’s daughter, abducted by the Doorgars. She is being held in the Yamnaya barracks. To reach it, you have to go through a landslide: the Doorgars have walled up a tunnel with Nere and slaves. Loyal to Nere is another leader of the Absolute, and he must either be saved or killed by choice.
Rockfall Explosion: Find the rune powder in the next room, lay it under the rockfall, and blow it up with fire magic. There will be a choice: Nere and the Doorgars get out alive — and immediately attack. Either you don’t blow them up and suffocate them under the rocks, but then Philomina and several dwarves will also die.
The most advantageous solution is to blow up and then kill Nere and the Doorgars. The freed dwarves will become allies in the final battle of Grimforge.
Search for casting molds and mithril ore
The forge requires two things: mithril ore and casting molds. The ore lies in an open vein near the southern wall. The uniforms are in different parts of the location, one per type of armor. There are five shapes in total: helmet, breastplate, gloves, boots, shield. Choose one, and one. Only one form works for the entire playthrough, so consider in advance which slot you have the weakest.
The ore is extracted with a pickaxe (the one from the cave of Medvesych). You can’t take it without a pickaxe.
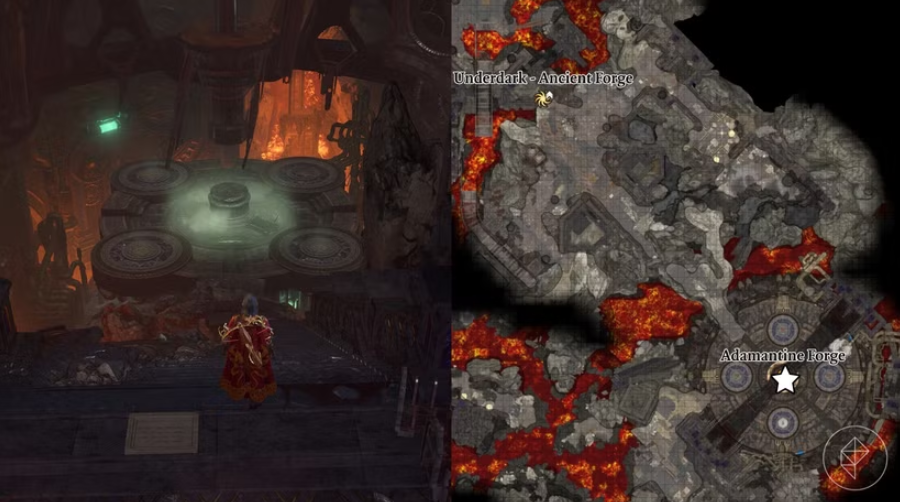
Fight with the Grim robot boss and achieve “In fire and Blood”
Adamantine Forge — a hall with a river of lava and a giant stamping machine. You put the mold and ore in the press, and then the Grim, the iron guardian, comes out of the wall. The boss of the 1st act of the major league: 177 HP, 30+ hits, immune to fire and poisons.
Tactics:
-
Work with relief. A lever in the corner of the room opens a trapdoor in the floor — you can drop the Makeup into the lava. This is immediately minus 50 HP.
-
Hit with power spells: “Blow”, “Power of fire”, “Magic arrow”. The physical damage is almost nonexistent — the robot has resistance.
-
Withdraw part of the party to the far tier — from there the arrows strike safely.
-
Keep HP above 50%, otherwise his “Press” blow will kill you one-way.
The final blow, delivered by lava or falling, gives the achievement “In fire and blood.” A simple ordinary keel is not. Hang the guardian over the press, pull the lever, take a good shot — it falls, and your adamantine helmet is ready.
The finale of Act 1 and the transition to the second act
After the forge— there is a final corridor with a door mechanism and a Bullet, the last mini boss. Buley is an old priest of the Absolute, his 92 HP and ray attacks cover a squad of four zombie doorgars. A battle of medium difficulty.
Next is the elevator to the top. Get up and go out into the Cursed Lands. This is the finale of the first act and the beginning of the second.
In front of the elevator, the game shows a save screen and offers to relax. GET SOME REST. Most of the partners’ personal cutscenes are triggered at this very moment – if you skip, some of the content of the second act will pass by.
Companion Recruitment Guide — BG3
The two partners are mutually exclusive: Halsin and Mintara. The first requires the protection of the grove, the second requires its destruction. It is impossible to combine them in one run with any combination.
How to Boost Approval and Start a Romantic Line
Approval grows from behavior in dialogues and from decisions in quests. Each partner needs their own key:
-
Shadowhart. He loves secrets, irony, and secrecy. He hates obvious “good” deeds.
-
Laezel. Respects strength, despises weakness, approves of directness.
-
Astarion. He loves cruelty and cynicism. Reacts terribly to self-sacrifice.
-
Gail. Approves of curiosity, education, and good manners.
-
Will. The classic kindhearted: to save everyone, to be fair, to help the weak.
-
Karlach. He loves holidays, fun, helping children and animals.
-
Khalsin. Nature, life, protection of the grove. Everything is simple.
-
Mintara. The power, the killing, the victory of the Absolute.
The novel is triggered at a Tiefling holiday in the camp — this is the trigger. With the approval of “High” and “Exceptional”, the partner will sit down by the campfire, and the scene will begin. Important: Shadowheart and Gail are the first to actively pester. Karlach and Will are more modest, you need to initiate a dialogue with them yourself.
Hidden companions: Halsin and Mintara
A mintara is added only if you have passed the grove massacre on its side. Even God won’t do otherwise — neither the correction nor the mod will save here (vanilla game). Khalsin was originally a story NPC, but since patch 6 he has become a full-fledged partner with Roman. To get him to join: Save him in the camp, don’t lose him in bear form, and fulfill his first request in the Shady Lands.
All Bosses of Act 1: Tactics and Rewards
Boss fights in Baldur’s Gate 3 are separate mechanics that should be understood. Almost every boss can be thrown into a chasm, drowned in lava, or killed with a single Hit of Mercy. Here are concise tactics and key weaknesses.
The Phase Matriarch, Aunt Ethel, Dror Ragzlin, Grim, Buley
The phase matriarch. 78 HP, weakness to fire. Tactics: blowing up eggs, dropping into the abyss through a “Push”. Loot: Poisoner’s mantle, Spider Boots.
Aunt Ethel. 84 HP in granny + 90 HP in hag. Immune to poison. Tactics: dispel illusions by checking perception, finish off before escape. Loot: Aunt Ethel’s hat.
Dror Ragzlin. 115 HP, holy weapon. Tactics: AOE in the center, silence the bards, attack from above. Loot: Ragzlin’s Mace, the necklace of the Absolute.
Make-up. 177 HP, immune to fire/poison. Tactic: dump into the lava through the press lever. Loot: Adamantine armor to choose from.
Booleans. 92 HP, weakness for force effects. Tactics: first the zombie, then himself. Loot: The scroll of the Shadow Spear.
Boss Table: Level, Health, Weaknesses, loot
Boss Guide — Act 1
All achievements of the first act of Baldur’s Gate 3
Achievements in Baldur’s Gate 3 are often related to a specific way to kill bosses or rescue NPCs. It’s easy to skip. It’s not possible to go platinum in one go, but you can take most of the first act in one run.
List of achievements with exact conditions
“The annoying devil.” Kill Commander Pathetic in the prologue. The final blow is from the main character.
“Teach your little spiders better.” Drop the Phase Matriarch into the abyss instead of killing her with direct damage.
“I’m going to be twice as happy now.” Pet the rescued medvesych Kroll in the heroes’ camp twice.
“In fire and blood.” Kill a Grim by falling into lava or pressing, not by normal damage.
“The bigger the cabinet.” Destroy the entire magic tower of Lorroakan by starting its own generator.
“At the command of the Shovel, the children cover their ears.” To make the squad of “dummies” of the Dried-up silent through a special command.
“Food for the mind.” Complete the walkthrough to the end of Act 1 and keep all eight partners alive (except the mutually exclusive ones).
What achievements can’t be combined in one playthrough?
-
“Mintara in command” + “Protect the grove”. It is impossible to combine them.
-
“Union with Ethel” + “Ethel’s Hat”. Union — loss of status, fight — hat.
-
“Save Arabella” + “Kagi’s Gift”. If you save Arabella, Kaga will kick you out.
The full list of achievements in BG3 in one run requires the Dark Urge mode and pre-planned forks. Platinum usually takes 2-3 runs, so just accept that there won’t be an ideal at a time.
Moral choices and their consequences in 2-3 acts
The first act of Baldur’s Gate 3 is not a collection of disparate quests, but a woven web of consequences. Much of what you decide now will catch up in the Shadowlands, at the Fair of the Last Light, even in Baldur’s Gate. Below are the key forks that are really important.
Tieflings or Absolutes — the key fork of the act
Protection of the grove. The Tieflings go to Baldur’s Gate, have a party, and some of them will appear in the second and third acts. Get a unique Zevlor quest at the Ghost Camp, plus scenes with Arabella. More emotions. More good endings.
The massacre of the grove. Tieflings are dying, Mintara is in command. You get exclusive quests with the Absolute, scenes in the Moon Towers, the path of the “true follower”. The ending is dark, but solid.
There is no middle way. Baldur’s Gate 3 does not recognize neutrality.
Refusal of the Zevlor award. A modest but subtle point. Refused gold — Zevlor will remember and in act 3 will give you a rare item. They took it and it will be forgotten.
The Fate of Astarion, Karlach, Shadowheart and their quests
Astarion. If you give him all the pages you found about Kazita, the ascension ritual will open in Act 3. Full adventure dualism — become a monster or remain yourself.
Karlach. Without Dammon— death in Act 3. With Dammon and all three repairs, a chance to survive. Keep an eye on the Dvergar infernal ore: Dammon needs it.
Shadowheart. The Sharran way or apostasy. The choice is made in Act 2, but the foundation is laid in the first one — through approval and dialogues about her past.
Preparation for the second act: checklist
Going to the Cursed Lands is the point of no return. You can return, but some of the content will disappear. Therefore, it is worth gathering before the elevator in Grimforge or before the pass.
What to take with you: loot, scrolls, potions
-
Shadow Vision scrolls are required in the Shadowlands.
-
Torches (10+ pieces). Without a light source, death from shadows.
-
Aunt Ethel’s hair (if you haven’t given it back) will be needed for Myrina.
-
Arabella’s Medallion (if saved) is a quest item.
-
Rune Powder (5+) — for exploding rubble.
-
Necrotic Damage Resistance Potions — minimum 8.
What to sell to merchants before switching
Extra one-handed weapons, unopened folios, level 1-2 armor, goblin helmets, troll horseshoes. Dammon’s is the most profitable — he gives +10% to the purchase price after the Karlach quest.
Comparison of three crossing paths: Pass, Underdark, Grimforge
The best option is to complete ALL three paths to the crossing: the mountain pass at the very end, and the Underdark and Grimforge before it. Returning later will be difficult.
Conclusion: Act I Summary and What’s Next
The first act of Baldur’s Gate 3 is 40-60 hours long, packing in almost everything that makes this game great: moral choices, detailed companions, secrets at every turn, and a true dungeon master in the form of the engine. Finish it fair and square, and you’ll receive a team, an artifact, understanding of the parasite, and a map of the Cursed Lands. Now lie the Shadowlands, the Last Light Faire, the Host, and the confrontation with Kateri.
The second act of Baldur’s Gate 3 shifts the pace. Fewer open spaces, more vertical dungeons. The choices become more pressing: Shadowheart will have to take a major step in his life, Astarion will meet someone he didn’t expect, and Karlah will either get a chance at salvation or be consumed. Everything you laid out in Act I—from Arabella to Minthara—will be revealed there. Have a great campaign. Remember: there’s no single, correct playthrough in Baldur’s Gate 3. There’s yours.