Deadlock is the 22nd character added to Valorant and proudly stands as the fifth agent in the Sentinel class. While she hasn’t yet become a fan favorite within the community, her abilities hold significant potential, particularly her Barrier Mesh skill. This unique ability can change the dynamics of a match, but many players are still figuring out how to leverage it effectively.
In light of this, we’ve crafted a comprehensive guide aimed at helping you understand and utilize Deadlock’s Barrier to its fullest potential. Whether you’re a seasoned player or new to Valorant, mastering this skill can greatly enhance your gameplay. Let’s dive into the details and discover how to make Deadlock work for you on the battlefield!
Table of Contents
Barrier Mesh: Full Description, Characteristics and Applications
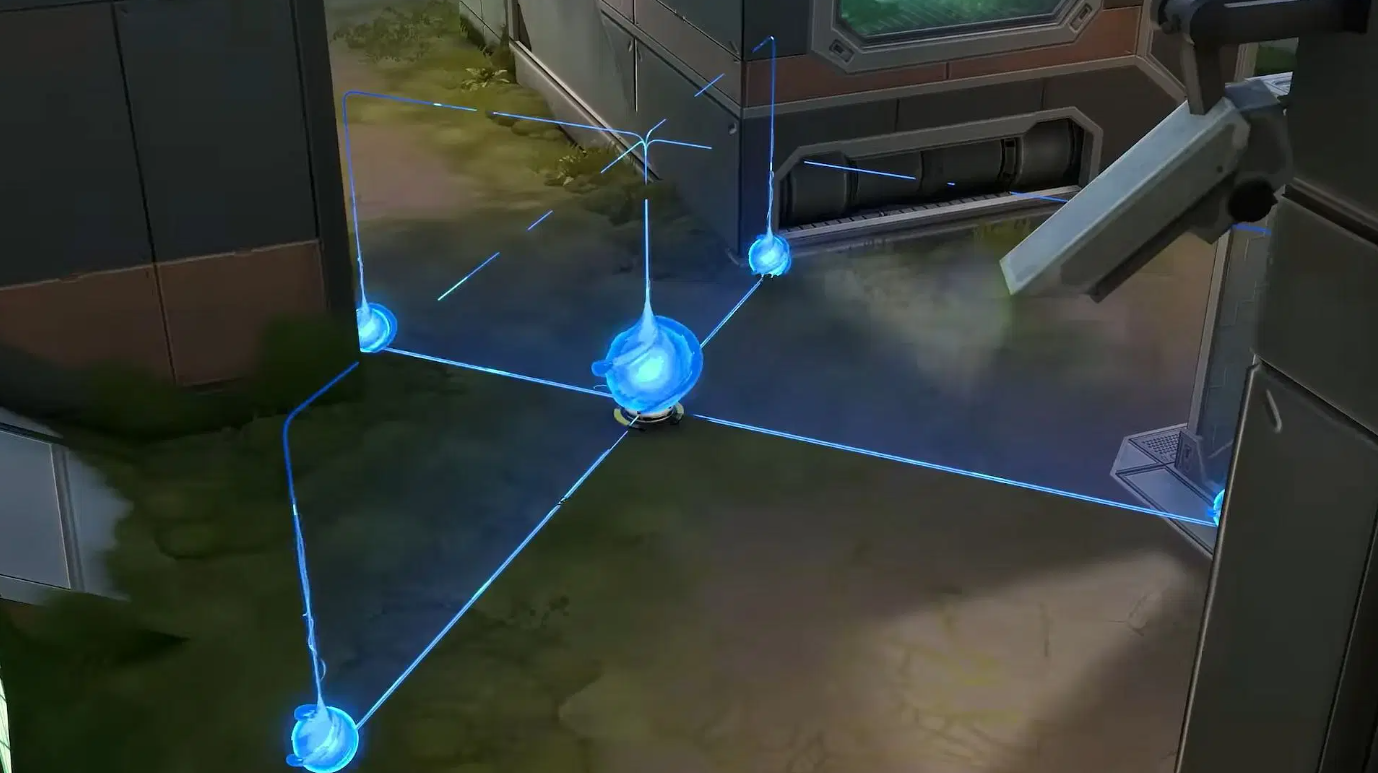
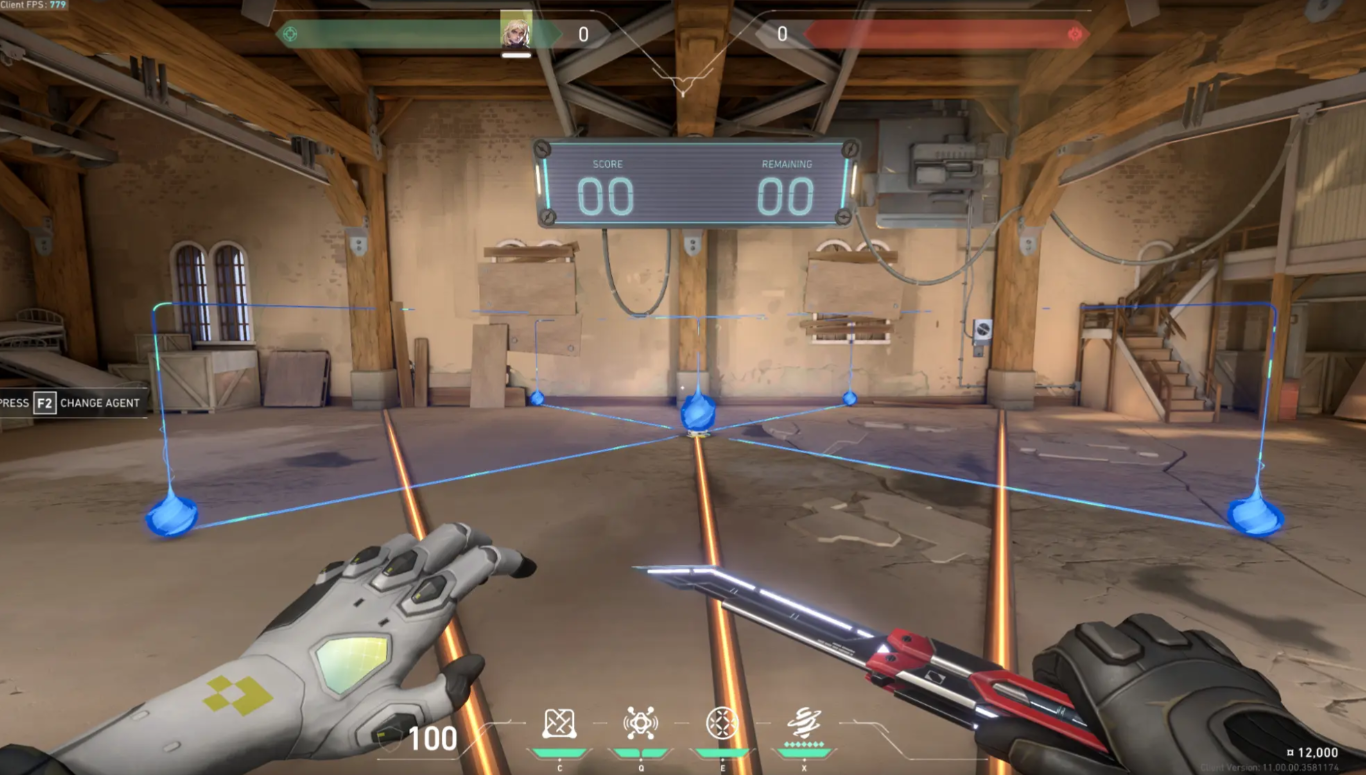
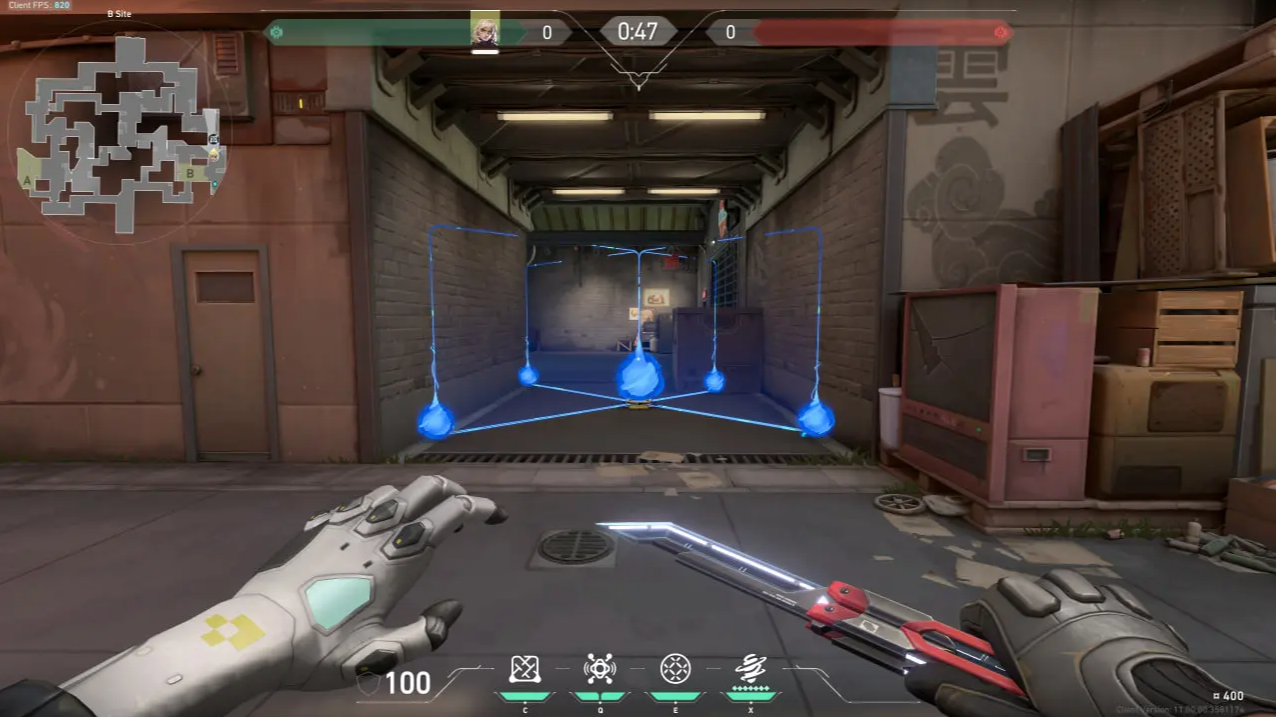
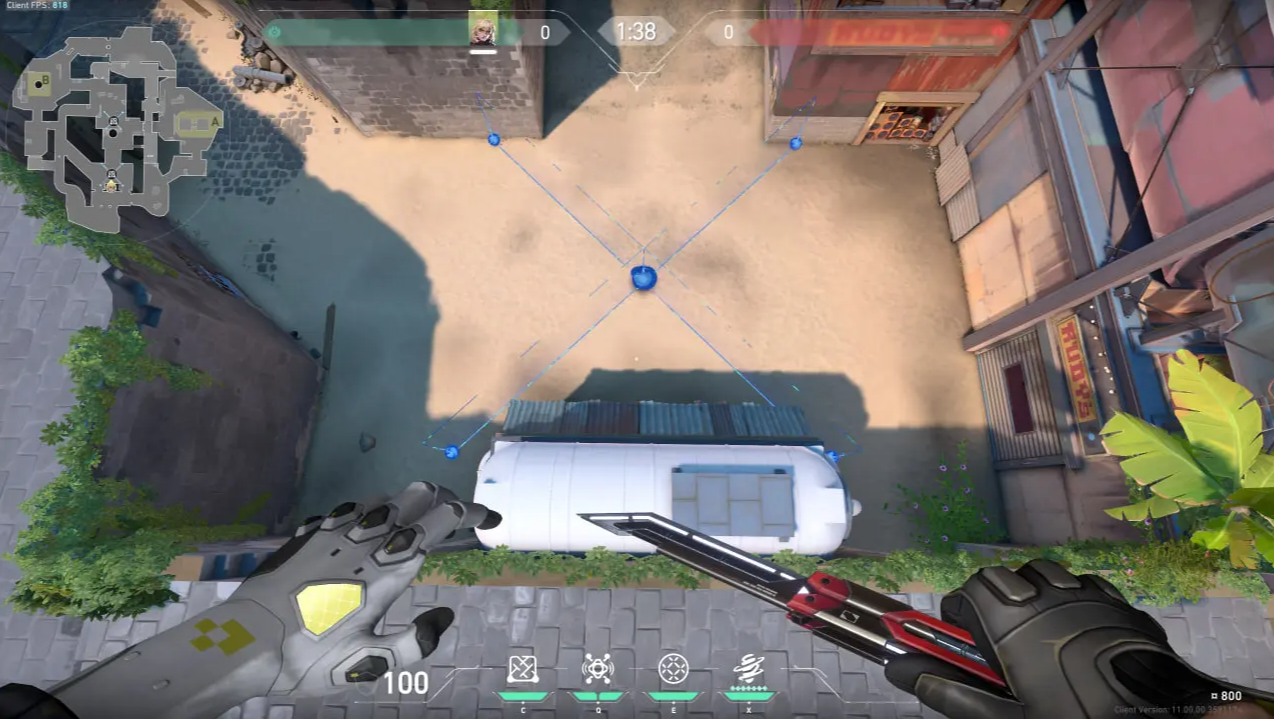
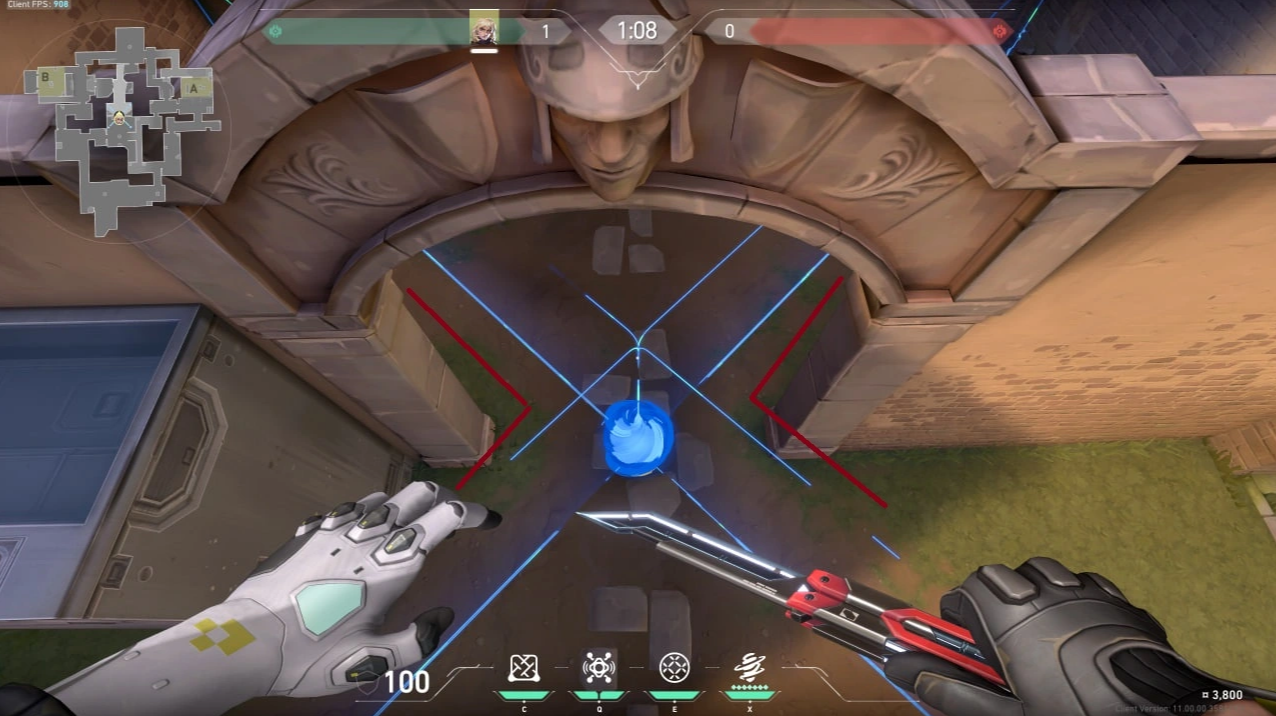
Let’s take a closer look at how this ability operates. The Barrier Mesh is Deadlock’s primary skill, activated by pressing the C key. When you use it, you place a sensor at a selected location, from which laser walls extend outward in four directions. These walls effectively block enemy movement, making it difficult for them to advance, but bullets and most abilities can still pass through without obstruction. The barrier can be destroyed by dealing damage through shots, knife strikes, or various abilities. The main sensor at the center of the wall has a total of 680 health points, and if it is destroyed, the entire barrier collapses. On the other hand, the smaller side sensors each have 320 health points; taking out one of these only removes a single section of the wall, allowing part of the barrier to remain intact.
How to use the barrier correctly and in what cases will it bring the most benefit?
After you have figured out the mechanics of the ability and how it works, it is time to talk about how to properly use the barrier in practice and in what situations it can really change the outcome of the round.
Buying a barrier in the first round: is it worth it?
In the pistol round, it is especially important to consider the economy. The barrier net will cost you 400 credits – this is not a small amount to start the game. Therefore, the logical choice is to use it only on defense and mainly on maps with three spike sites, such as Haven or Lotus. There, the net can be a real salvation: you block an important passage and win about 30 seconds, and for a pistol round this is critical.
If you are playing on the attack or on a map with two spike sites, it is better to invest in the Sound Sensor or buy an additional weapon – this way you will be more useful to the team.
Blocking Key Routes
One of the Barrier Mesh’s greatest strengths is its flexibility and long placement range. Unlike the Sage wall, which is poor at blocking wide passages, the Deadlock Mesh can effectively block a narrow corridor or cut off an entire sector.
Some examples of successful uses:
- On Ascent, Haven, and Split, you can block passages to points or slow down enemy rotations.
- On maps like Breeze or the new Corrode, the mesh can completely close off central zones, depriving enemies of freedom of movement.
This ability not only disrupts enemy plans, but also forces them to waste time bypassing or destroying the barrier.
Protecting an installed spike
A barrier is useful not only in defense, but also in attack. After installing a spike, place the mesh next to it. This will create a safe zone for you and your team, where you can control enemy approaches. Listen to the steps, read the actions of your opponents – this way you will be able to react in time to their attempts to break through.

Why practice is everything?
On paper, the strategy looks perfect, but in reality, it all comes down to experience. The grid has no direction indicator, and it is difficult to predict the final shape of the walls. A mistake in the installation – and the enemy can easily bypass your “protection”.
So practice in the lobby: try different angles, points and distances. The better you understand the mechanics, the more effectively you can use the grid. Remember that some schemes that work for other agents will not always work for Deadlock, especially on maps with narrow corridors.
How to Effectively Destroy Deadlock Barrier in Valorant: Best Strategies and Agents
At last, let’s delve into the most effective strategies for countering or dismantling Deadlock’s ability when she’s on the opposing team. Among the top agents capable of dealing with her barrier are agile characters like Jett and Omen, who can effortlessly teleport beyond it, rendering the wall useless. Chamber can also achieve this with the right timing and positioning, making him a valuable asset against Deadlock.
If you’re curious about how to effectively eliminate the barrier in Valorant, Raze stands out as an excellent option. She can quickly destroy the sensor using her Paint Shells grenade, which deals significant damage in a wide radius. Similarly, Tejo can take out one of the walls with just two charges of Guided Salvo, making her a formidable opponent when it comes to breaking through defenses.
There was once a clever method to break the wall that involved the agent Yoru. He would approach the main sensor and activate his Fakeout ability, performing a jump to create a clone. This clone would then appear right above the sensor and destroy it in a mere second, bypassing the barrier entirely.
However, it’s crucial to understand that this was a glitch related to the barrier in Valorant. This bug has been addressed and corrected in subsequent updates, so as of 2025, players can only remove the wall using other techniques. Adapting your strategy is key to overcoming Deadlock’s defenses effectively in your matches.