The developers at Capcom (yes, those same Capcoms) scattered locked chests throughout five key zones: Solar Power Plant, Mass Production Array, Terra Dome, Lunum Mines, and Central Port. And these aren’t just chests for show—they can contain anything from a measly 100 Lims to rare Cabin Coins, Upgrade Components, or Lunanite stacks. Therefore, no safe can be missed forever: after the end credits, all sectors reopen in Unknown Signal Mode. But to access most, you’ll need special tools—a Lim Eraser or a Deletion Protocol. So be prepared to backtrack to previously completed locations, otherwise the “Cradle Explorer” trophy (and with it, 100%) will remain elusive.
Table of Contents
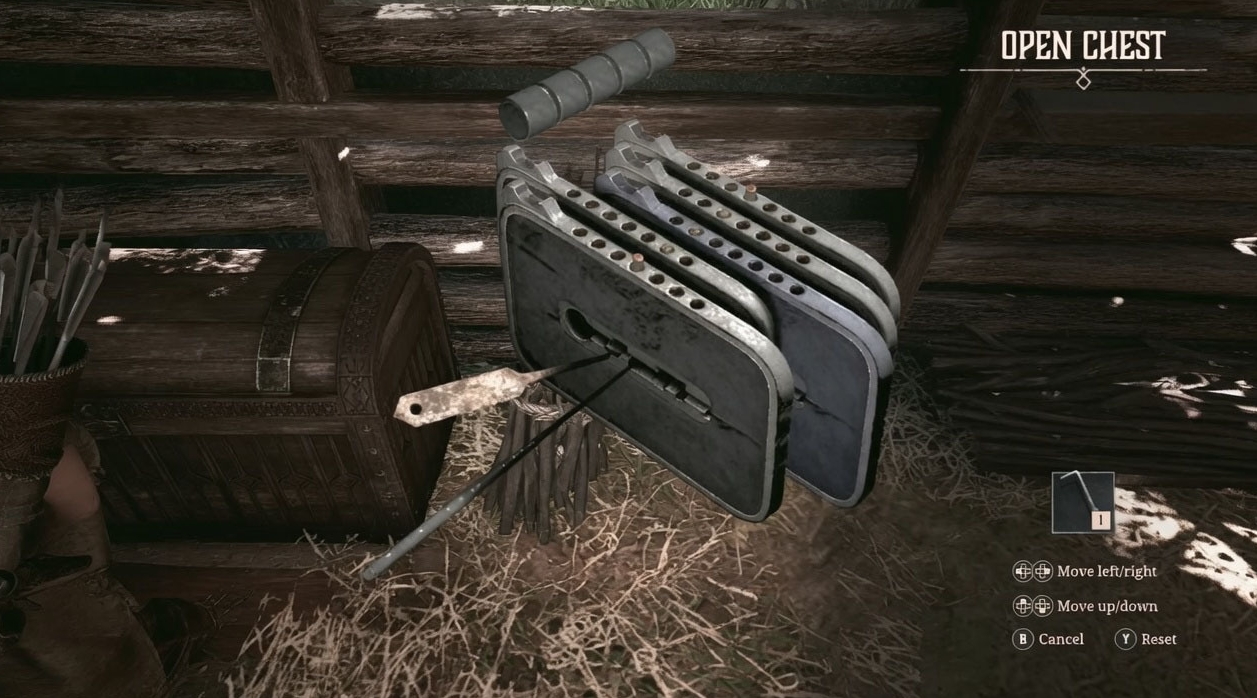
What do Pragmata safes look like and what’s inside?
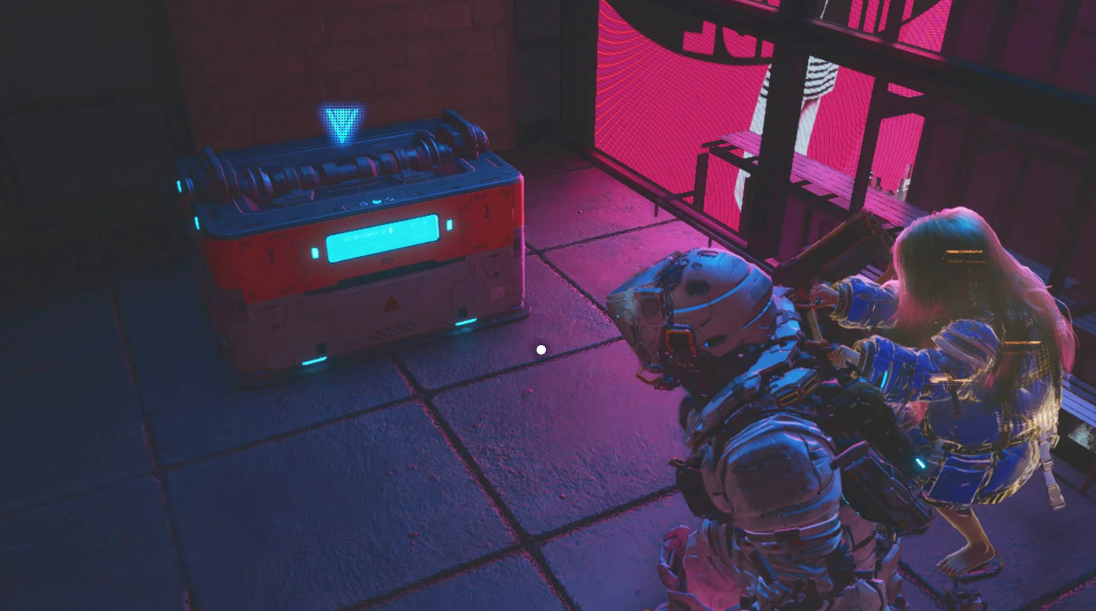
Silver boxes are visible in corners, on high ledges, or behind Lunanite rubble. No locksmith minigames—just approach and press the interaction button. The contents, by the way, vary:
-
Regular Safe: 100–400 Lims—the main currency for purchasing equipment and consumables in the Vault.
-
Valuable Safe: Upgrade Components—Hugh uses them to upgrade weapons and suit modifications.
-
Best Option: Cabin Coins (for cosmetics in the Mini-Cabin) or a bunch of Lunanites—Diana needs them to level up her lockpicking skills.
This is where the fun begins.
Pragmata Safe Mechanics: Why the Code Won’t Work
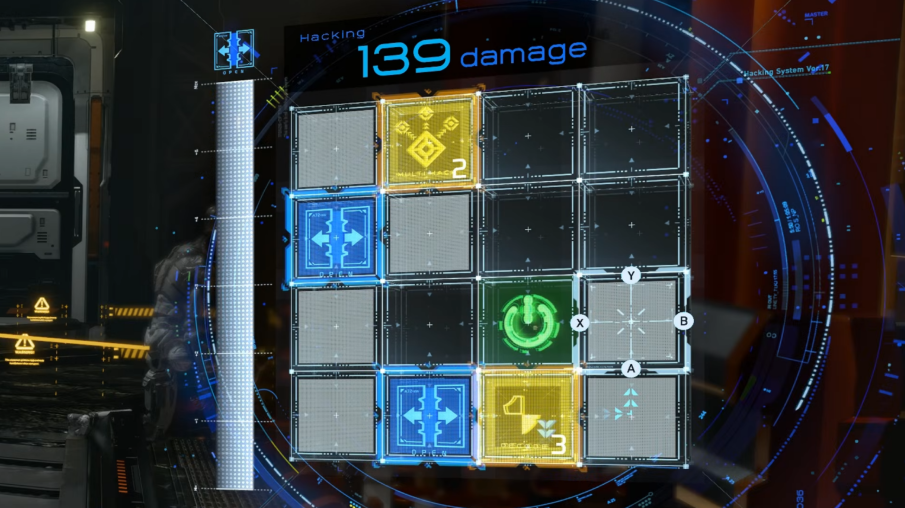
Lockpicking in Pragmata is a two-step process. First, you physically approach the box, and then Diana and her Visor take over: the Limcode is launched directly from the helmet interface. A 3×3 grid appears on the screen, with symbols scrolling across it, and a timer counting down 8 seconds—you must assemble the correct sequence within that time, otherwise the defense will cancel the attempt. The color-coded hints are familiar: green means the symbol is in place, yellow means the symbol is guessed but in the wrong place, and red means you’ve missed it completely. It’s closer in spirit to Mastermind than the simple brute-force locks from Resident Evil 4 (yes, the comparison is obvious).
Now about the pain—why a code from a guide or forum post might not work for you. There are three reasons, all of them valid.
The first is procedural generation. Some safes in the Mass Production Array and Hidden Chamber shuffle the Limcode with each playthrough. So, someone else’s code is literally a lottery. The second is the connection to Diana’s skill. Until her “Decoder” is upgraded to at least level two, the visor only renders six out of nine characters, and any external clues fall apart. The third is a legitimate bug: patch 1.03 (the same one that arrived a week after release) breaks validation on two boxes in Terra Dome. The code is accepted, the animation plays, but the safe won’t open until you reenter the area. It’s a questionable decision by Capcom not to patch this right away, but it happens.
Sound is the main indicator here, and for some reason, everyone ignores it. A valid input is indicated by a short double click and a low hum from the servos. If you hear a single click, the grid goes dark, and the lid doesn’t budge, it’s a failure, not an opening. Little is written about this, but confusion is common: players walk away from a locked box, thinking it’s empty. It’s a shame.
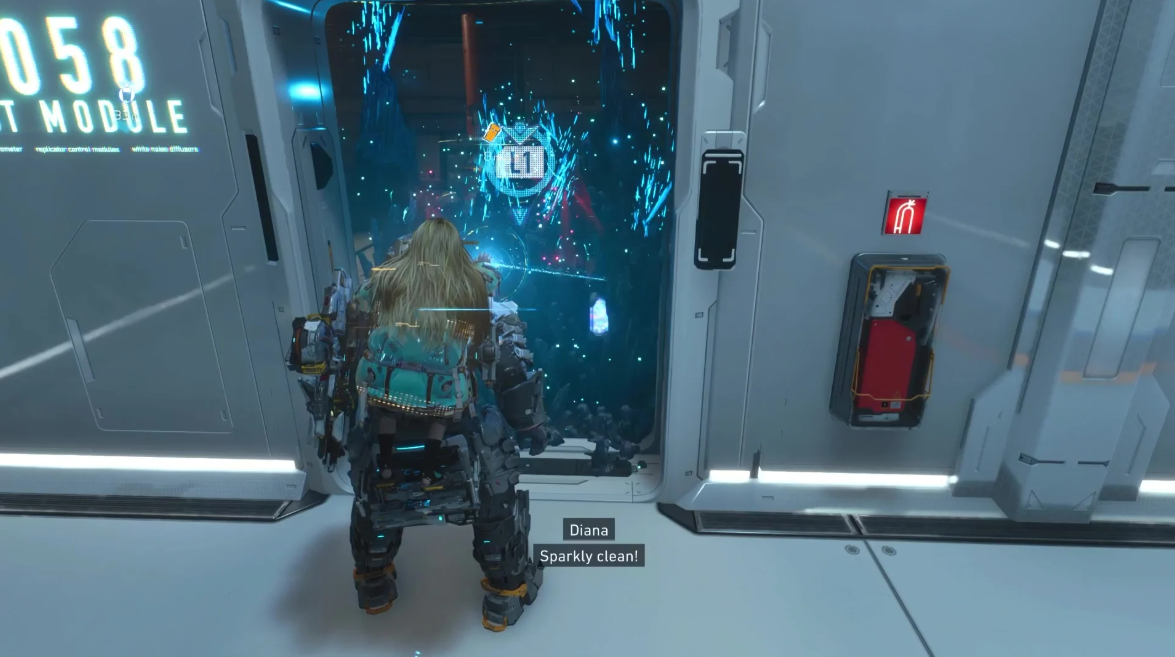
How to distinguish an open safe from a locked one?
An open box in Pragmata differs from a locked one in four ways—and, tellingly, no guide summarizes them all in one place. The lid is tilted back at an angle of approximately 110°. The internal backlight switches from pulsating blue to a solid white. The holographic “LOCKED” label on the case goes out. And the final detail: when you hover over it, the interaction prompt disappears: instead of “Hack,” a blank pointer appears in the interface. When in doubt, don’t waste the timer. Open the block information menu: “Map” → “Sector Details.” The “Safes: X/Y” counter updates immediately after opening, so re-entering the Limcode is unnecessary. Checking your inventory is also helpful. Lims and Cabin Coins drop into the resource slot instantly, without a pickup animation. If the currency counter doesn’t move and the safe appears empty, you’re looking at an already cleared box. It simply hasn’t redrawn due to the texture cache—a known bug on PS5 when fast-traveling via teleport. Capcom is aware of this, but it remains to be seen when it will be fixed.
Lim Eraser and Deletion Protocol: Accessing Safes
Many chests are hidden behind blue Lunanites crystals. They can’t be destroyed with your starting equipment—you’ll need the Lim Eraser. Diana gets it automatically in the “Mass Production Facility 05” location. As soon as the tool appears, immediately return to the Solar Power Plant and the same Array—clear all the rubble you passed earlier. A classic example: the safe behind the Lim wall near the Nouvelle storefront and in the diner across the street (Testing Ground Entrance).
Other boxes are protected by denser Dead Lunanite—the Eraser is powerless against it. They require a Deletion Protocol, which can only be unlocked after completing the Lunum Mines.
Hidden Pragmata Safes: Holo-Walls and Gravity
Some safes employ tricks. Some are hidden behind holo-walls—you can only spot them if you carefully inspect the locations. Others are on ledges and can be reached by hacking a laser panel or carefully flying across a low-gravity room in the Lunum Mines. There’s at least one box in the Terra Dome that requires first growing a tree into a platform—yes, just enough to reach it.
Unknown Signal Mode: Post-Credits Safe Collection
Defeat the final boss, and the game will unlock all sectors anew—complete with all your tools. The Block Info menu displays what’s missing in each area. Any unopened safe is displayed there, making the end-game clearing quite smooth. This can hardly be called a coincidence. Capcom has clearly designed a system for perfectionists.
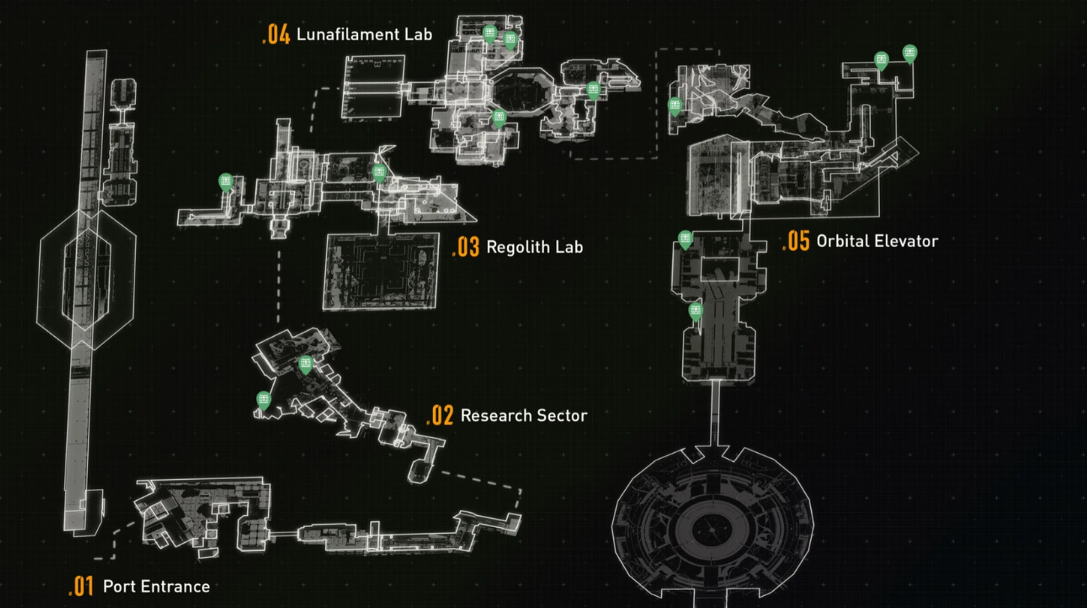
All Cradle Safes in Pragmata by Sector
Typically, the developers didn’t skimp—in the Cradle alone (yes, the very one where the action takes place), there are nearly a hundred safes hidden. They’re spread unevenly across the sectors, and there are a couple of nuances.
-
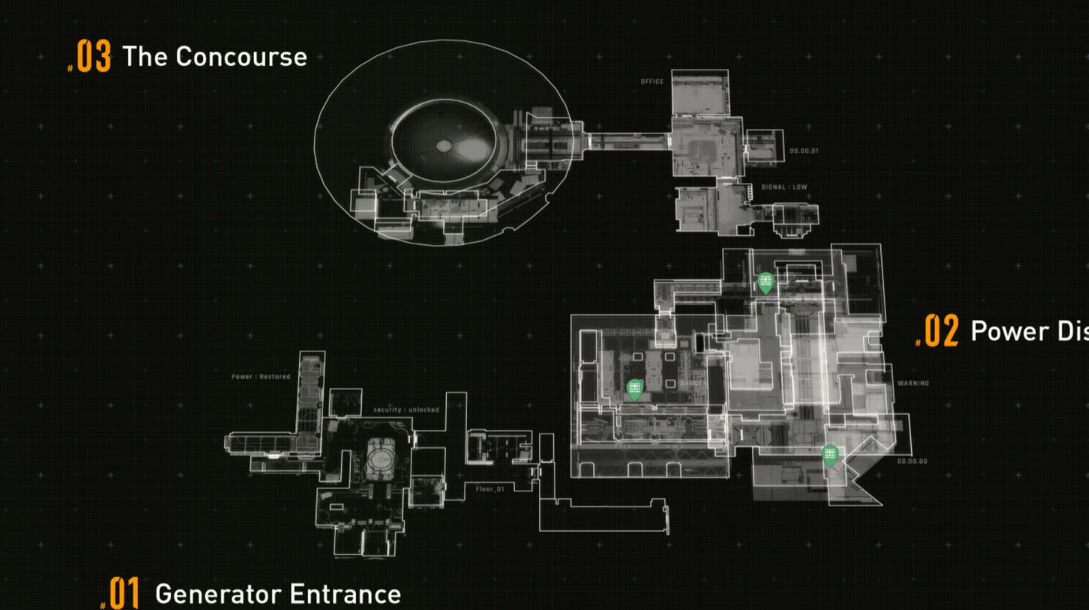
Sector 01—only three boxes. Some of them require the “Lima Eraser” ability. It’s acquired later, in Sector 02, so be prepared to return.
-
Sector 02—a whopping 14 safes. Incidentally, it’s the most dense of the early sectors. There are chests in literally every block, so it’s overwhelming.
-
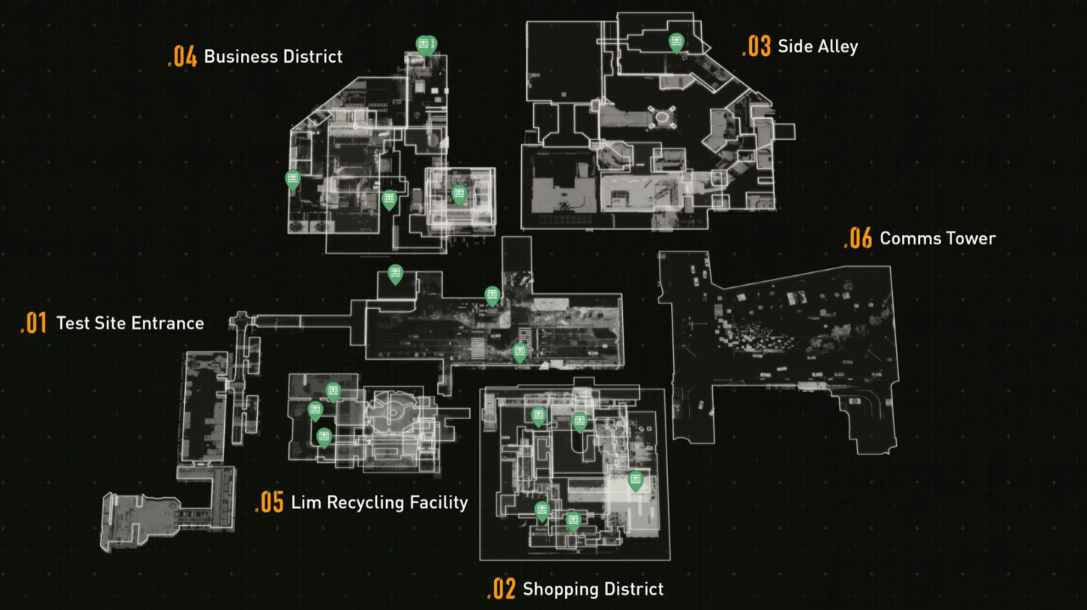
Sector 03 leads the pack with 20 safes. Many are hidden in labs and underground tunnels. It feels like the level designers simply loved hiding rewards.
-
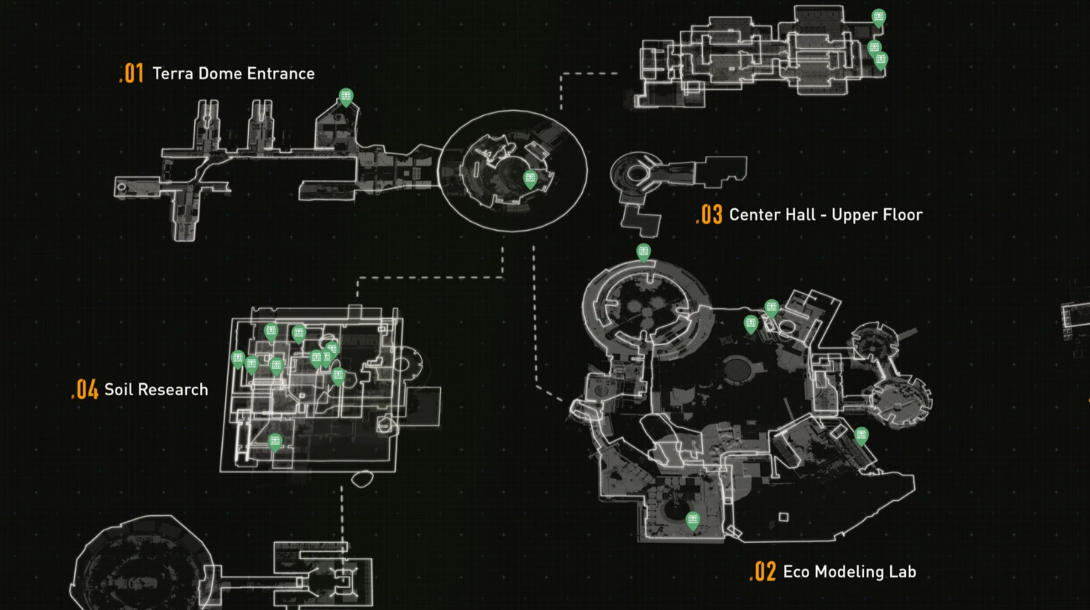
Sector 04 has 17 boxes. But here’s the catch: some are obscured by red Moonfiber growths. They can be cleared with the “Purification” ability, which is only available in Sector 05. (Questionable decision, huh?)
-
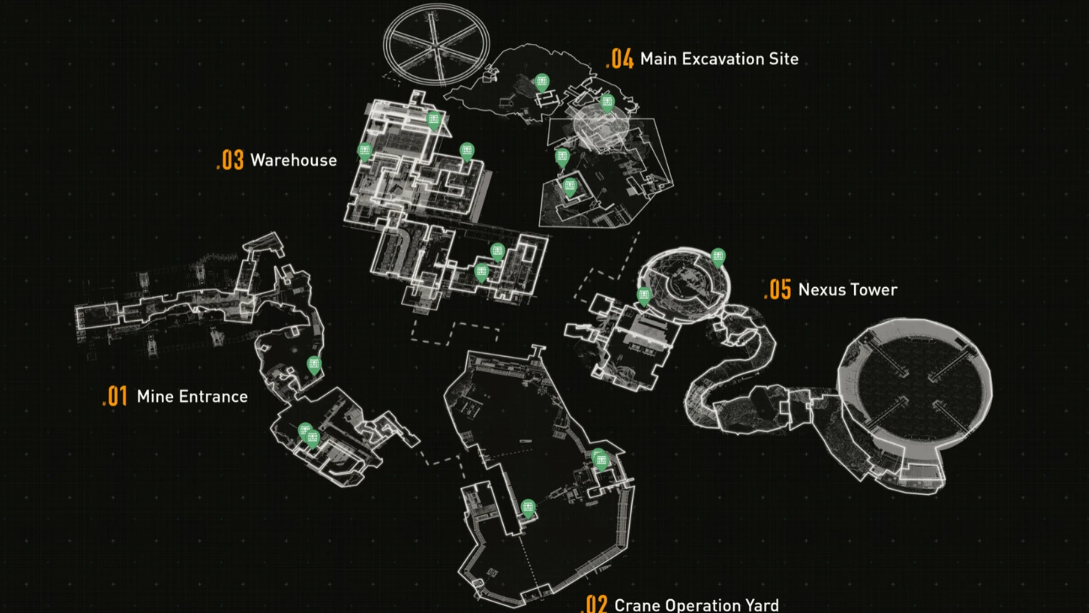
Sector 06 has 13 safes. Block 01 doesn’t contain any at all, while the remaining blocks are evenly filled with research and lab areas.
And the most interesting thing is the Hidden Chamber. It’s a separate area with its own 19 safes. You can only access it after the main story, through post-game mode. Nothing is lost; you just have to wait.