Crimson Desert has its fair share of secrets, but the puzzle in the dragon’s stone room is one of those that’s not easy to figure out. It’ll require some running around and some brainstorming. We’ll tell you where to go and what to turn to open the passage.
Table of Contents
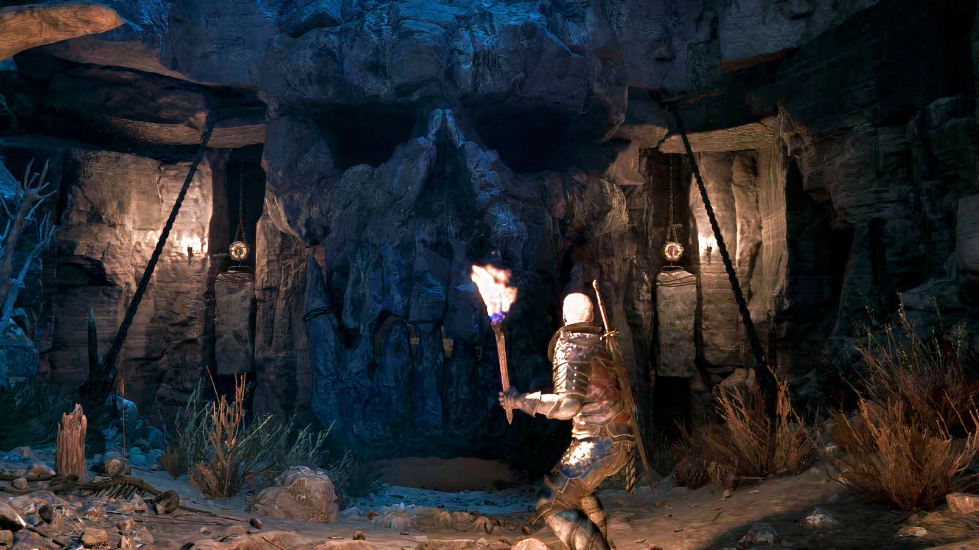
Dragon’s Stone Room Location in Crimson Desert
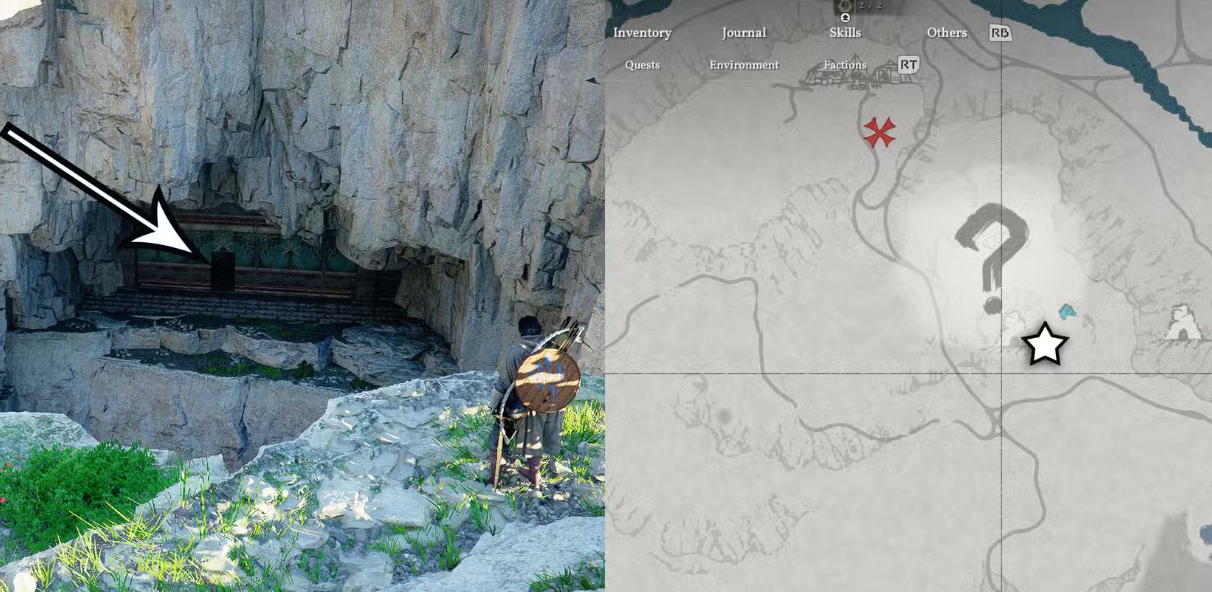
You need to search south of Hernand Castle—cross the river to Wolf Hill. Landmark: the Graymane camp and the fast travel point nearby. On the map, the location appears as a huge crater right next to the road leading south.
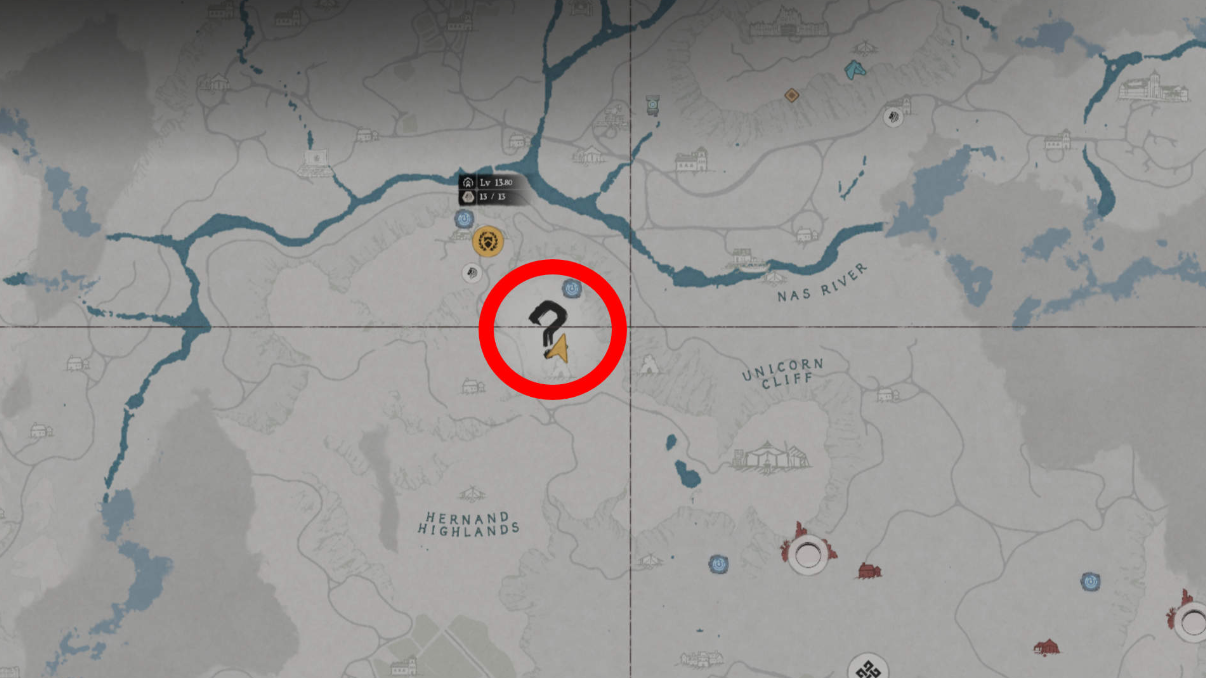
Approach the crater and look at the rocks to the left—you’ll notice a painted red door. Jump into it. Use your wing: glide down and land softly. As soon as you reach the door, the lantern will light up—a sign you’re on the right path.

How to Open the Dragon’s Stone Room Entrance
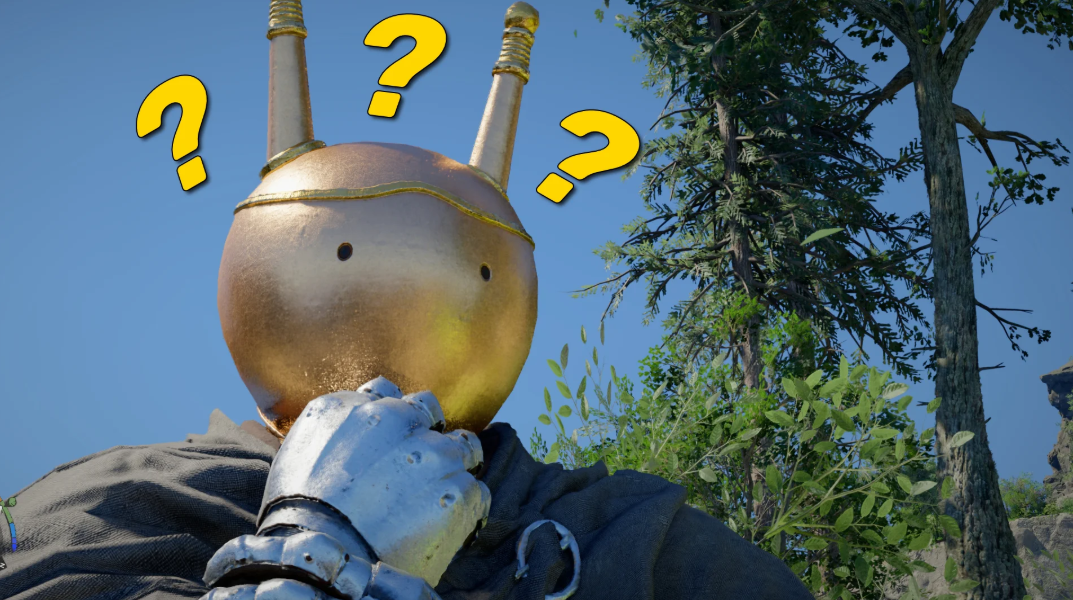
If you’re wearing a horned helmet (vision), activate its magic. Ghostly silhouettes of soldiers will appear before your eyes—they’re discussing the room’s secret. This memory is the key.
Then it’s simple: face the central wall and push against it. After a few seconds, the stone will slowly give way, revealing a passage to a hidden room. Push until you enter.
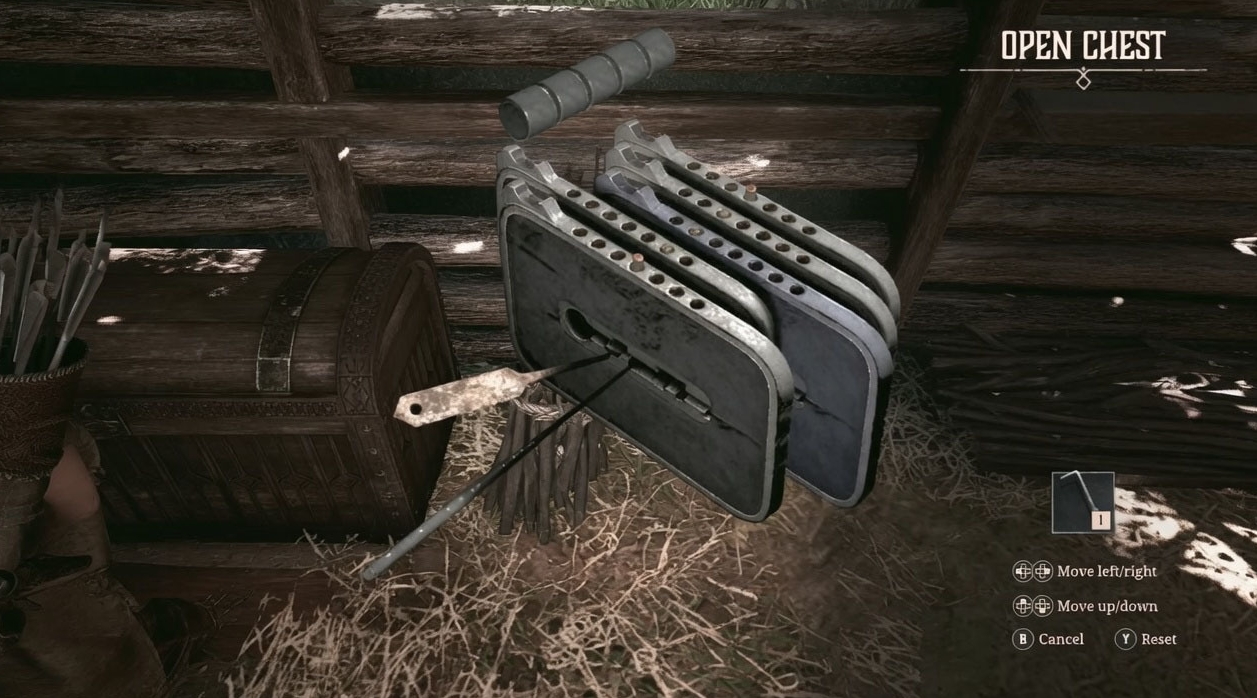
Solving the Three-Disc Puzzle in the Ruins
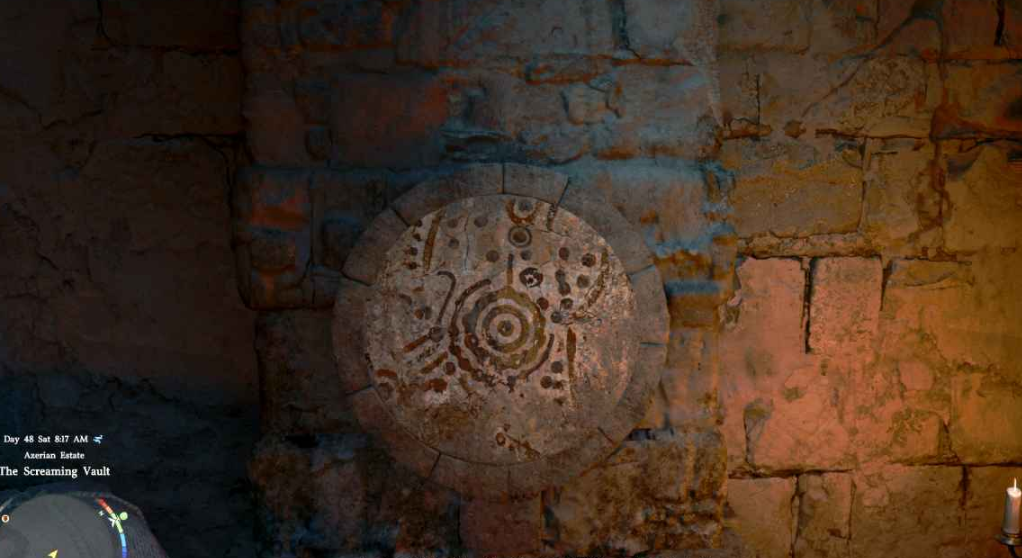
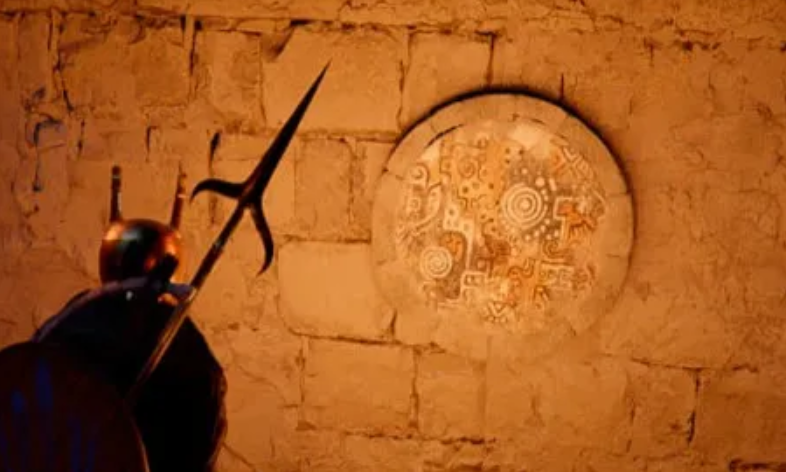
Inside the hall, you’ll find three disks with pictures. You can rotate them. To avoid guessing and immediately set the correct positions, read the next section. If you want to find the clues yourself, you’ll have to explore the room more closely (but we’ll give you the answer).
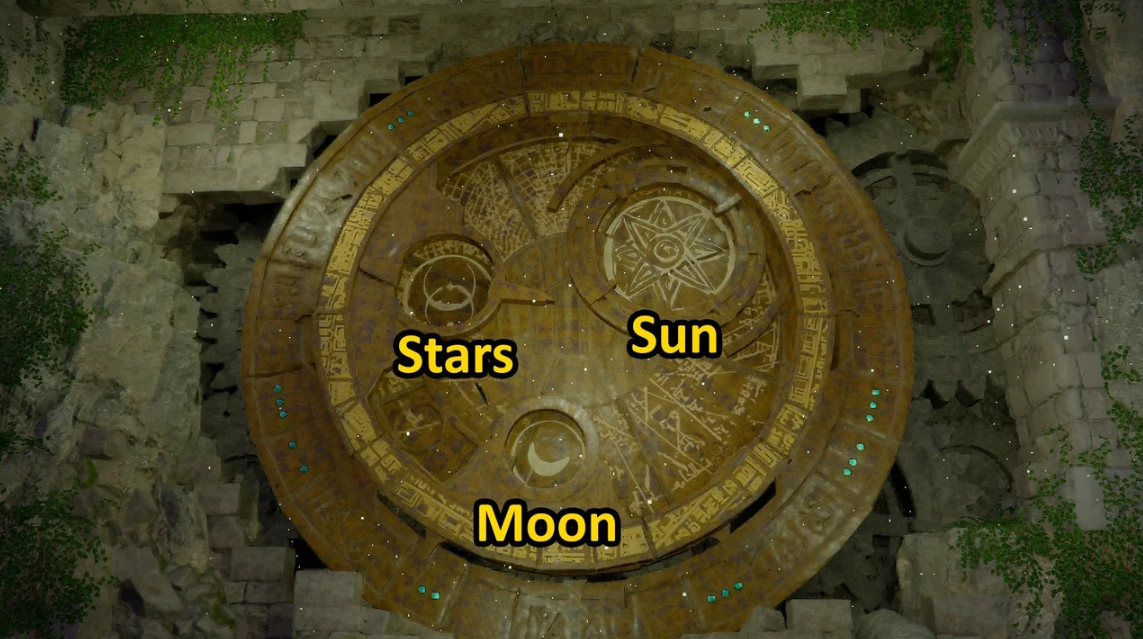
Straight to the solution: rotate the disks so the images match the symbols shown by the ghosts in the memory. For the left disk—the moon, for the central disk—the sun, for the right—the star. Once the combination is complete, the cache containing the reward will open.
Since the final combination has been completed, but the door is still stuck, let’s move on to the debriefing.
Puzzle Bugs in Crimson Desert and How to Fix Them
The puzzle with the disks in the dragon’s stone room is perhaps the most buggy area of Crimson Desert at launch. Pearl Abyss has already released patch 1.03 with fixes for quest triggers, but some of the issues have persisted into the latest build. We’ll explore the most common issues and how to fix them—without reverting saves or making hasty decisions.
The disks aren’t rotating: causes and a quick fix
The rotation is tied to Cliff’s animation. If you constantly press the interaction button, the game simply doesn’t have time to register the final position of the symbol. Step back 3-4 steps, wait for the interaction icon to fade, and then approach again. This glitch is more common on a gamepad than on a keyboard and mouse—especially on the DualSense; the controller’s polling rate is to blame.
The second cause is stuck input after gliding on the Wing. Rolling or jumping before approaching the disk resets the condition. This almost always helps.
The ruins door doesn’t open with the correct combination
The most annoying thing is that the moon, sun, and star are perfectly aligned, but there’s no cutscene. Check three points:
-
Vision (horned helmet) must be activated at least once per session—the memory trigger is hardcoded into the quest flag;
-
The disks must be exactly centered on the symbol, not “almost there.” The camera in Crimson Desert distorts perspective slightly, so step back and look at the disk directly;
-
If you stumbled into the room before finding the frescoes on Anvill Hill, the quest variable might not have been set. Go outside, quickly teleport to any point, and return—flags are recalculated when the location loads.
The wall in the dragon room doesn’t push: how to fix it
It only pushes when you hold down the action button, not by tapping. Another caveat: Cliff must be standing strictly perpendicular to the surface. If he stands at an angle, the push animation plays, but the collision doesn’t trigger, and the wall stays in place. Turn around with LMB + W; side strafe doesn’t work here.
Puzzle Game Bug and Quick Fixes Table
Resetting Puzzle Progress via the Debug Menu
Open the debug menu: Settings → “Problem Report” → “Reset Local Quest State.” This isn’t a Skyrim-style console command, but an official feature that Pearl Abyss added in patch 1.02—precisely in response to the flood of complaints about the puzzle with the discs. The main plot remains intact; only the flags for the current puzzle are overwritten. After resetting, exit to the main menu, load the autosave—the room is accessible again, the discs return to their original position, and you’ll be back to solving the puzzle from scratch.
Clues to the Cliff Puzzle: How to Find It Yourself
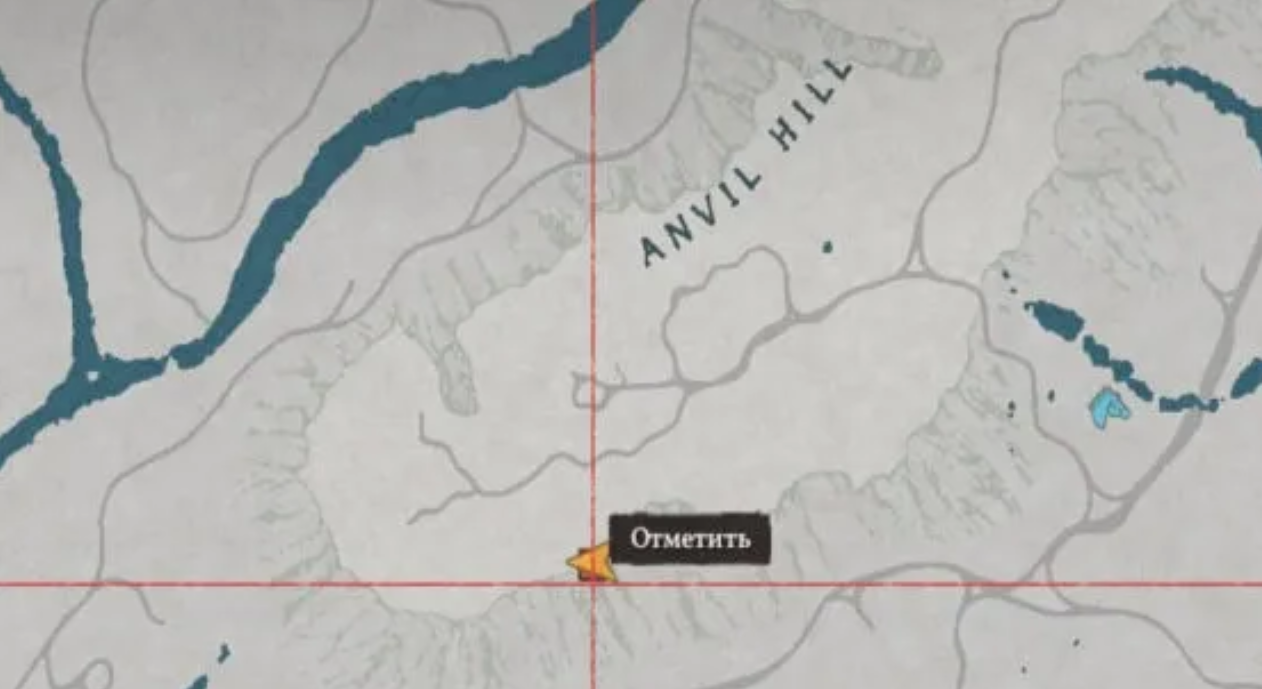
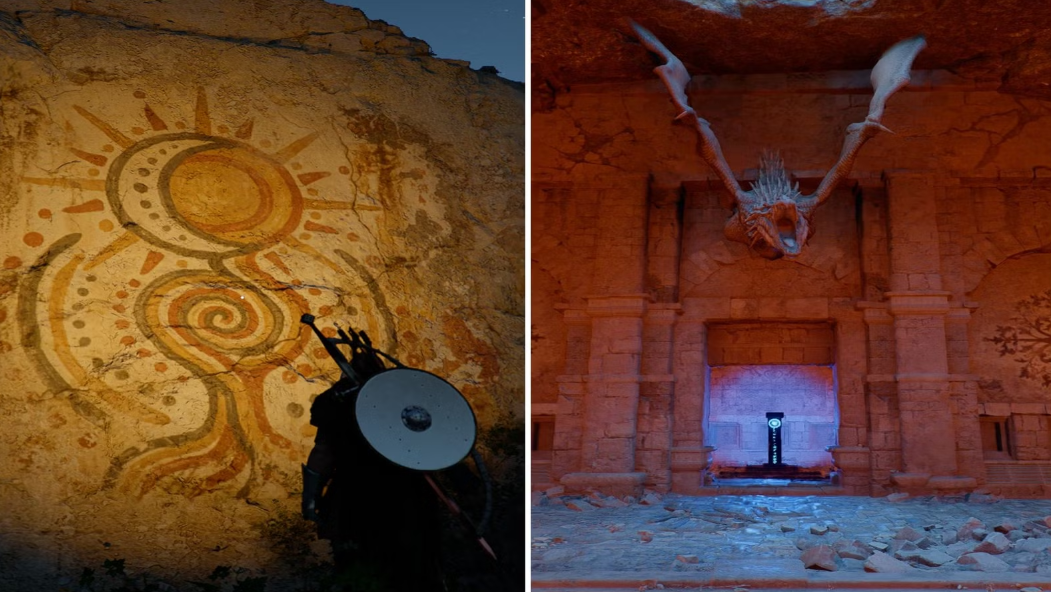
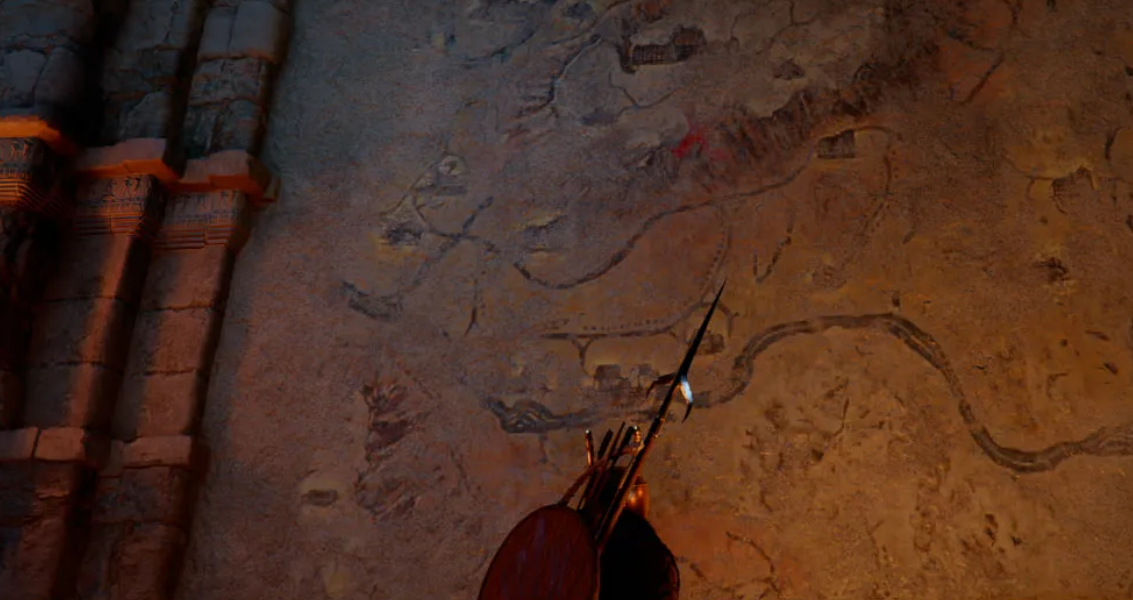
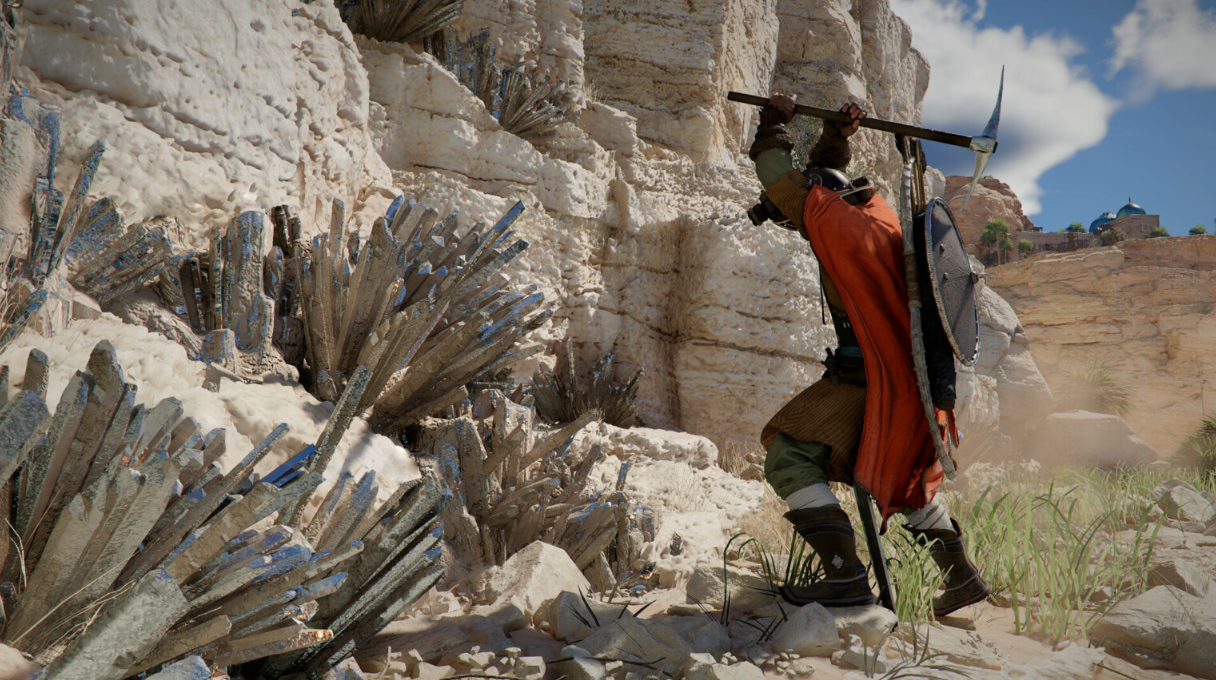
For those who don’t rely on guides for answers, the developers have created a whole quest for orientation. The clues aren’t hidden in the room itself—they’re painted outside, and in a place you wouldn’t accidentally stumble upon. Take a look at the wall to the right of the entrance to the dragon’s stone chamber. There’s a large fresco there with Hernand’s map and three red crosses. These are markers. They all point to the same location: Anvil Hill (marked as Anvill Hill on the global map). It’s located east of Hernand’s castle.
You won’t have to climb to the top. The images you need are carved directly into the sheer cliffs on the southern side of the hill. Find the first fresco, and then simply move along the rock wall to the east. The other two will appear quickly.
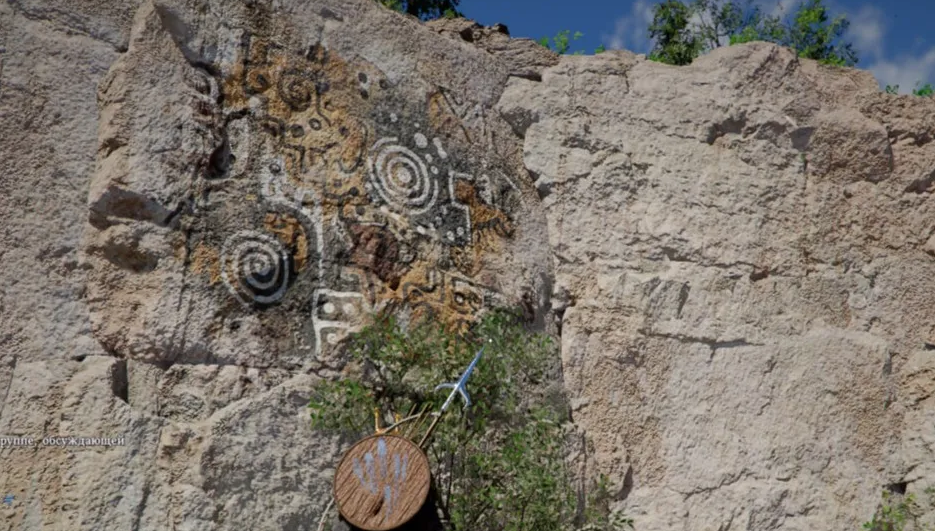
Each of the three frescoes depicts the only correct position of one of the disks. Remember (or take screenshots) – they’ll come in handy when you return to the hall.
Fine-tuning the disks: moon, sun, star
Return to the dragon’s stone chamber. Now, the key is accuracy. The mechanism only activates when the patterns perfectly match those you saw on the rocks (or the clues from your vision memory, whichever is more convenient).
Fortunately, the discs rotate in small increments—you can adjust their position literally pixel by pixel. Align the left image with the moon, the center one with the sun, and the right one with the star. Once all three are aligned correctly, the game will show a short cutscene: the door will open.
All that remains is to collect the artifact. The quest is complete.