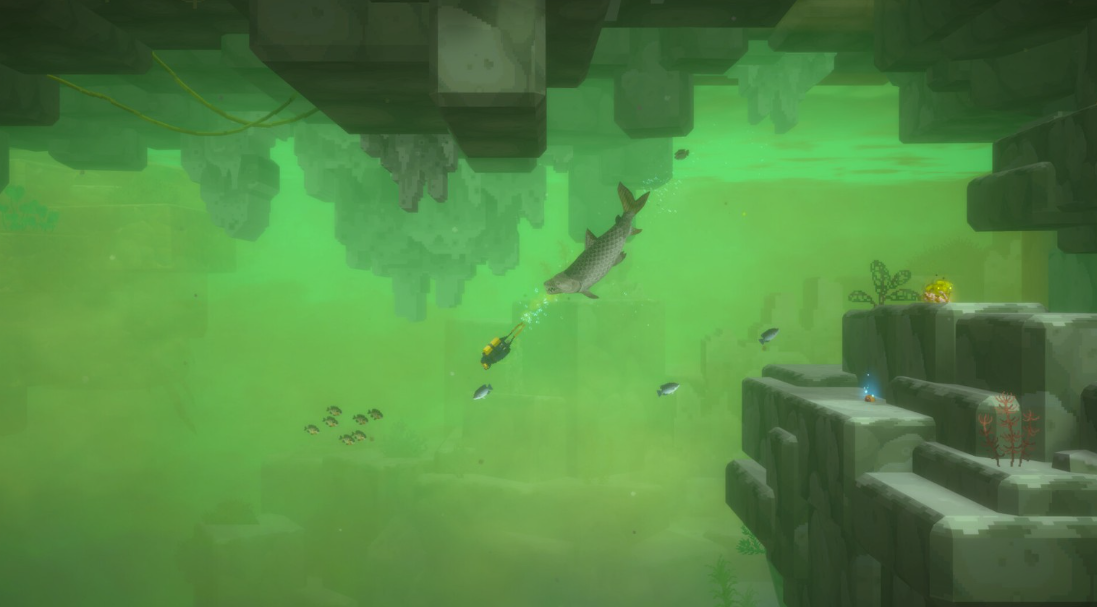
Crimson Desert is vast and multifaceted. There are hundreds of items: armor, blades, consumables, all sorts of key items that are easy to miss if you don’t rummage around. Some of them are pure junk, but Kuku’s bags are a different story. They’re a real game-changer.
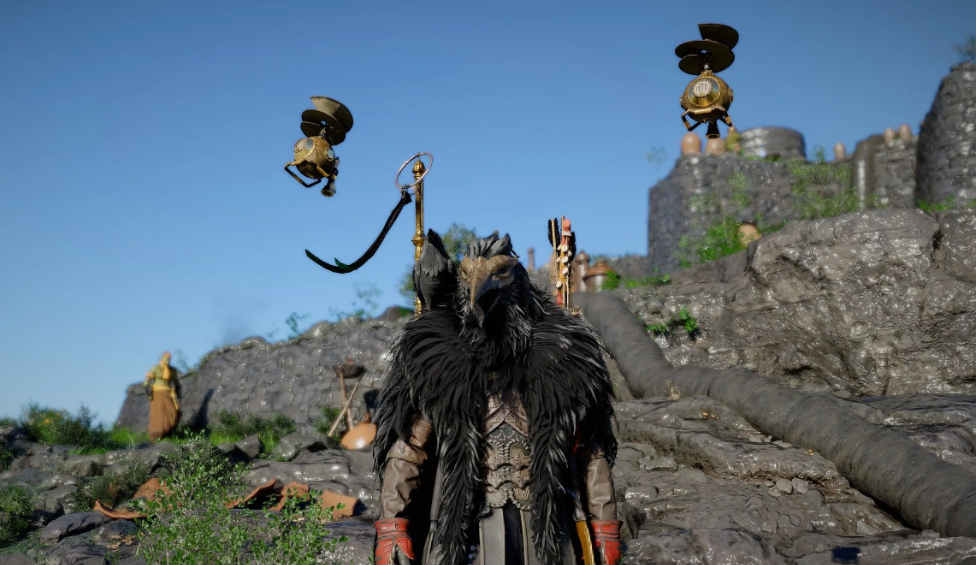
One of the most valuable is the Yellowbeak Observation Backpack. This thing summons two drones that hover over the battlefield with the “Invulnerability” effect, constantly burning enemies. It’s ideal for crowds, and also works great on stunned bosses. Vpesports personally believes this backpack is a must-have. Now, how to get it and build a personal army.
Table of Contents
How do you unlock the Witch of Wisdom quest and find the first blueprint?
Spoiler: you won’t get it for free. First, you’ll have to craft a regular Yellowbeak Observation Backpack.
How do you unlock it? Find the “Witch of Wisdom” quest, then clear the Sanctuary of Repentance. It’s located on the map southeast of the main city of Ernand and northwest of the Willow River.
The mechanics are standard for shrines: kill cultists until the meter is depleted. Then, grab the reactor core and put it in the machine. The device activates, triggering a cutscene with the Witch, who gives you the blueprint for the Yellowbeak Bag.

Take this blueprint to the Kilnden Workshop (west of Ernand). Find a guy named Grimnir there, and he’ll craft you the bag.
Where can I activate the Witch of Kindness quest in Pailun?
Do you have the bag in your inventory? Great. Now let’s head to Pailun, the northern region. There, you need to unlock the “Witch of Kindness” quest.
Head southeast of the Wandering Woods, into the mountains. There’s a small tent there, and inside is a freezing woman.
Nearby is a brazier. Light a fire. She’ll come over, warm up, and give a speech about saving lives. And—surprise!—this lady is the Witch. She’ll invite you over. A marker will appear on the map, directly north of your current position.

Arrive at her home, speak with Pari, and listen to her request. It looks like the “Witch of Kindness” faction quest is unlocked.
What does this mean? Cultists are starting to raid all the shrines in Pailun. And this is a direct path to the final goal—the Yellowbill Observation Backpack blueprint. From there, it’s a matter of technique.
Walkthrough of the Sanctuary of Atonement and zone clearing
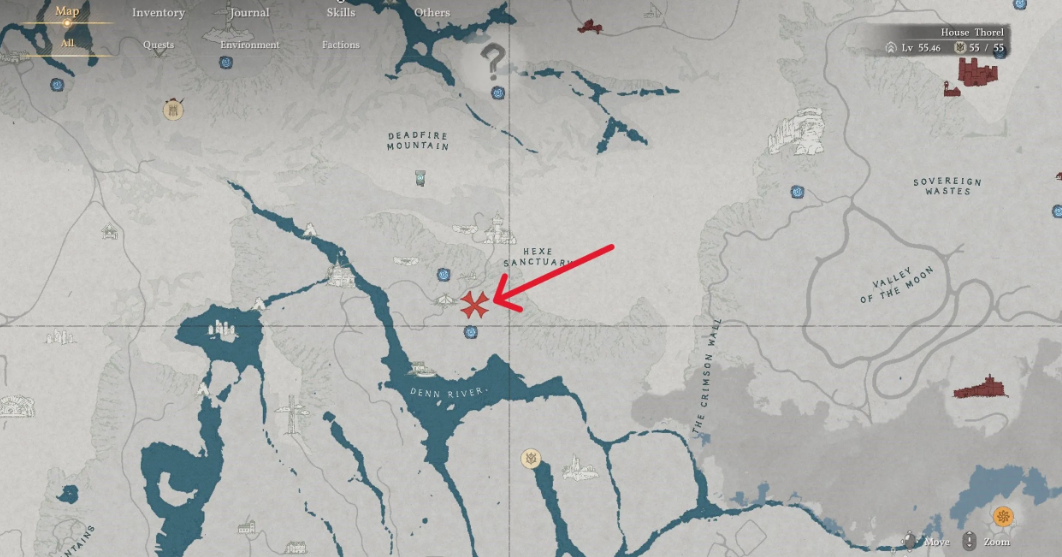
So, you’ve completed the quest from Pari. Now the path leads to the Sanctuary of Atonement. It’s on the map west of the Hunated Hills and slightly north of the “A” in Hernand. The landmark is simple.
We’ve arrived. The objective is standard: mow down all the cultists in the area until the meter in the upper left corner is reset. No hidden bosses—a pleasant surprise. The only ones who can annoy you are the flying mages. But they can be taken down with a couple of arrows, so no problem.
Where can I find the Reactor Core and the missing Pillar piece?
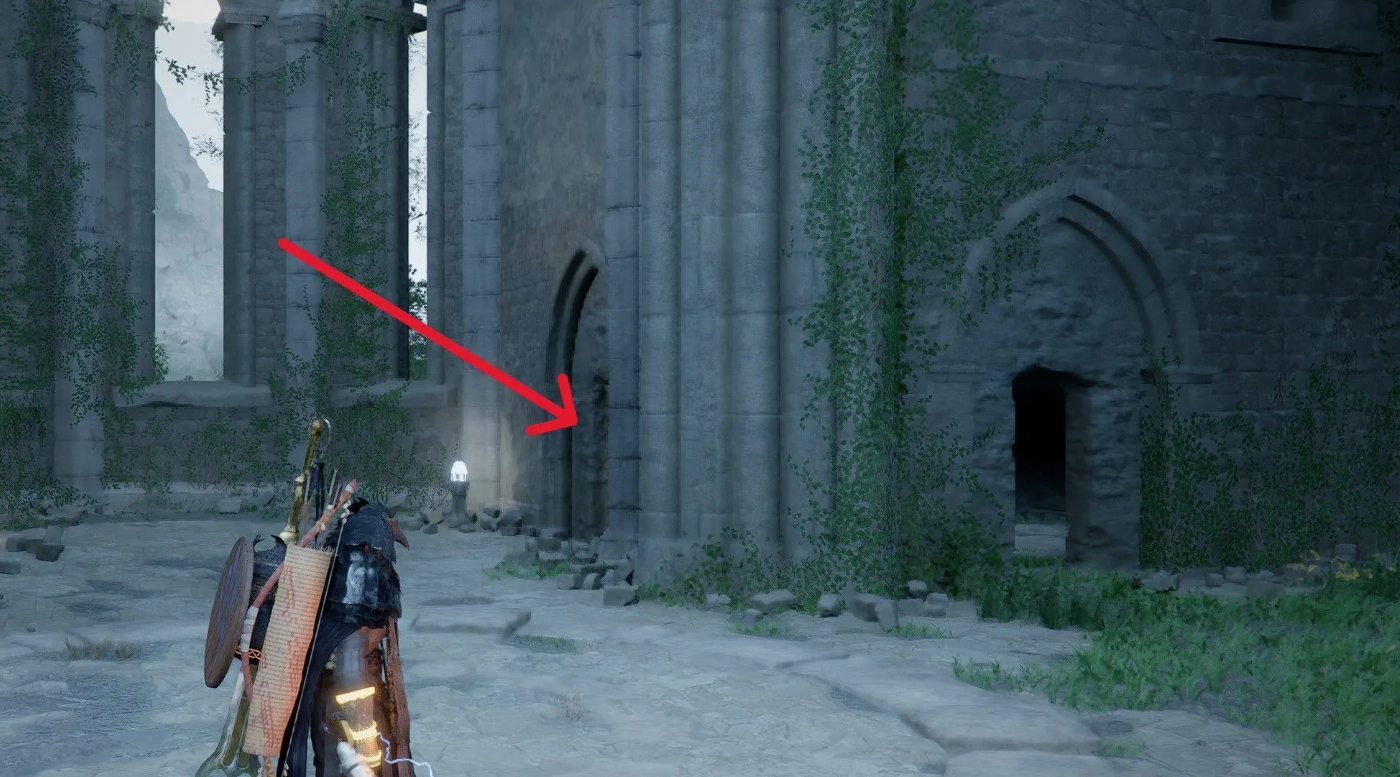
After clearing them, we’ll look for two items: the Reactor Core and the missing Pillar piece. Head to the northern end of the sanctuary. There’s a side room with two small doors inside the main hall.
Go through the first door and look up. The Pillar piece is floating near the ceiling. We’ve got it.
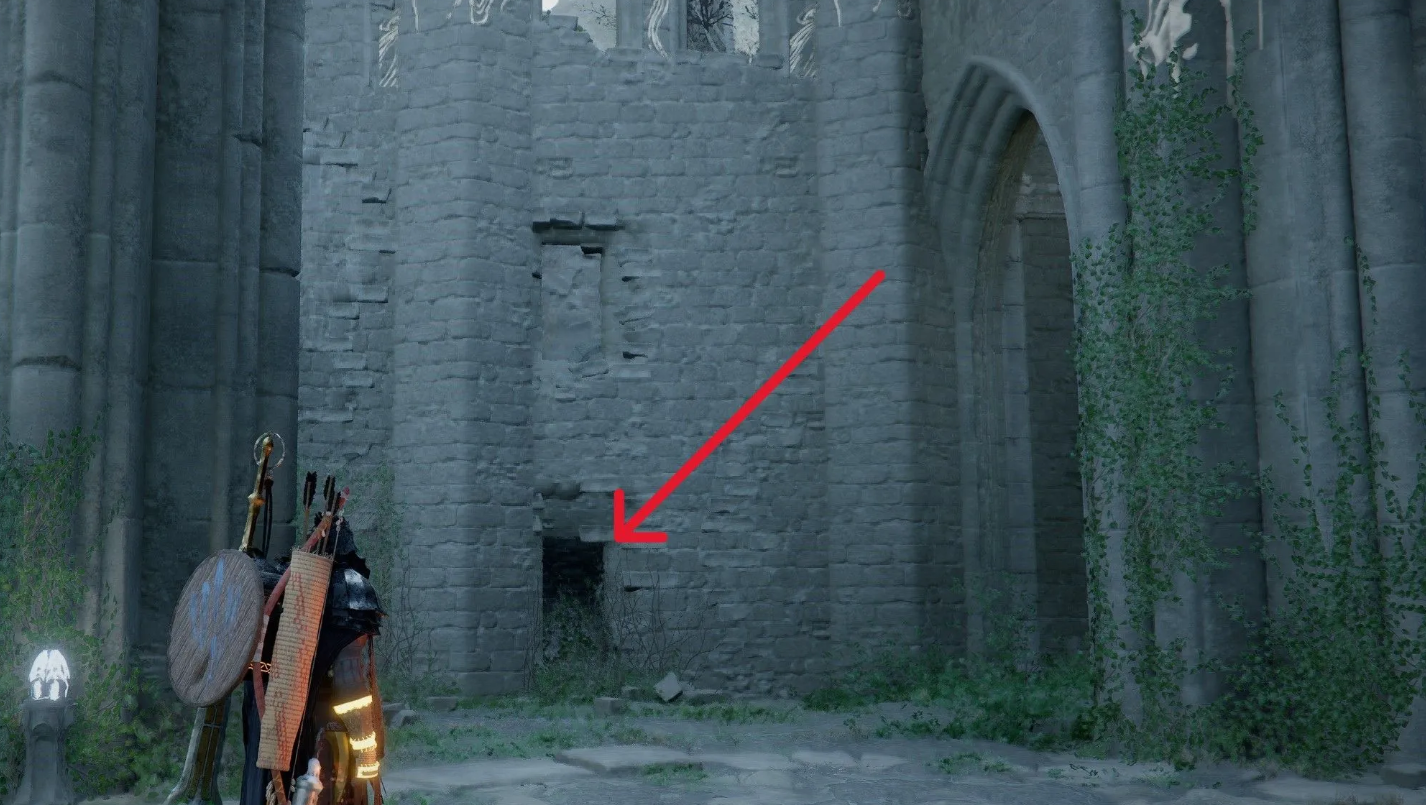
We exit and cross the main hall to another rectangular door—directly opposite the first. This one is slightly camouflaged by plants. Inside is a floating Reactor Core.
We drag both parts to the machine and insert them. The Sanctuary is cleared. Cutscene: Pari thanks us and hands over the coveted Yellowbill Observation Backpack blueprint.
How do I open the secret chest in the Iron Spear room?
Before leaving, there’s an important point. To the right of the Iron Spear room are two torches. Light both. The grate will lower, revealing a chest. Inside is a Refined Palmer Pill and a Knight’s Shield Mirror. A nice bonus, you’ll agree.
Where can I farm resources and crafting materials for the backpack?
You’ll need a fair amount of materials. Let’s start with the simplest.
Where can I find Abyssal Cores and how do I break the Bismuth Wall?
These are the huge spherical cores that shatter with Palmara Strike: Focus. There are quite a few of them scattered throughout the region.
Specific location: north of the Denn River, northern Demeniss. Head to Hollow Harbor, then slightly southeast. Look for a rocky outcrop with a wall of bismuth ore. Approach the wall, cast Palmara Strike: Focus, and three cores will fly straight through the wall. The wall will collapse, and you can collect the loot. Don’t forget to seal them in Yellowbeak’s Iron Cauldron.
Quickly farming clockwork insects with Yellowbeak’s Bag
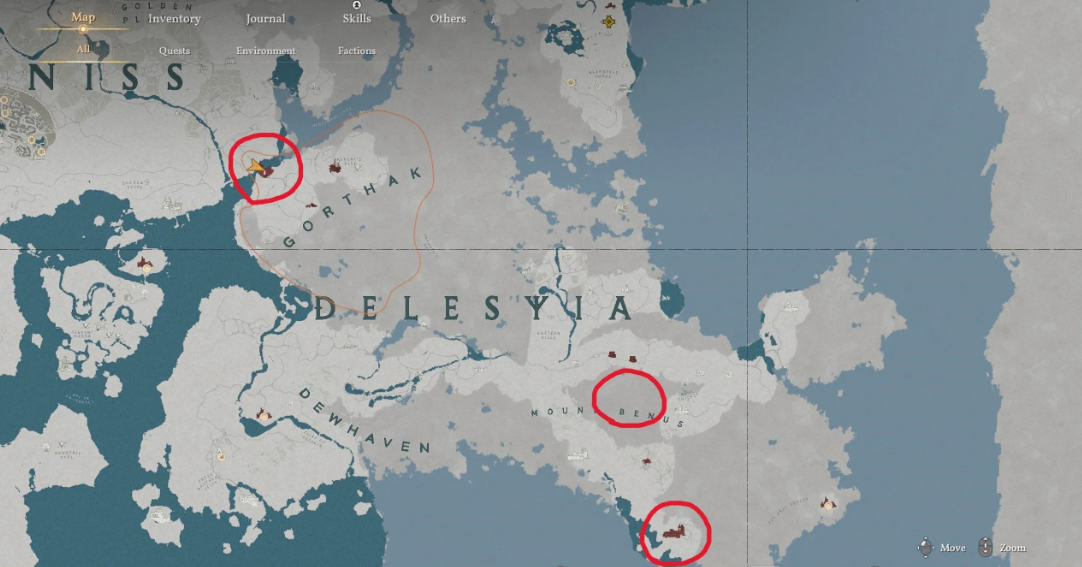
The next item on our checklist is 300 clockwork insects. Sounds like a quest for a couple of evenings? Not really. The Yellowbeak’s Bag, which you should have crafted earlier, is the key. Take it and head southeast to the Delesia region. There, huge swarms of clockwork dragonflies and ants swarm across the entire area.
Where exactly should you look? We’ve circled several spots in the screenshot above, but there’s one hidden gem. If you haven’t yet reached Chapter 10 of the main storyline, head to the Gates of Peace in northeast Delessia. It’s a never-ending battle: soldiers are fighting a swarm of dragonflies right on the bridge. Run up, equip the Yellowbeak Bag, and suck up everything in sight with a simultaneous press of both triggers. Dozens of insects in seconds. The swarms respawn instantly. The count of collected bugs appears in the upper right corner of the screen when the bag is active—conveniently, it eliminates any guesswork.
How do I get Electrical Components from Ancient Golems?
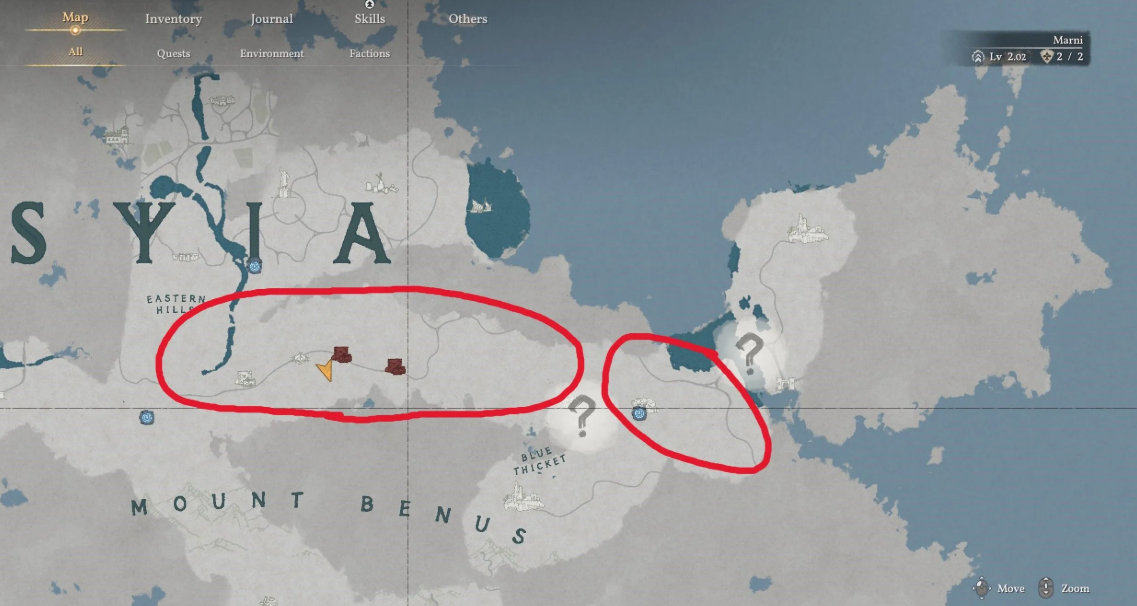
Next on the list are Electrical Components. Head north of Mount Benus along the main road leading to the Blue Forest. Along this road, you’ll encounter mechanical golems armed with drills and circular saws. These enemies are tough—they hit hard, so don’t neglect explosive arrows and your strongest moves. A spinning kick, for example, works great.
Each of these golems has a chance of dropping an Electrical Component—a large part resembling a sparking engine. Pick it up with the Power of Axiom, select “Seal,” and the part is sent to Yellowbeak’s Iron Cauldron. There are no other ways to obtain these components. Kill the golems until you’ve sealed three of them. That’s how many you need for the backpack.
Where can I find Small Batteries in Delesia?
The final material is 200 Small Batteries. Delecia again, there are no other options. Batteries drop from small robots and golems. The best farming spots are near Marni’s Machine Shops and Marni’s Workshop (circled on the map).
If you haven’t fully cleared these areas yet, patrol robots spawn there endlessly. Just stand on the road near the fortifications and mow them down as they appear. The drop rate is high, and you can collect them manually or with a pet.
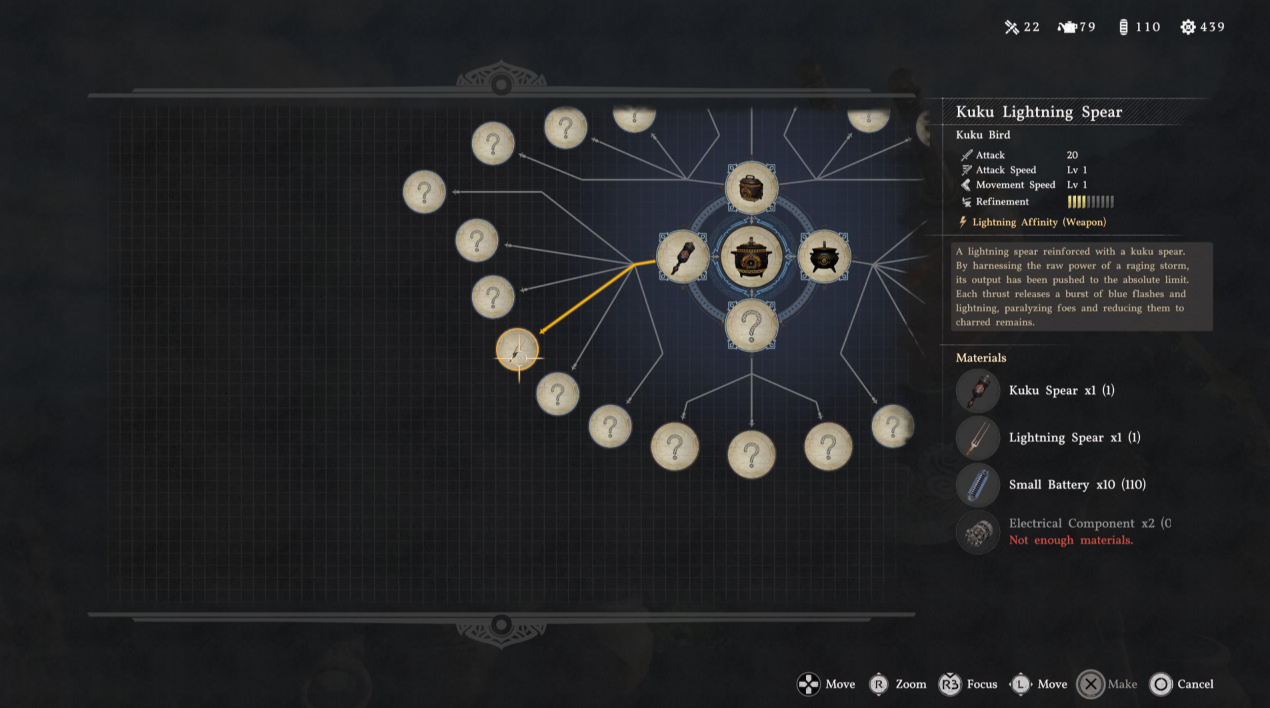
But be prepared for 200 batteries to take more than five minutes. Unlike insects and components, these will require some tinkering. The best tactic is to passively collect them while liberating locations or completing faction quests in the region. When everything is ready, return to Kilnden Workshop, speak with Grimnir, open the “Craft” menu, and select “Yellowbeak Observation Backpack.” That’s it—now you can equip it and summon drone assistants in any fight.
The Best Builds for the Yellowbeak Backpack and Overwatch Control
The Yellowbeak Backpack radically changes the combat system, turning flying drones into the ultimate stagger lock. The main feature of this gear lies in the constant pressure on the enemy’s stun meter. While you frantically regenerate stamina or dodge attacks, the Overwatch drones bombard the target relentlessly. Bosses are stunned much more often. Windows for safe damage open up earlier. It all depends on the weapon you’re wielding.
By the way, no one is stopping you from spamming the summon—the L2+R2 combination works without any cooldown. Call them back, regroup, and deploy them again. The drones will instantly lock on a new target, saving you from having to wait for timers to run out at the most frustrating moment of the fight.
What weapon should I choose for interacting with support drones?
Dual wielding (two one-handed swords) guarantees virtually infinite stagger lock. The speed is insane. Lightning-fast combo chains build up the stun meter with every hit. When combined with air support, the synergy is incredible: the elite is knocked out before even completing its first attack cycle. This is especially effective against flying creatures. Observers take out targets in the clouds while you’re stomping on the ground. It’s pure joy.
For lazy resource grinding and questing, any weapon will do. Running around open areas of Delessia or completing Pailun quest chains? Drones will mow down small mobs in the background. You won’t even notice. They’re great at drawing aggro. As a result, your character takes less damage and easily avoids frequent visits to fire pits. If you farm batteries and clockwork insects simultaneously, the savings on healing items will be quite significant. Pure profit.
A two-handed sword is your main trump card against powerful bosses. Its wide swing and colossal damage per hit instantly boost your stagger potential, which stacks with drone shots. The standard rotation of a spinning attack allows Observers to instantly finish off the remnants of an enemy’s meter-stagger during pauses. The enemy simply won’t break out of their stun under your onslaught. I’ve personally verified this. For example, those very same mechanical golems from the route near Mount Benus literally break in three cycles.
Yellowbeak Backpack Weapon Efficiency Comparison Chart
Which Bosses Block Passive Stun from Drones?
There is one detail, however, that most guides tactfully gloss over. Exactly four bosses in the game, at the level of their AI, completely block any passive stagger build from flying minions. In fact. If you suddenly notice that the stun meter is frozen in place during the Observer cast, that means you’ve encountered just such an enemy. Don’t waste precious time waiting for the stagger window to open. Switch immediately to the classic aggressive style and break the cockpit manually.