Neverness to Everness (NTE) only appears at first glance to be just another gacha with a pretty picture. In reality, its combat system is a more complex puzzle than it might seem. While the damage fundamentals will be familiar to Genshin Impact fans, the developers have mixed in esotericism and anomalies. Let’s break it down.
Unlike the elements we’re accustomed to, Neverness to Everness revolves around Esper types. Each character is assigned to one, and almost all of their attacks deal damage of that specific type (there will be rare exceptions later). The list looks like this:
-
Cosmos — Zero, Hotori, Cheese
-
Anima — Mint, Nunnally, Juyuan
-
Incantation — Addler, Baican, Sakiri
-
Chaos — Daffodil, Lacrimosa
-
Psyche — Aurelia, Fadia, Hanniel
-
Lakshana — Hathor, Skia
Pumping up Juyuan? Then you primarily need Anima’s damage stats plus pure ATK. Build Arcs, Consoles, and Modules with this in mind.
Table of Contents
ATK and Bonus Damage in NTE: What’s More Important for a Build
Your character’s attack is the base. The higher the number, the harder you hit (with rare exceptions, of course). But there’s a catch: in addition to ATK, universal damage and multipliers depending on the Esper type come into play. Ideally, you should get both.
The damage stats from console modules are added to the overall bonus multiplier—I can’t say exactly how they factor into the final NTE formula yet (the developers haven’t shared any secrets), but no one has turned down the extra damage. Especially if it’s counted as a separate multiplier.
A notable exception is Fadia. Her ultimate deals Psychic damage, not Psyche. So far, she’s the only character who directly uses a secondary type outside of her Esper.
Briefly about the types: everything is tied to Espers, ATK is the foundation, and damage multipliers are your insurance. Build your squad wisely.
All Esper reactions in Neverness to Everness and their effects
When you press a utility skill, a reaction can be triggered between two characters, provided their Esper types are adjacent on the wheel. The effects are completely different.
Here’s what happens:
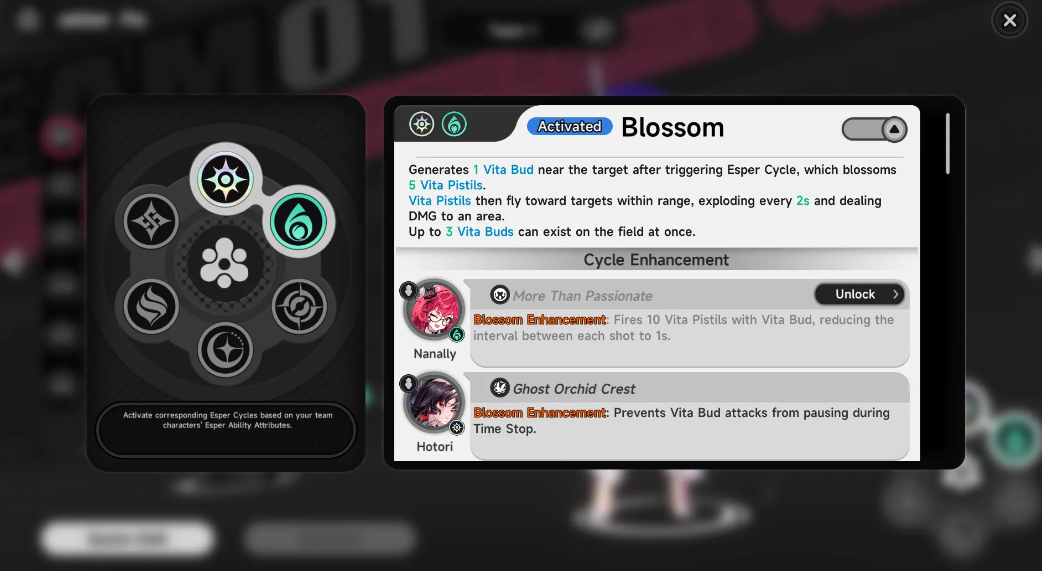
-
Blossom (Anima + Cosmos) — Spawns a Vita Bud. It fires projectiles at enemies.
-
Remora (Cosmos + Lakshana) — Slows the target’s attack and movement speed.
-
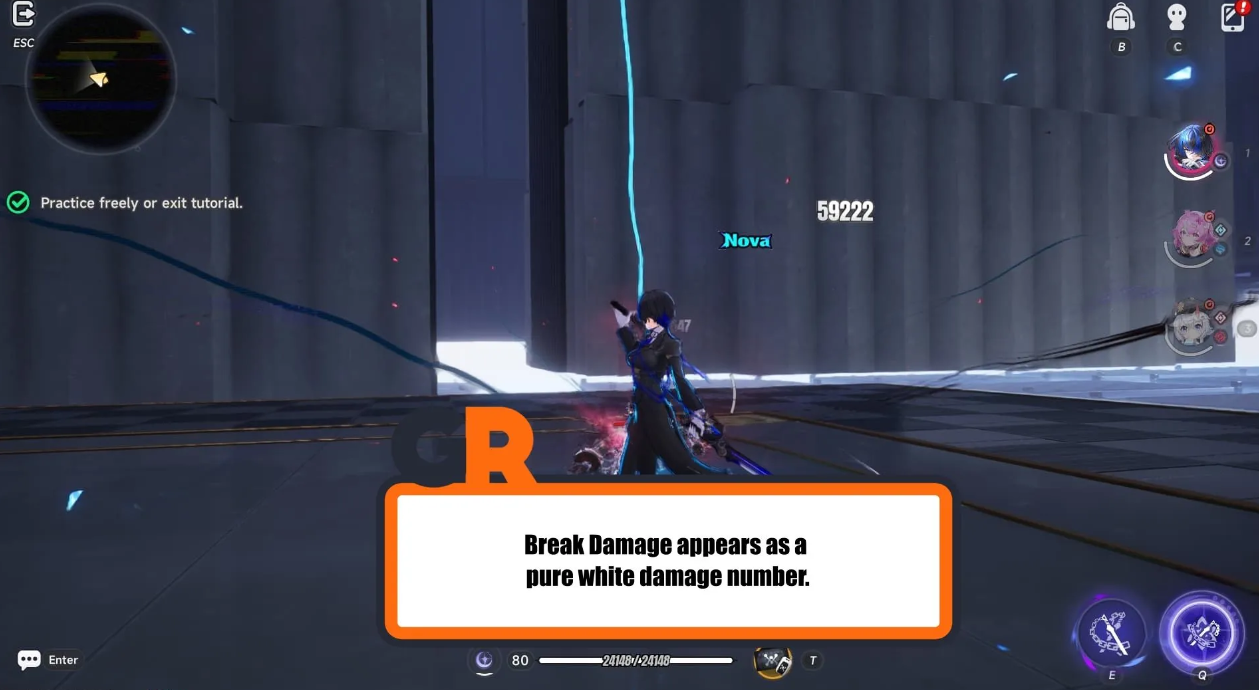
Nova (Chaos + Psyche) — Places an effect on the target that explodes with Psychic damage after its duration.
-
Scorch (Chaos + Spell) — Enemies burn, taking damage over time.
-
Curse (Spell + Anima) — The target takes additional “catch-up” damage from attacks of these types.
-
Dye (Psyche + Lakshana) — Enemies take increased damage from Psyche and Lakshana.
-
Charge (Cosmos + Lakshana + Anima) — When Blossom projectiles hit, the active character gains Ultimate energy.
-
Discord (Psyche + Chaos + Spell) — Applying Nova and Burn simultaneously significantly reduces the target’s interruption scale.
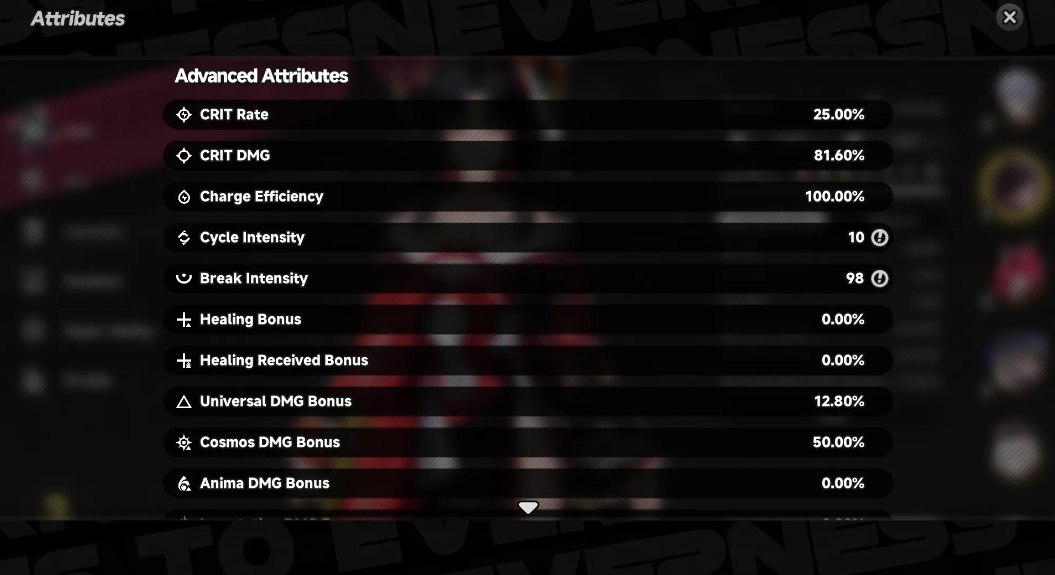
Cycle Intensity: What Determines Reaction Damage in NTE
This is where the “Cycle Intensity” stat comes into play. The game takes the highest value among all reaction players. The trick is to build supports purely for intensity, and the main damage dealer for normal attacks and crits. This yields a decent amount of damage.

But not everything is so smooth. We tried testing the damage of “Bloom” on the Serenetti boss. I took three characters:
-
Esper Zero (1087 ATK, 7 Intensity)
-
Hotori (1224 ATK, 10 Intensity)
-
Juyuan (1019 ATK, 83 Intensity)
According to the training logic, damage should be calculated based on the maximum intensity—that is, Juyuan. But the projectiles summoned by Esper Zero dealt 875 damage, while those activated by Hotori dealt 880. The difference is negligible, but it’s there. Then I replaced Juyuan with Nunnally (28 intensity)—the numbers remained the same.
Strange, right? It’s not yet clear whether this is an exception or if the formula is more complex. We’ll update the guide when we figure it out.
Attachment Mechanics in NTE: Hidden Damage from Debuffs
“Attachment Damage” in Neverness to Everness is a mechanic that most new players overlook. And that’s a shame. Understanding how these hidden damage ticks work can help you squeeze 30-40% more out of your combos. We’ll explain which characters inflict debuffs and how to properly enhance them.
Which characters inflict Attachments in NTE?
NTE has a special category of debuffs called “Attachments.” They’re not very obvious, and function similarly to effects like “burning” or “poisoning” from other games, but with a few twists. Some characters apply effects to enemies that tick periodically, without requiring you to attack again.
Here are two notable examples:
-
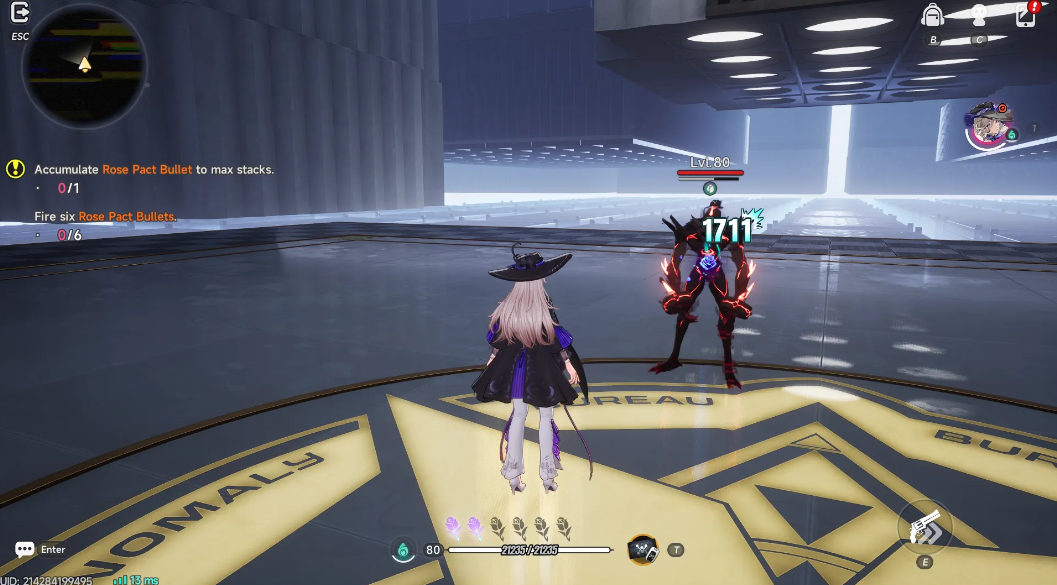
Juyuan and her “Rose Death Pact” – a tiny rose symbol appears on the target. While it’s active, the enemy steadily loses health in small chunks.
-
Skia and “Fang Lunge” – two yellow rings form at the enemy’s feet. During this time, the target takes additional ticks of damage.
The problem is that these debuffs are easy to miss. They don’t have giant numbers, and their visual appearance varies greatly from character to character. But they form the basis for the “Attachment Damage” mechanic.
Attachment Damage: How to Scale and Strengthen Debuffs
“Attachment Damage” is a stat that directly increases each tick of the effects listed above. If you don’t level it up, debuffs will only deal symbolic damage. If you invest in it, enemies will begin to melt away on their own while you switch to other targets or dodge.
Important: this mechanic works in tandem with other builds. For example, if you’ve assembled a team focused on frequent interrupts, Attachments will be a welcome addition. However, building an entire squad from scratch around them is a questionable idea.
Breakthrough Damage in NTE: When to Build a Squad for Interrupts
Speaking of hidden mechanics, we can’t ignore “Breakthrough Damage”—a stat that activates after you’ve reset a boss’s interrupt meter. The logic here is different:
-
Damage depends on the total “Breakthrough Intensity” of the entire squad. It doesn’t matter who exactly deals the final blow to the meter—the stats of all four characters are combined.
-
It also scales with the target’s maximum health. Therefore, it’s especially beneficial to break through bosses with thick HP bars.
In practice, we wouldn’t recommend pushing every character into “Breakthrough Intensity.” Unless you’re building a team 100% around this archetype, the usual crit, ATK, and damage bonus will provide a much more stable DPS boost.
If you do want to experiment, consider Daffodil. His skills contain several effects that increase Breakthrough Damage while simultaneously making the interrupt easier. This is perhaps the only case where this build makes sense.
Best Damage Type for Beginners in Neverness to Everness
If you’re just getting started in Neverness to Everness and haven’t yet figured out Espers, don’t chase character rarity. In the early hours, something else is more important: stable DPS, a straightforward build, and damage that doesn’t require rare modules or tricky conditions. Simply put, a good starting element should work right away.
Three damage types are most effective early on: Anima, Cosmos, and Incantation. They have a reasonable entry threshold, a quick ramp-up, and minimal stat headaches. This is important. It’s much more beneficial for a beginner to assemble a working deck in an evening than to wait for the perfect artifacts for complex reactions.
Anima: stable damage without complex conditions for a first build
Anima seems like the optimal choice for a first build in Neverness to Everness. It provides consistent and predictable ATK damage, is easily buffed by basic modules, and doesn’t require rare stats like Intensity. Where to start? With the classic ATK and damage bonus combo.
Plus, Anima works well with the Blossom and Curse reactions. It’s not the flashiest option, but it’s very stable. For the early game, this approach often outperforms more “intelligent” builds because it deals damage without the need for unnecessary rotational fuss.
Cosmos: quick DPS boost through Blossom reaction
Cosmos is slightly more complex than Anima, but can feel more powerful in the early game, especially against mob packs. Even at early levels, the element benefits from generating additional damage through Vita Bud. Critical hits aren’t a requirement.
This is why Cosmos through Blossom often feels like the best starting option. Damage scales quickly, requires little investment, and the overall DPS of the pack improves almost automatically. However, a thorough understanding of the mechanics is essential.
Incantation and Scorch — a convenient start without complex rotations
Incantation is worth taking if you want to play with Scorch right away. It’s a solid starting option with damage over time that isn’t as dependent on precise rotation timing. Misplaced the button order? No problem, the effect will still work.
This is especially nice for beginners. The spell doesn’t require perfect execution and is forgiving of minor mistakes, allowing you to explore Neverness to Everness without worrying that every fight will fall apart because of one wrong button press.
Chaos and Psyche at the NTE Start: Why It’s a Trap
Chaos and Psyche actually looks tempting: the effects are interesting, the potential is high, and the reactions promise serious damage. But at the start of the game, it’s more of a trap for beginners. Without the right synergies and understanding of the mechanics, such builds quickly falter.
The main problem is intensity. Early on, it’s almost nonexistent in artifacts, and it’s precisely through this that many reactionary builds scale well. As a result, the player expects explosive damage, but instead gets inconsistent DPS and a feeling of being stuck.
Starting Damage Type Comparison Table in NTE
The bottom line is: for the easiest start in Neverness to Everness, take Anima and build around ATK + damage bonus. If you want to clear groups of enemies faster, Cosmos with Blossom will give you a faster early game. Incantation is suitable for those who want to comfortably play with Scorch and not suffer from complex rotations.
It’s best to leave Chaos and Psyche for later. Once you have proper artifacts, more intensity, and a better understanding of reactions, these areas will blossom much better. At the start, it’s not the theoretical maximum that’s important, but consistent damage here and now.
See also: Daffodil Build Guide