
In Windrose Early Access, there comes a point sooner or later when you start casting a suspicious eye at every suspicious mound of earth. This usually happens after a couple dozen hours of survival—and then the shovel becomes your new obsession. Seriously, you’ll be carrying it everywhere, lest you miss the next cache.
The game won’t give you this tool right away. You’ll have to tinker: chop down wood, find copper, smelt it into ingots, and convince yourself that three solid pieces of metal for an otherwise ordinary-looking shovel are a wise use of resources. Spoiler: it’s worth it.
This information is current for Early Access—mechanics are subject to change.
Table of Contents
How to craft a shovel in Windrose: recipe and resources

The shovel recipe will only unlock after you mine your first copper. But don’t get too excited: one or two ingots aren’t enough. You need exactly three. So, the assumption is that you’ll find a vein, mine some ore, load the smelter, and wait.
Besides copper, you’ll need wood—it’s mined with an axe. An axe, in turn, is crafted from wood and stone on a workbench. Yes, it’s a short progression chain, but it’ll only take about ten minutes.
When everything’s ready: 3 copper ingots + 10 wood on the workbench—and you have a shovel.
Three functions of a shovel in Windrose: digging, combat, terraforming
Did you create one? Great. Now forget the stereotype that a shovel is only for digging. In Windrose, this thing solves three problems at once.
-
First, it’s used to unearth buried treasure. There are hidden caches scattered throughout the world, and without a shovel, you’ll just stand there, perplexed.
-
Second, it’s a melee weapon. Yes, you can swing it like a club. Its damage is average, but it never breaks at the most inopportune moment.
-
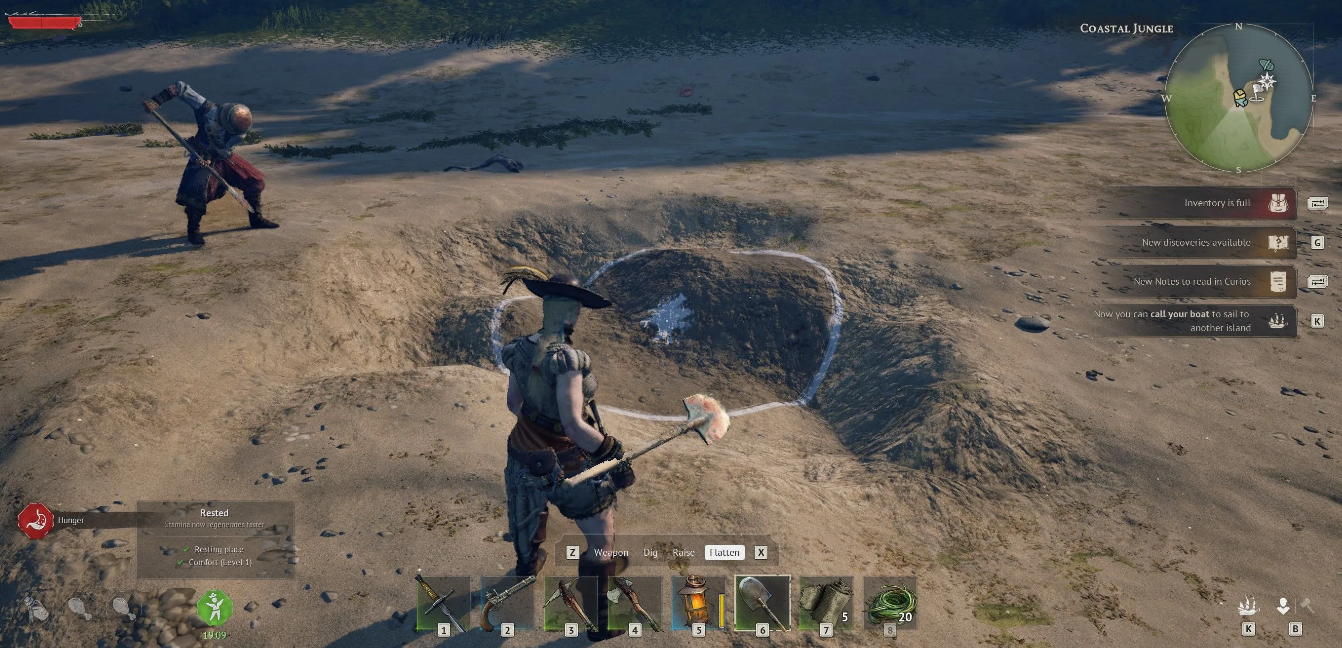
Third, terraforming. A shovel allows you to level uneven ground or, conversely, raise areas of soil. Want a level base? Or an artificial hill for visibility? Grab a shovel.
-
Switch between modes with the Z and X keys (when the shovel is equipped). Try spinning it; you won’t miss.
By the way, a survivalist tip: always keep your shovel in the secondary slot. You’ll be grateful when you stumble upon a buried chest with rare resources.
Dig Raise Flatten Shovel Modes: Controls and Hotkeys
Three modes for one shovel, and you shouldn’t mix them all up. Z cycles through the modes, X confirms the action at the cursor position. LMB is the primary strike trigger, RMB clears the selection if you click the wrong button.
Dig creates a crater under your crosshair, about one block per swing. This mode is used to open buried chests and mine ore veins from hillsides—much more convenient than going around a hill. Raise works in the opposite direction: it pulls the soil upward and, in 4-5 clicks, builds a column of earth the same height as the character. Flatten, however, is more sophisticated. It averages the height of a 3×3 area around the target point and adjusts adjacent tiles to match this height.
Terrain Tools
The algorithm for building a base is simple. Find a gently sloping area near water, turn on Flatten, and cover the entire future site in squares—this creates a level floor on which the workbench and smelter can be placed without the “unstable surface” effect. Next, Raise around the perimeter, creating a rampart the size of your character. At night, this rampart cuts off the attack line for wolves and boars, and in one square of the perimeter, it leaves a passage for the future door.
A few points to consider when saving stamina:
-
Digging from top to bottom is more profitable than from bottom to top: Raise uses approximately 30% more stamina per click than Dig.
-
Flatten is useless on water and rock—clear the area with a pickaxe first.
-
The ground texture under the cursor is highlighted before hitting: a green grid means “allowed,” a red grid means the ground is protected (NPC territory or root biome).
-
After terraforming, tiles become “processed.” Grass won’t grow on them, and resources won’t spawn—keep this in mind when choosing a location for your garden beds.
Placing your base on a slope? The order is: Dig into the back wall of the hill, then Flatten under the floor, and finally Raise onto the front. Reversing the order will force you to redo the foundation twice—this has been proven by those in a hurry.