
The “Minecrawler Armor” side quest in Chapter 4 of the remake is a great way to acquire a durable set of armor that will come in handy in future adventures. The quest is given by Wolf, a local craftsman from the New Camp, but, as is often the case in Gothic, it’s not that simple. Players regularly stumble over three things: where to gather sixteen plates, where Wolf goes after handing in the materials, and why he doesn’t hand over the finished armor right away. Let’s take a look at each of these.
Table of Contents
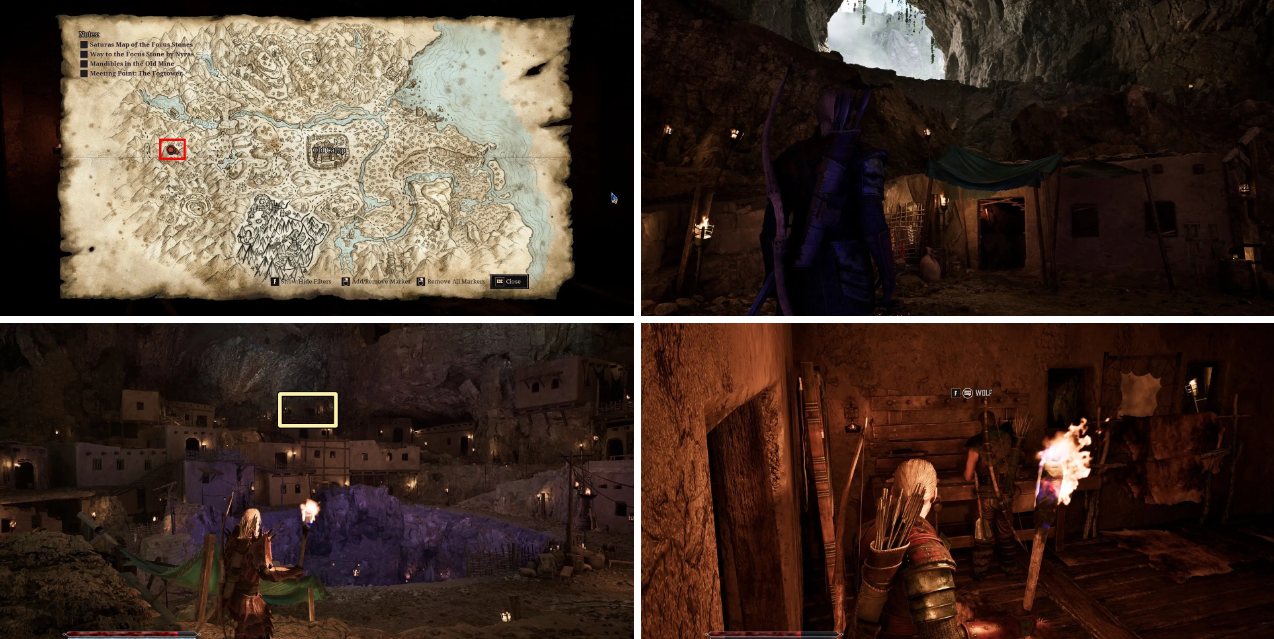
Where to find Wolf and how to start the quest
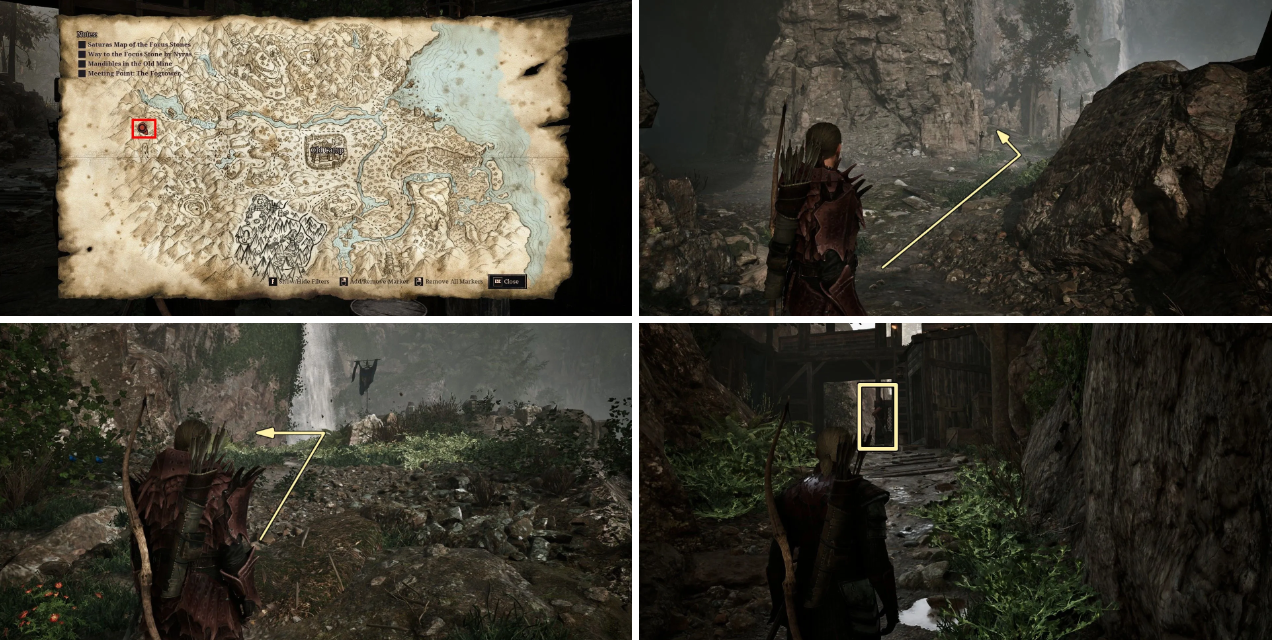
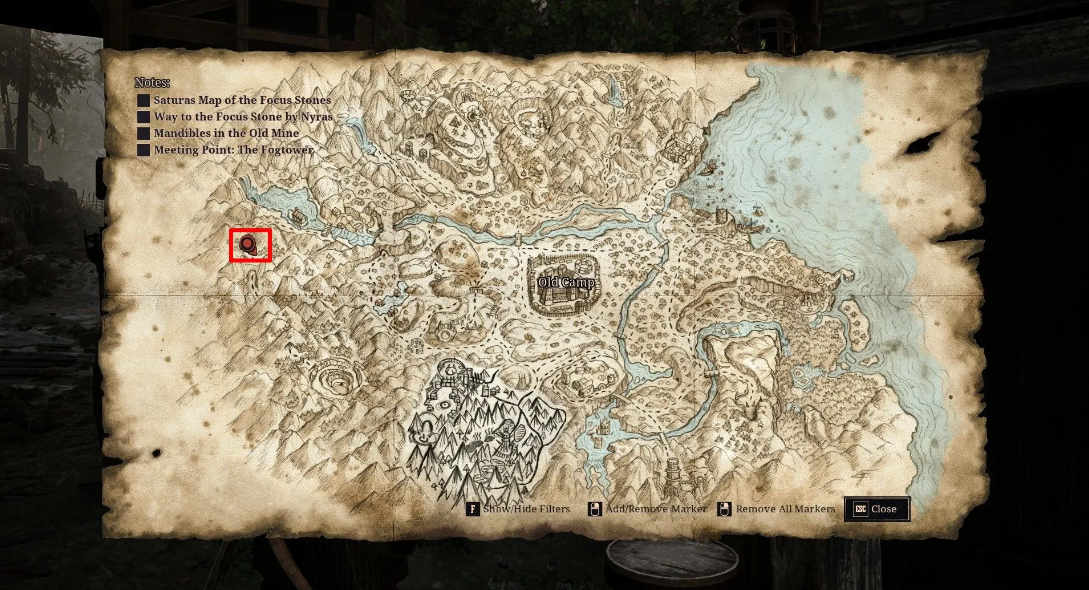
Wolf is standing on the path leading to the Free Mine—it’s roughly in the rear of the New Camp, just past the Dwelling Cave. Walk past the waterfall, turn left, and climb up; the hunter will be waiting right by the road. Talking to him starts the quest and also teaches the “Plate Retrieval” skill—without it, you won’t be able to loot the necessary fragments from defeated enemies.
Incidentally, the quest becomes available before Chapter 4, but you can only complete it after completing the main plot point, “Banner of Banners.” So, if you haven’t yet reached the Free Mine via the main questline, you can safely postpone your crawler hunt until a better time. Wolf will accept plates before then, but he’ll only give you the armor after completing “Banner.”
Requirements for Receiving the Completed Armor
Here lies the main catch: even after collecting all sixteen plates and handing them over to the blacksmith, you won’t receive the armor right away. The blacksmith will tell you that you need to wait, but the timer is actually tied to the completion of the “Banner of Banners” quest. Once you complete this stage, return to Wolf—he’ll hand you the long-awaited armor. Until then, you can safely do other things: the crawlers won’t run away, and the plates can be stored in your inventory.
Where can I find crawlers in the Free Mine
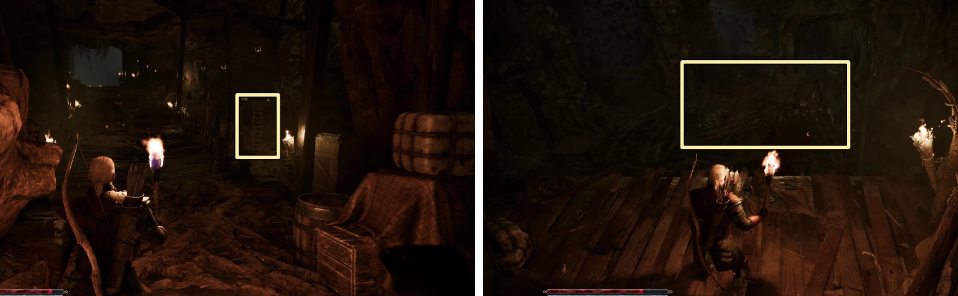
You’ll need exactly 16 plates for the order. Each warrior provides two, meaning you’ll need to destroy eight creatures. They live exclusively in the depths of the Free Mine, and not in the first corridor, but on the lower levels. To reach the first group, descend into the mine all the way to the bottom until you encounter Jackal and his guards. Deal with them, approach the metal grate, enter the room on the left, and turn the wheel to open the passage.
Continue along the main tunnel until you reach a large chamber filled with guards. After clearing out the human resistance, find the stairs leading down—it’s hidden in this same chamber. Once you’ve descended, you’ll find yourself at a pit where three Mine Crawler Warriors have already taken up residence. Kill them and use the “Plate Retrieval” skill to obtain six plates—a third of the required amount. You’ll have to search deeper for the remaining five warriors, but more on that in Part Two of our guide.
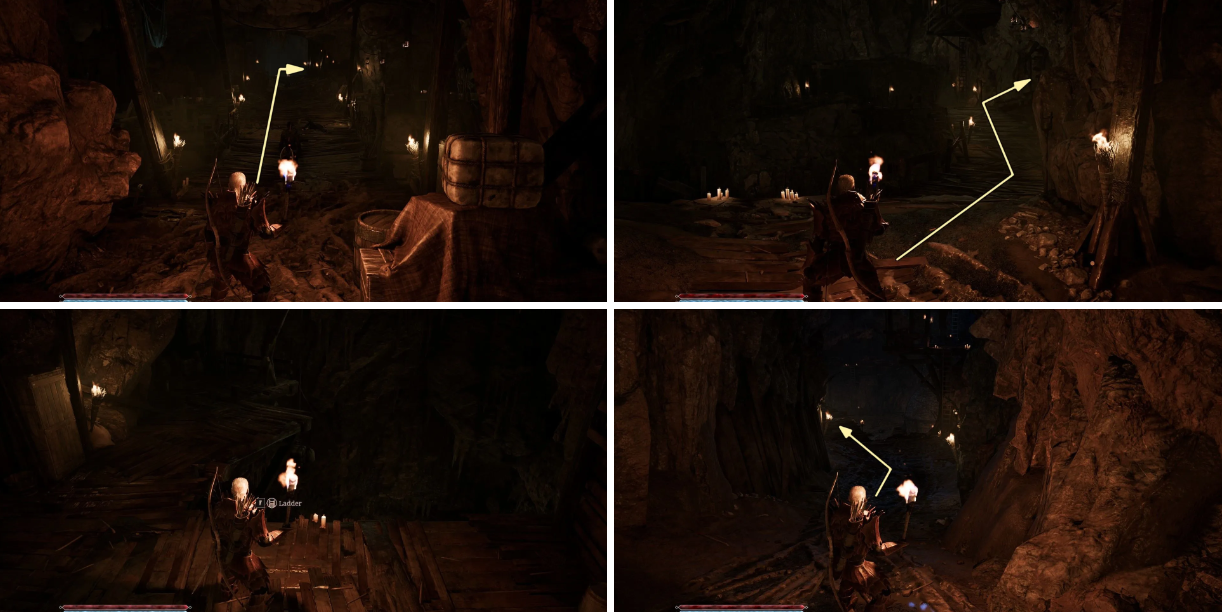
Once you’ve dealt with the first group and collected the six plates, don’t rush to leave the mine. There are five more warriors ahead, and they’re hiding deeper. Return to the same chamber where you descended the stairs and look for a path leading up and to the right. It will lead you to another staircase—descend it and you’ll find yourself in a spacious room with a large forge. Incidentally, the smell of resin and iron permeates here—the Gothic atmosphere is at its finest.
Where is the second group of monsters hiding
From the entrance to the forge, follow the wooden walkway up and to the left. Follow this path until you reach a small pond. Three more Minecrawler warriors are entrenched around the water. Deal with them, use the “Plate Retrieval” skill, and you’ll find six more fragments. That’s twelve in total, four left.
Where are Tarrok and the third group
Now, from the pond, climb the stone ledges to the left—they’ll lead you to a room with prison cells. This is the very place where Tarrok (yes, that Tarrok) is held during the “Banner of Banners” quest. The last two Minecrawler warriors reside here. Kill them, remove the plates, and you’ll have the coveted sixteen in your inventory. Your journal will update: now you can return to Wolf. Handing over the Crawler Plates to Blacksmith Wolf
After collecting all the plates, head back to Wolf on the path to the Free Mine. Talking to him will start the armor crafting process. But don’t be fooled: the craftsman will immediately warn you that the set won’t be ready for at least a day. So, you really will have to wait.
Time of Crafting and Where to Receive the Armor
After handing over the plates, head to the New Camp, to the Dwelling Cave. Find the house with the green awning on the inner ring—you can sleep there for exactly 24 hours. After waking up, head up to the outer ring, to Wolf’s workshop (it’s located directly above that same green awning, so finding your way around is easy). Enter—the blacksmith should already be sitting at his workbench. Select the dialogue option “Any progress on that special armor?” and receive the long-awaited armor. The quest is complete.
What should I do if Wolf does not give the armor
Sometimes the armor dialogue doesn’t appear. First, check if the “Banner of Banners” quest is complete—Wolf won’t hand over the armor under any circumstances without it. If the main quest is complete and the conversation still isn’t going well, try sleeping another full day and visiting the workshop again. As a last resort, skip to Chapter 5 and return to Wolf afterward. Usually, one of these steps is enough to unstick the system.
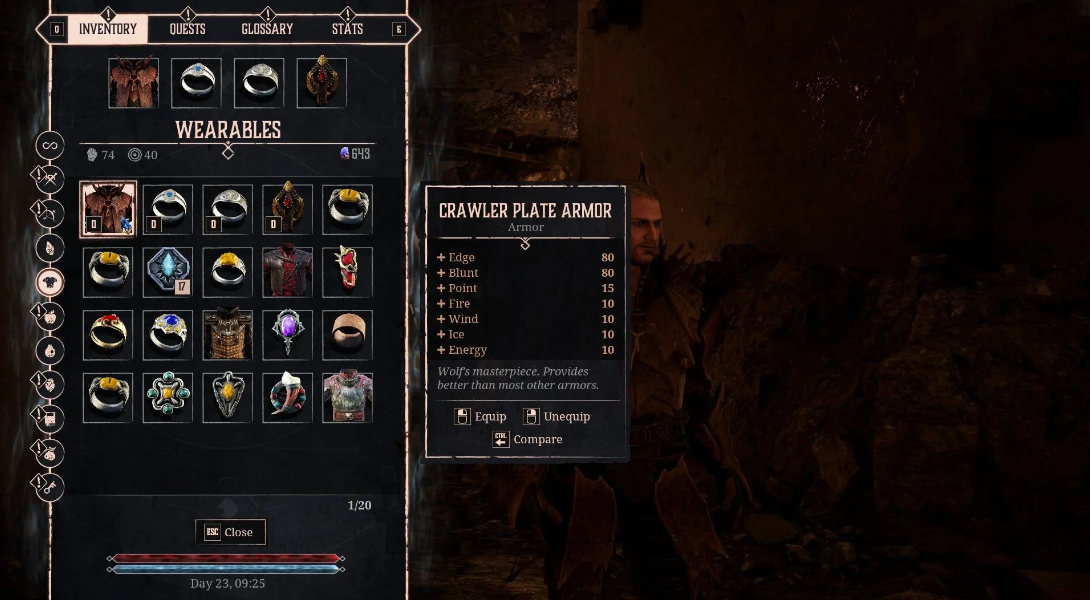
Why is Carapace Armor needed in Gothic
The new armor’s defensive stats break the traditional balance of Chapter 4. The developers have given the equipment impressive values: 80 slashing resistance, 15 piercing resistance, 30 flame resistance, and 5 magic burst resistance. Calling this set a “go-to” set is a huge mistake. In terms of resistance to slashing damage, this armor surpasses almost all equipment in the current stage, including top-tier faction armor. The best part is, you don’t need to swear allegiance to local leaders or hoard mountains of magical ore to craft it. The set is collected solely by clearing caves of warrior crawlers.
Comparison of armor stats in Chapter 4
To clearly assess the awesomeness of armor, it’s enough to compare its stats with the current alternatives from the Old and New Camps, which are available to the player at the beginning of Chapter 4:
The melee protection here is second only to the Ancient Iron Armor, which is hidden in Xardas’s Tower. However, it can only be accessed in Chapter 5, which is still a long way off. Compared to the starting gear of the Ghost or Bandit with their modest 30 points of resistance, crafting with Wolf is an instant leap over several levels of skill.
Pros and Cons of Crafting a Crawler Set
It’s definitely worth joining the hunt. This option is ideal for those playing a neutral character or those who have been delaying choosing a side in the conflict. The main advantages include the following:
-
Protection of the elite camp sets without any financial investment. Why hand over thousands of ore to blacksmiths for an average of 45-70 points of resilience when you can get 80 for free?
-
Complete freedom in leveling. The gear imposes no restrictions, doesn’t block the story paths of the Swamp, Old, or New Camps, and allows you to maintain your independence.
-
Excellent resistance to elemental damage. 30 points of fire protection and 5 points of magic barrier save where basic jackets miss critical hits. This piece of clothing is useful to carry in your backpack for tough encounters with shamans or lizards.
Ignoring Wolf’s offer only makes sense if you’re leveling a pure caster and are determined to get the Mantle of Water. Its 40 points of fire resistance and 15 points of magic barrier are more valuable for a mage. For all other archetypes—pure swordsmen, archers, and hybrid builds—farming in the Free Mine is worth every minute spent. You’ll only want to change these armors before the final credits, when you’ve obtained Xardas’s steel and given it to Blacksmith Stone for upgrading.
Summary and procedure for obtaining the armor set
The procedure is simple: speak with Wolf on the path to the Free Mine, obtain exactly sixteen armor plates from eight warriors inside the mine, hand the materials over to the master, wait out the day in bed, and then visit the blacksmith in his workshop in the Dwelling Cave. After a short conversation, the armor is yours. Keep in mind: the set is not bad, but its defensive stats will be especially useful in later chapters, when the enemies become more challenging. So it’s worth the effort.
Next guide: Walkthrough of the “Exiled Shaman” Quest