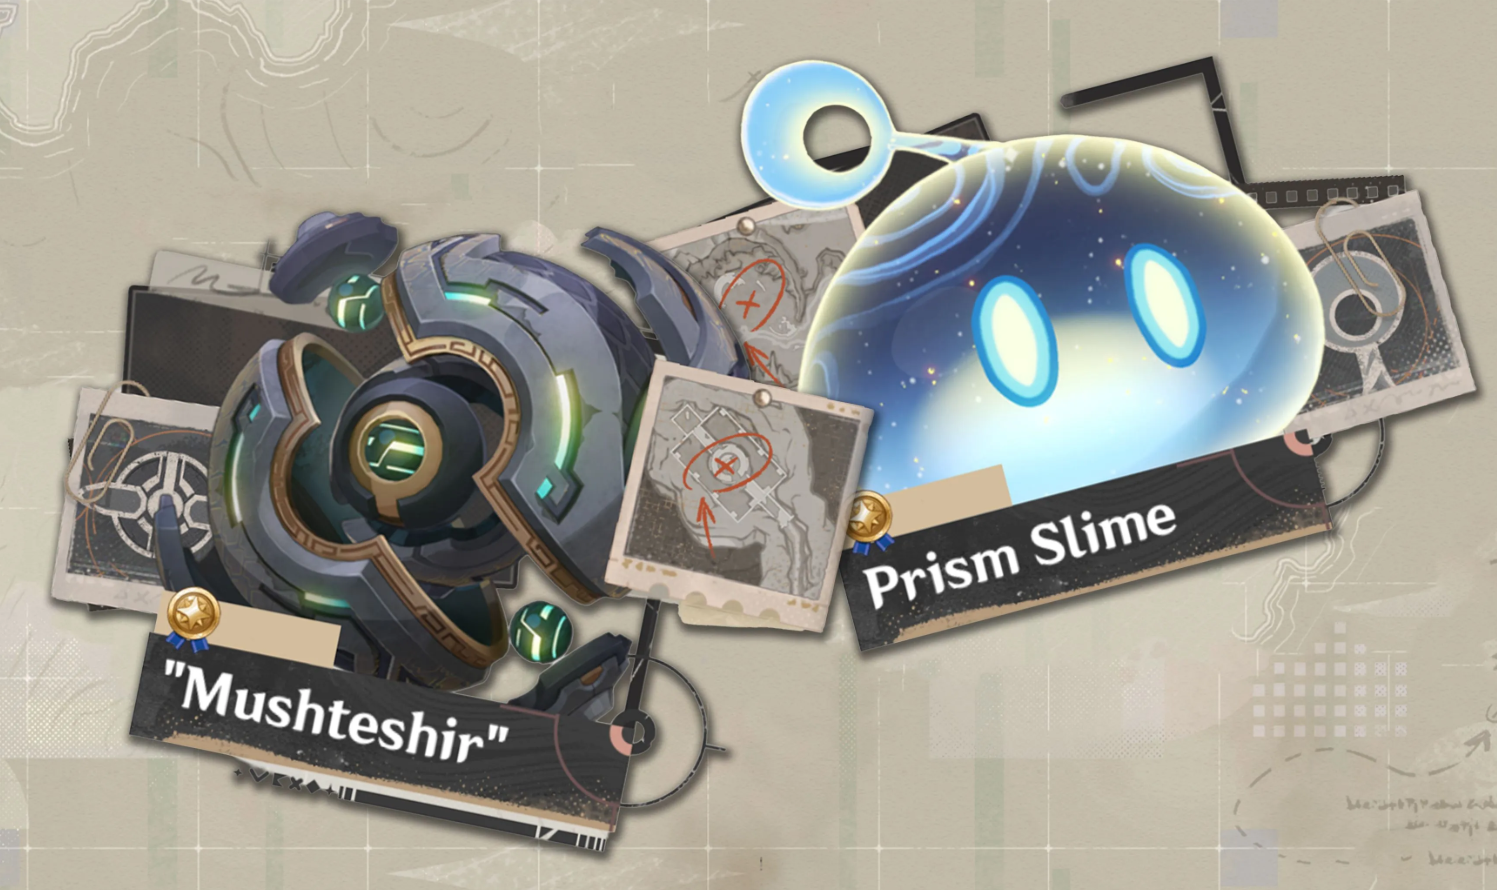
Genshin Impact developers added two new local legends to the Lunar Highlands region in the Luna VIII update (version 6.7): the Prismatic Slime and Mushteeshir. Both are hidden in Ungyen’s Circle, and each offers three achievements (for a total of 120 Primogems), but to claim all the rewards, you’ll have to navigate some unusual mechanics.
The Prismatic Slime steals your active character’s energy and becomes immune to its element—a mono-team will simply break down here. Mushteeshir, on the other hand, is immune to Hydro and summons flying tracking devices that must be shot down to paralyze the boss. Below is a full breakdown of the mechanics, step-by-step routes, and commands for completing all the achievements on the first try (including a working F2P version).
Table of Contents
Where can I find the Prismatic Slime and Mushteeshir on the Lunar Highlands map?
Both legends reside within the Ungyen Circle, the central location of the region, which opens after completing the quest “When We Gaze at the Moon” (aka Moon Gazing). Without this quest, you won’t be allowed into the Circle—the game simply won’t let you pass through the fog wall at the border.
How to get to Ungyen Circle (quest requirements)?
The “When We Gaze at the Moon” quest chain is automatically awarded after reaching Adventure Rank 40 and completing the Sumeru main story arc (Chapter III). If you’ve already unlocked the Lunar Highlands, look for a blue exclamation mark near the Archon statue in the center of the region. The entire quest takes about 20 minutes: you need to speak with three moonwalkers near the ruins of an ancient observatory, then activate four lunar obelisks. After this, the bridge to Ungyen Circle will be permanently unlocked.
Exact coordinates and routes to each boss
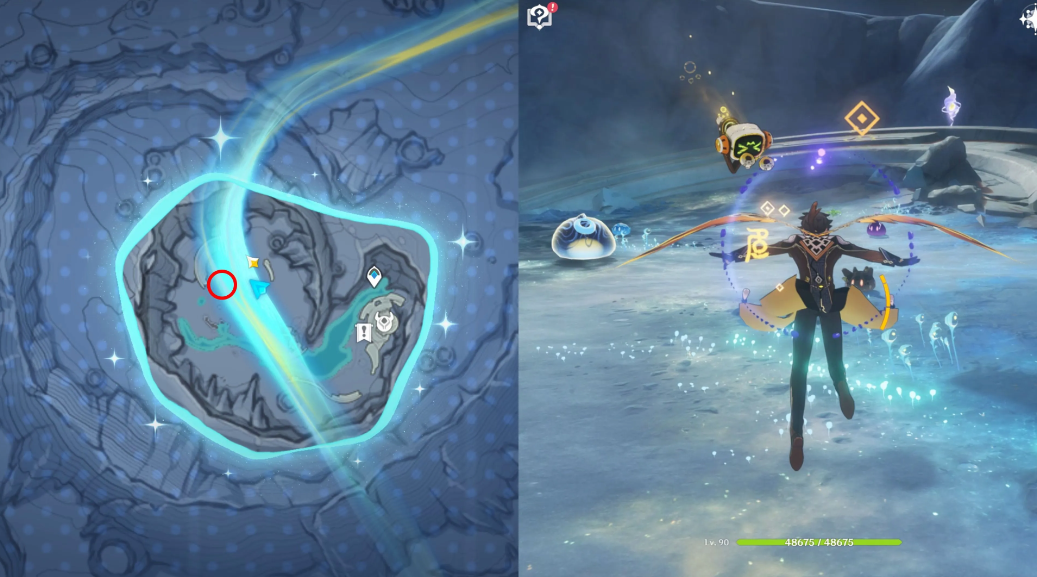
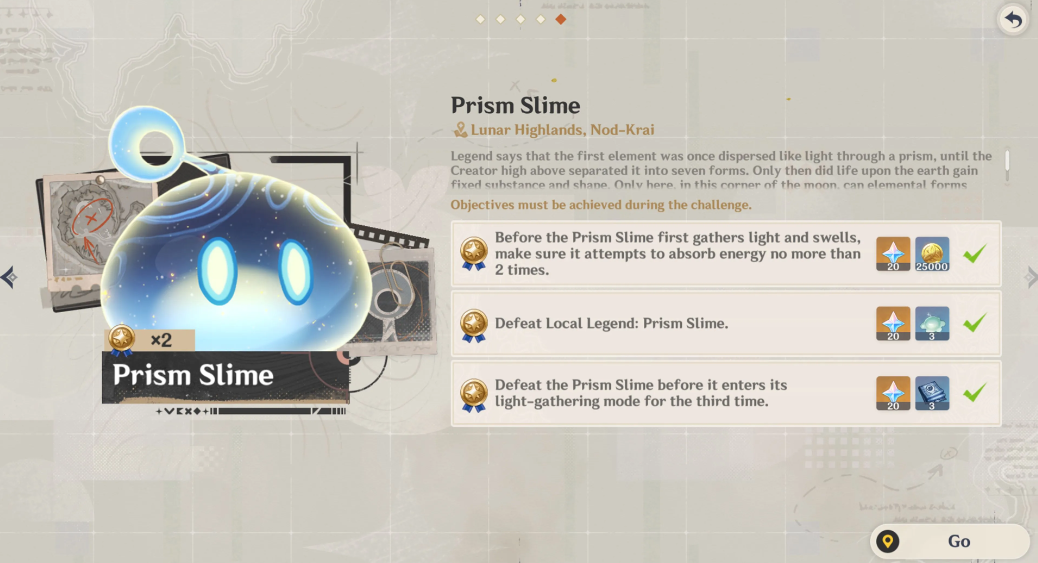
The Prismatic Slime is located at the southern end of the Circle, right by the cliff above the Moon Lake. Teleport to the “Southern Peak” point and run west—in just 15 seconds, you’ll see a giant glowing slime hovering over the abyss. It’s unmistakable: it shimmers with all the colors of the elements and is the size of a house.
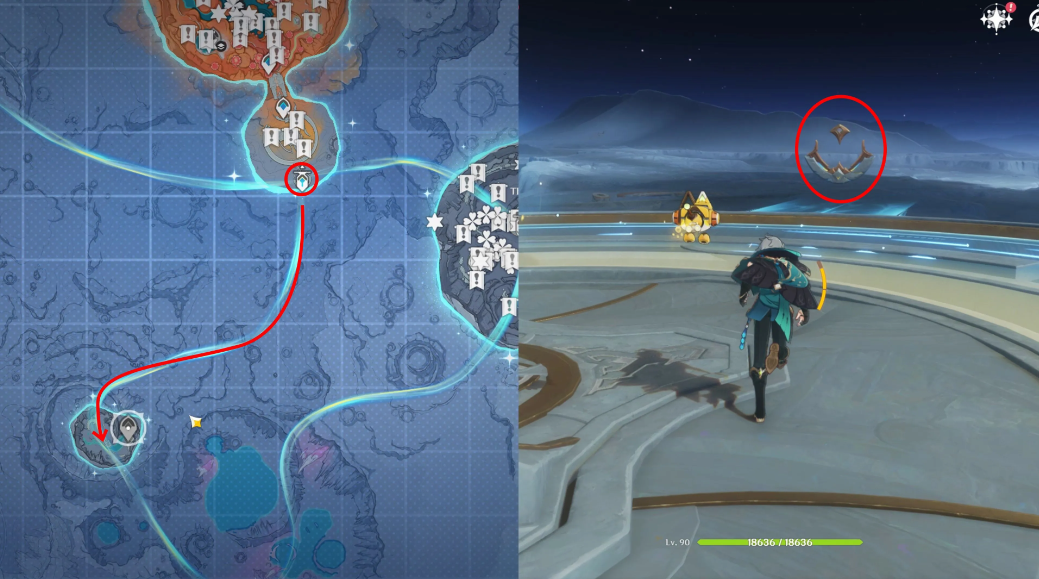
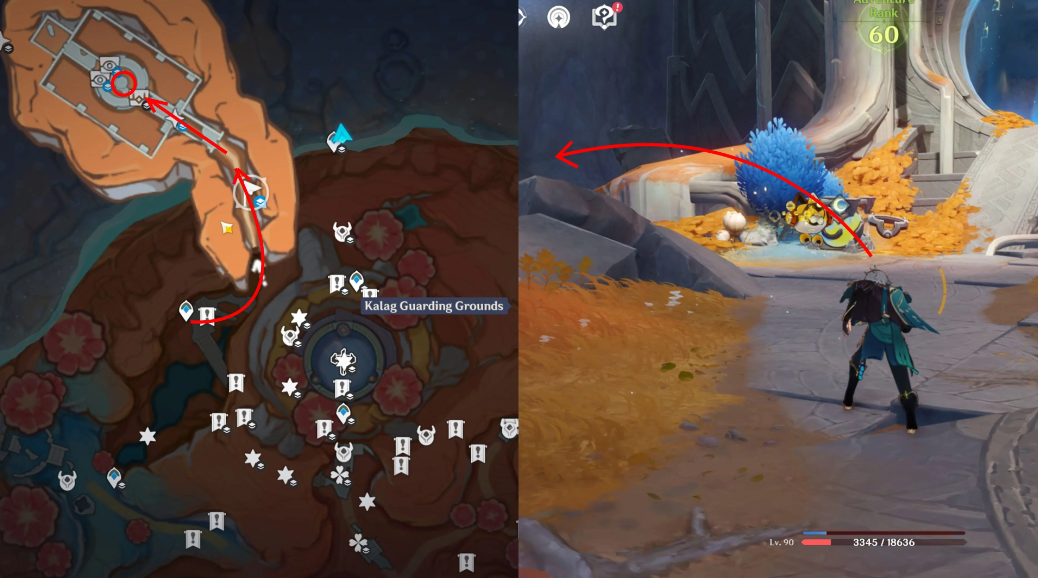
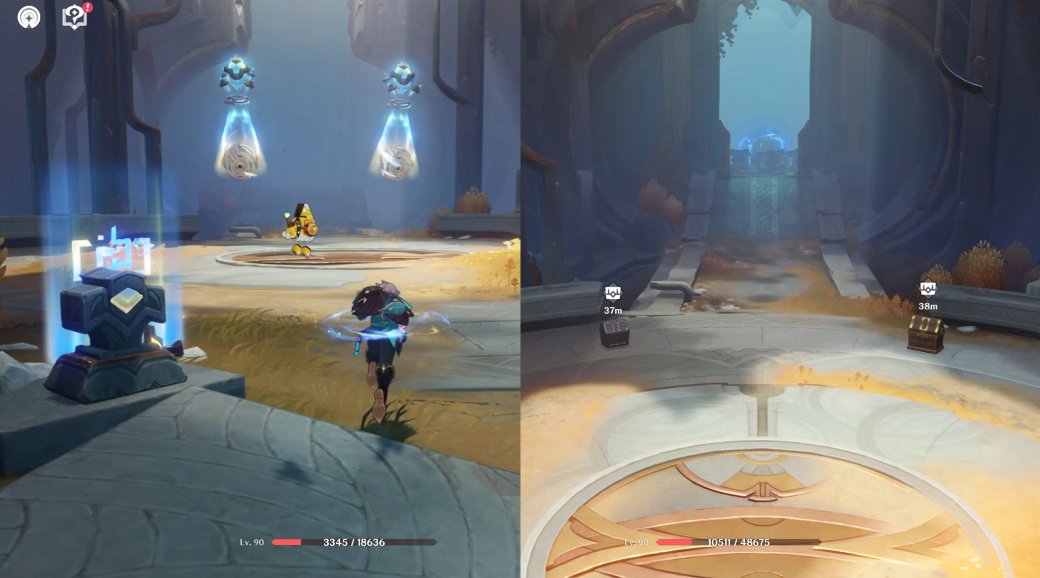
Mushteshir is hiding in the northeastern part of the Circle, in the ruins of an ancient observatory. From the “Northern Cliff” teleporter, descend the stone stairs to enter a dilapidated hall with a round window in the ceiling. The boss only appears after you’ve dealt with two waves of Ruin Guardians (automatons). If they don’t spawn, relogin or wait until daylight (respawns are 24 hours).
How the Prismatic Slime’s Energy Absorption Mechanic Works — A Complete Breakdown
This boss’s main gimmick isn’t just attacking, it steals elemental blast energy from the character currently on the field when the Absorption skill is activated. This happens every 10 seconds, and if you don’t switch characters, the slime will begin regenerating health and building up an Elemental Resonance meter.
When the meter fills (this takes approximately 29 seconds of continuous attacking without switching characters), the slime enters Overdrive: it instantly grows a shield of the element it stole and unleashes an AoE blast that halves the HP of any non-tank. After the blast, the boss resets the meter and the cycle repeats, but each time, players have observed the interval between absorptions to be shorter, typically 7-8 seconds.
Why Mono-Squads Are Useless and How to Use a “Sacrificial” Character
If you engage in battle with a team of a single element (for example, four Pyros), the slime will steal your main damage dealer’s element, become immune to it, and you simply won’t be able to penetrate it. Solution: add a designated “sacrificial” character to your team who isn’t actively dealing damage (for example, a healer or shielder of a different element). Keep this character on the field while the boss absorbs: the slime will steal their energy, leaving your main damage dealer untouched. Then quickly switch to your main damage dealer and hit the slime with their element before the boss switches focus.
This tactic requires good timing: the absorption occurs at 10-second intervals, and you can track it by the animation (the slime begins spinning and making a high-pitched ringing sound). As soon as you see this, immediately switch to the “sacrificial” character, wait for the animation to finish (1.5 seconds), then switch back to your main attacker. Experience shows that even with two or three absorptions before the first Overdrive, you can deal enough damage to force the boss into the second phase.
How to fill the meter in 29 seconds and enter Overdrive?
Counterintuitively, entering Overdrive isn’t always a bad thing: in this state, the slime loses its mobility and becomes vulnerable to elemental reactions (except for the element it stole). Therefore, some players intentionally fill the meter in one cycle, then unleash a “Steam + Superconductor” or “Melt” combo on it. The key is to avoid the explosion at the end of Overdrive: it occurs 5 seconds after the meter fills, and you must either dive into the abyss (dash with evasion) or put up a shield (a strong one, for example, from Zhongli).
The optimal strategy for most teams is to prevent the slime from filling the meter at all. To achieve this, simply switch characters every 8-9 seconds, preventing them from stealing energy twice in a row. If you have a team with a high reload speed (like Raiden), you can ignore the mechanic altogether and just kill the slime faster than it can recharge.
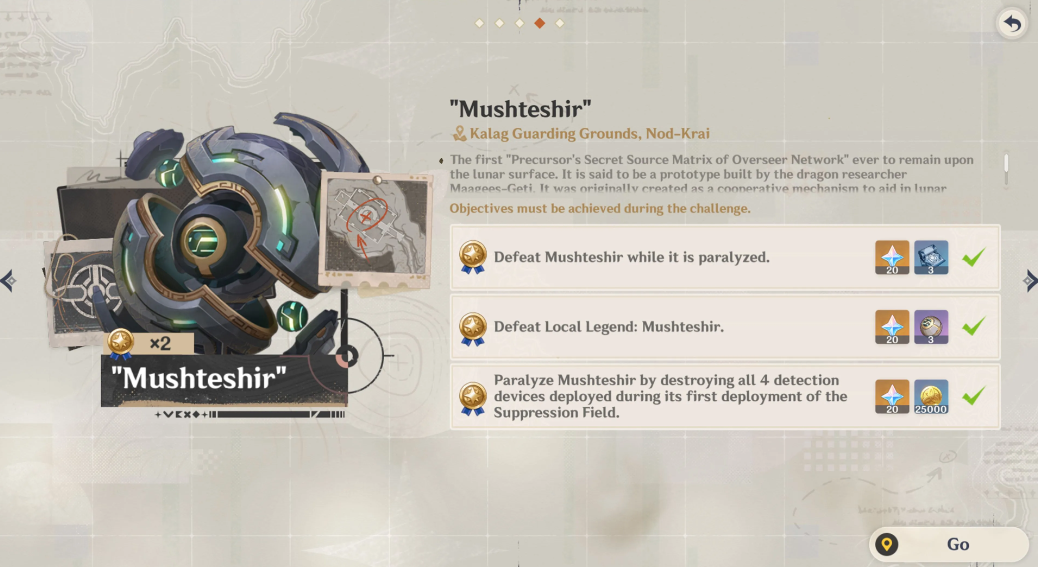
Mushteshi’r Fighting Tactics – How to Destroy 4 Devices and Paralyze the Boss
Unlike a slime, Mushteshi’r is a humanoid automaton with hydraulic drives that doesn’t steal energy but instead blocks your abilities. In the first phase (up to 50% HP), he simply attacks with laser bursts and spinning attacks—easy to dodge. The problems begin when his health reaches half.
At this point, Mushteshi’r activates a Suppression Field: a purple sphere appears around him, slowing your movements and reducing skill recharge speed by 30%. He simultaneously summons 4 flying tracking devices—small drones that spiral around him and fire weak but very frequent bolts. They’re unavoidable: while the drones are alive, Mushteshi’r gains approximately 70% resistance to all elements (according to community data) and regenerates approximately 2% of his HP every 3 seconds.
Why Hydro characters are useless and which reactions work
A key detail that most guides forget to mention: Mushteshir is completely immune to Hydro. He doesn’t just have high resistance, he’s actually immune—your attacks will deal 0 damage. Therefore, remove all Hydro characters from your team: neither Neuvillette, nor Furina, nor Ye Lan will help here.
However, the boss is vulnerable to Electro and Cryo: the Superconductor and Freeze reactions effectively reduce his attack speed and create windows for attacks. Pyro also works (for the Steam and Melt reactions), but be careful: if you use Pyro in combination with Electro, Overload can scatter drones across the arena, making them difficult to destroy.
How to kill Mushteshir in one paralysis window (all 3 achievements per battle)?
After you destroy all four drones (they have 5-7 thousand HP each and are easily shot down by any ranged attacker), Mushteshir enters a paralysis state for 10-15 seconds, falling to his knees. His resistance drops to almost zero, and this is when you should unleash all your ultimate damage. If you manage to destroy the remaining 40-50% of his HP during this window, the battle ends, and you earn all three achievements at once: “Paralytic,” “Speedy Dismantle,” and “Perfect Suppression” (if you weren’t knocked down at all).
If you don’t make it, the boss gets up, restores 20% of his HP, and repeats the drone phase. You lose time, but not the achievements—they can be completed on the second cycle. However, to achieve “Speedy Dismantle,” you need to complete one cycle of paralysis, so be prepared with power-up cans and food bonuses.
The Best Teams Against Prismatic Slime – From Top Teams to Free-to-Play
Team selection is critical for both Legendaries, but especially for the Slime, where elemental switching is crucial. Here are two proven approaches – for those with Legendaries and for completely free builds.
Top Teams with Legendary Characters
Against the Slime, the optimal combination is Nahida + Raiden + Bennett + Zhongli. Nahida and Raiden provide the Stimulate (Dendro + Electro) reaction – it doesn’t depend on the Slime’s element and deals consistent damage. Bennett is the “prey” for absorption (the Pyro Slime will steal him, and Raiden and Nahida will continue to attack Electro and Dendro). Zhongli provides a shield that protects against Overdrive explosions.
Against Mushteshir, take Ayaka + Sucrose + Fischl + Diona. Ayaka is the primary Cryo damage dealer, Sucrose boosts Elemental Mastery, Fischl stacks Electro for Superconductor, and Diona heals and provides additional Cryo Resonance (increasing critical chance). All four are long-range or semi-long-range, making them great for taking down drones.
A budget F2P team that unlocks all achievements
For slime, team up with Lisa + Kaeya + Barbara (the sacrifice!) + Noelle. Kaeya and Lisa each provide the Superconductor reaction, which reduces the slime’s physical defense. Barbara is your “sacrifice”: she heals, and if the slime steals her Hydro, it’s no big deal, as Hydro isn’t used for attacking. Noelle provides a shield and additional physical damage. This team doesn’t require any legendaries; all characters are free or guaranteed to drop in the standard banner.
For Mushteshir, team up with Kaeya (the main damage dealer) + Ember (for burning drones?) + Lisa + Barbara (healing only, don’t attack with her). In fact, against Mushteshir, it’s best to replace Barbara with any Electro or Cryo character; for example, Lisa and Kaeya are enough. If you have Xin Qiu, don’t use him; he’s a Hydro and useless. Take Kaeya + Lisa + Noelle + any archer (for example, Ember or Kolovri) – the archer is needed for shooting down drones from a distance. Ember with her charged attack is excellent. This foursome will also do the job, although the battle will take 2-3 minutes longer than with a top squad.
All achievements and rewards for both local legends
Each legend has three achievements, which are summarized in the “Wonders of the World” section. Below is a table with the conditions, rewards, and tips on how to get them all in one battle.
Boss Achievements
After completing all the achievements for both Legends, you’ll receive 120 Primogems and several Ascension Materials (Moonstone Crystals), which are useful for upgrading the new weapons from the Lunar Eclipse event.
Rewards can be claimed from Katherine at the Adventurer’s Guild—be sure to visit your Chronicles of Valor to activate them.