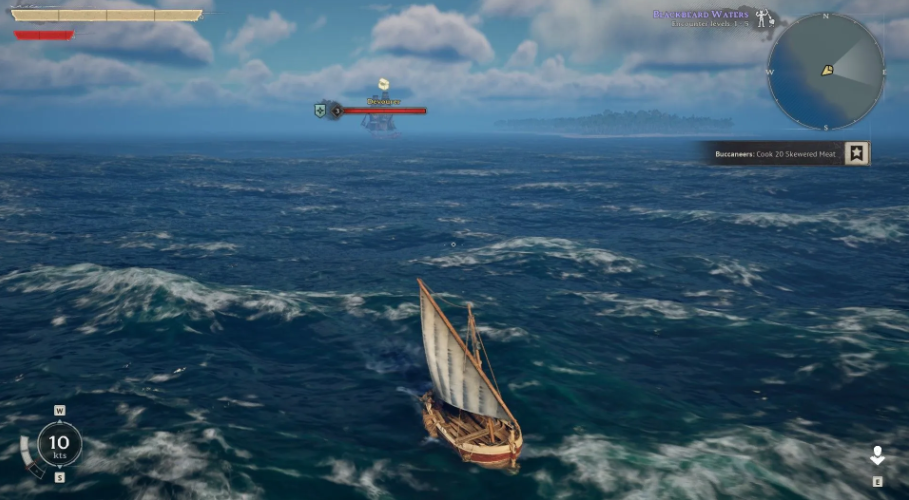
Blade battles in Windrose hardly raise any questions — swinging a sword is intuitive to anyone who has ever run a third-person action game. The situation is completely different when the schooner departs from the pier and you find yourself alone with cannon volleys and a capricious wind. Maneuvering in the open sea, calculating the trajectory of the cores and trying not to expose the side to enemy buckshot initially baffle even experienced players. This article describes the base, without which your flagship risks becoming a floating coffin, and the holds will empty faster than you say “boarding.”
Table of Contents
Equipping a ship in Windrose: from a wooden vessel to an archipelago thunderstorm
Before rushing into battle, it’s worth looking at the shipyard — it’s there that it’s decided how many direct hits the hull will withstand and how much pain your guns will respond to the opponent. At the start of the campaign, the choice is modest: twelve-pound guns and simple wooden paneling. It works, but without a light. Later, drawings of enhanced versions of both will appear — and then you can seriously think about dominating the waves.
Where to get recipes. Most ship upgrades and cosmetics are sold from merchants of the Coastal Brotherhood faction. Look for them in Tortuga or in the brotherhood’s own camps — there is a rich assortment, including full-fledged designs for new ships. Brigantines and frigates, by the way, also come from there. To craft advanced equipment, you will have to upgrade the production machines on the base — otherwise, even with a drawing, you will hit the ceiling of the workshop’s capabilities.
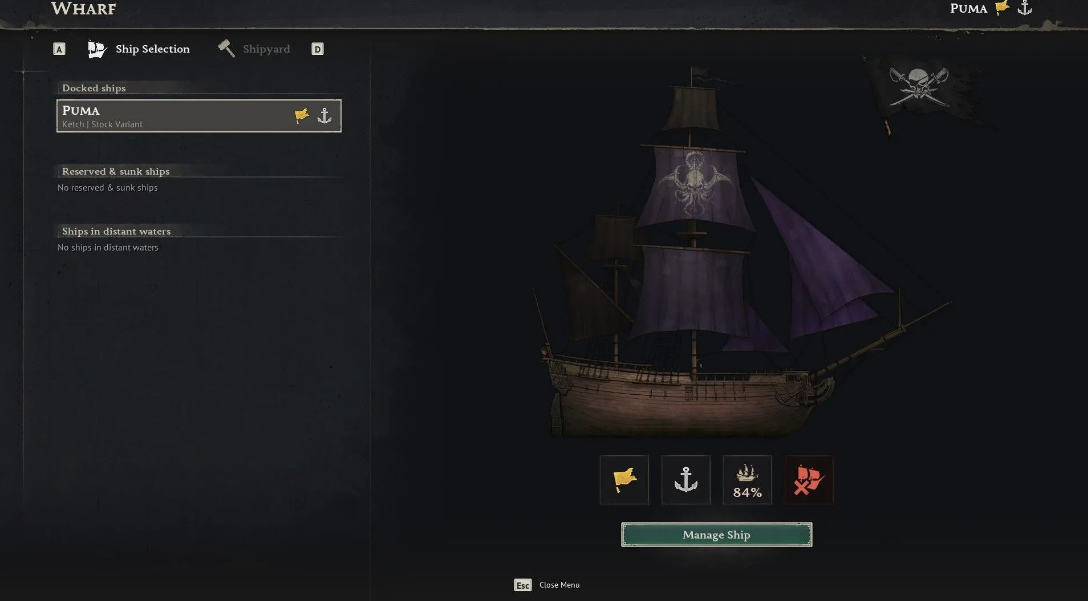
How to install guns and armor. First of all, build a shipyard. Please note an important caveat: the building clings strictly to the coastline. Don’t be lazy to build a pier nearby — this will save you from endless runs through the entire camp every time you want to change the caliber of the guns. Interact with the Shipyard or open the character’s menu on the “Flagship” tab — that’s where the barrels and armor plates are placed in slots.
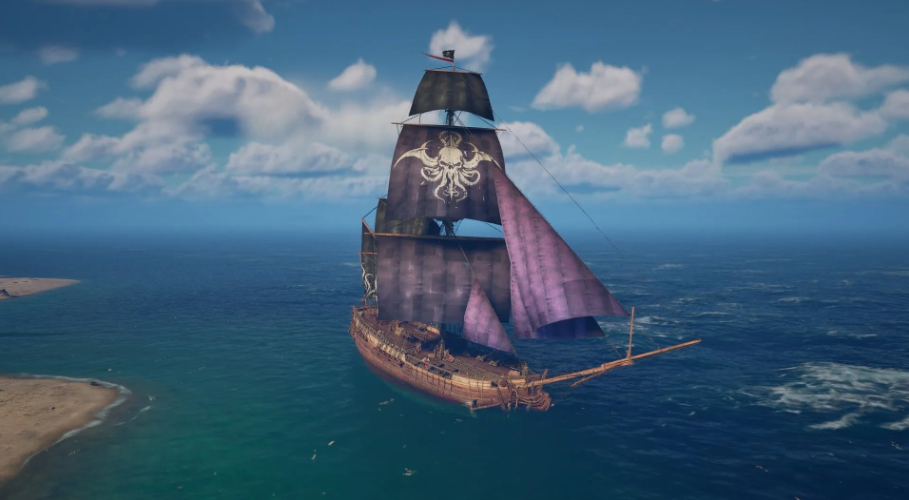
Change of name, sails and flag. The same Shipyard, the “Control” button under the ship icon, and the “Customization” tab. Change the appearance of the flagship to your heart’s content — it doesn’t affect the driving performance, but it’s always nice to stand out from other corsairs.
A few last tips (for those who want to survive)
Naval battles in Windrose are not about “aimed and fired”. Keep an eye on the position of the hull relative to the waves and the enemy, learn to anticipate enemy maneuvers and do not be greedy with repairs in the midst of a firefight. The first skirmishes will almost certainly be clumsy — this is the norm. As soon as your hands remember the salvo distance and the inertia of the turn, you will begin to return to port with holds full of loot, and not with holes in the side.
Where to get blueprints for vessel upgrades
To acquire all these improvements and cosmetic goodies, you don’t necessarily need to dive into the abyss or plunder royal caravans (although that’s also an option). The main source of knowledge in the world of Windrose are merchants and artisans scattered throughout key points like the free Tortuga. If you’re aiming for truly significant hull modifications or want to change your ship class, say, to a maneuverable Brigantine or a mighty Frigate, then your direct route is to representatives of the Coastal Brotherhood faction. You can purchase exclusive recipes from these guys, which aren’t just lying around.
Keep in mind: just picturing a supergun in your head isn’t enough. To create advanced ship equipment in metal and wood, your production stations at your base must also match your ambitions. Without a well-developed forge or workshop, even the rarest blueprints will remain useless scraps in your chest. So, developing your land base is directly tied to your power on the water.
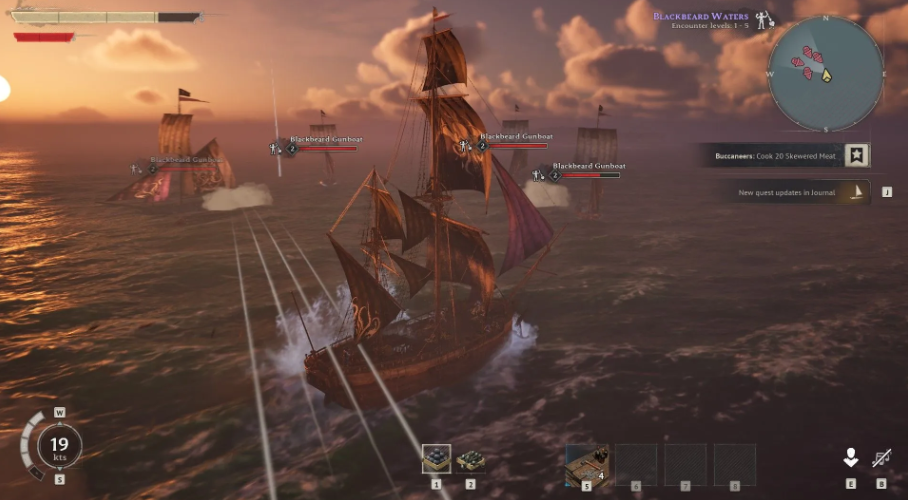
Last time, we discussed how to turn a rusty hulk into a capable ship using the Shipyard and the right blueprints. But even the most sophisticated Brigantine with a full complement of guns won’t save you if you take to sea without an understanding of tactical geometry. Battles in Windrose aren’t a duel of “who can blast the loudest?” Here, a cool calculation of positioning, a sense of reloading rhythm, and, of course, the ability to hit your target, not a passing seagull, are crucial. It’s especially frustrating when the enemy is overwhelming you with numbers, and you’re alone on the waves.
Below are the three pillars upon which any victory in the waters rests. Without them, you’re just a pretty target.
Positioning: The Art of Not Being Surrounded
A Windrose captain’s worst nightmare is being pinned down by enemy ships from both sides. In such moments, even the thickest armor becomes foil. Your task from the first seconds of combat is to keep the enemy strictly on one side of the horizon. Watch the minimap like you watch your fuel level on a long journey: if you’re distracted, a couple of ketches will be closing in on your stern.
Steering is your best friend. Remember this simple rule:
-
Full speed ahead – for pursuit or when you need to quickly close the distance after an enemy salvo.
-
3/4 speed – ideal for maneuvering. At this speed, you’re nimble enough to swerve and maintain control when turning.
-
1/4 or 2/4 speed – this is practically a stop. Use it only in two situations: to finish off a motionless target or to slip behind an enemy who has just passed you by.
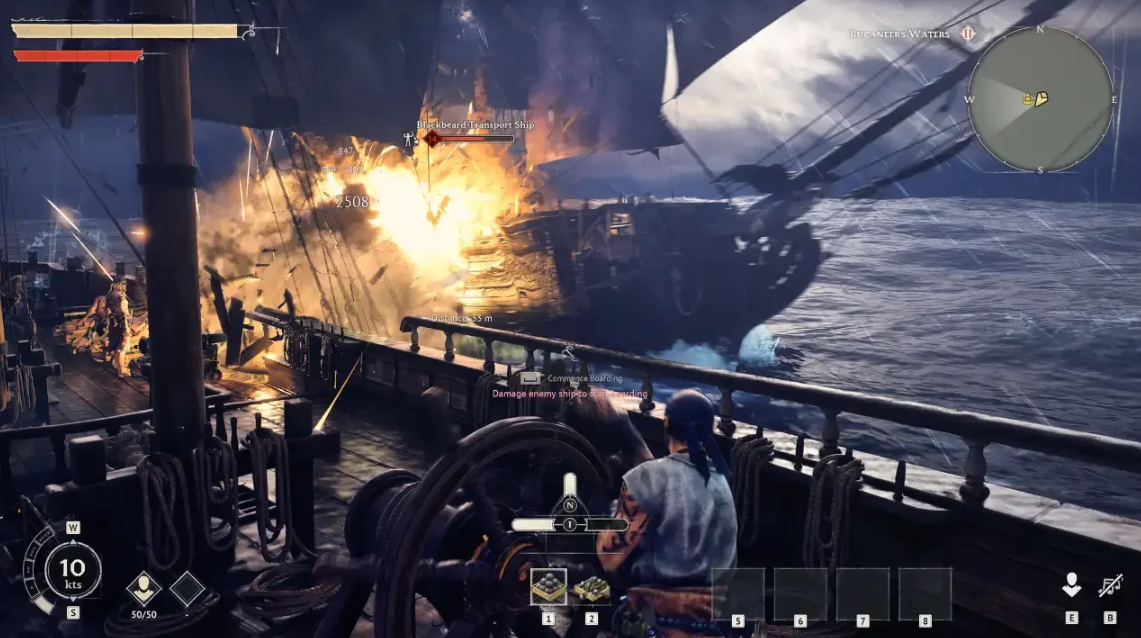
The ideal position in Windrose is to hang on the enemy’s tail. Almost no one has stern guns, but you’re sure to have something loaded in your bow. Fire with impunity while the enemy tries to turn. It’s pure math: you deal damage, and all you get in return is a salty breeze.
Timing: The first salvo is everything
Naval combat in Windrose is an endless dance around reload time. The average cannon cycle is about 11 seconds (depending on the type of cannon), and those seconds feel like an eternity when a frigate is firing at you. Rule number one: always try to fire first. This gives you a head start of those 11 seconds, during which you can either finish off the target or escape from return fire.
If you’re fired upon first, don’t try to be a hero. Give it full speed and retreat to reload, using the waves as cover. If you have the initiative, stay at the edge of firing range, but never expose your broadside to enemy guns ready to fire. Watch the white ammo indicators in the center of the screen—they’ll show you when you can pull the trigger again.
Aiming: Why It’s Better to Aim Low
A miss in the Windrose is costly. Ammunition is limited, and every second lost is a potential return fire. Experienced captains know: it’s better to aim just below the waterline than to fire a cannonball at the tops of the masts. Too often, shells miss because they overshoot. Hitting the hull causes significant damage and slows the ship.
Chain cannonballs are a whole other story. If you see the enemy trying to escape, switch to them. A successful salvo to the rigging applies a significant speed debuff and deals additional damage to the sails and masts. It’s very useful when you need to catch up with a nimble ketch or, conversely, escape pursuit.
As for choosing a victim, the logic is simple: hit the weakest. The faster you disable one enemy ship, the fewer guns will be firing in your direction. And don’t forget to keep an eye on the sea’s swells—high waves sometimes act as a natural shield, absorbing both your and the enemy’s cannonballs.
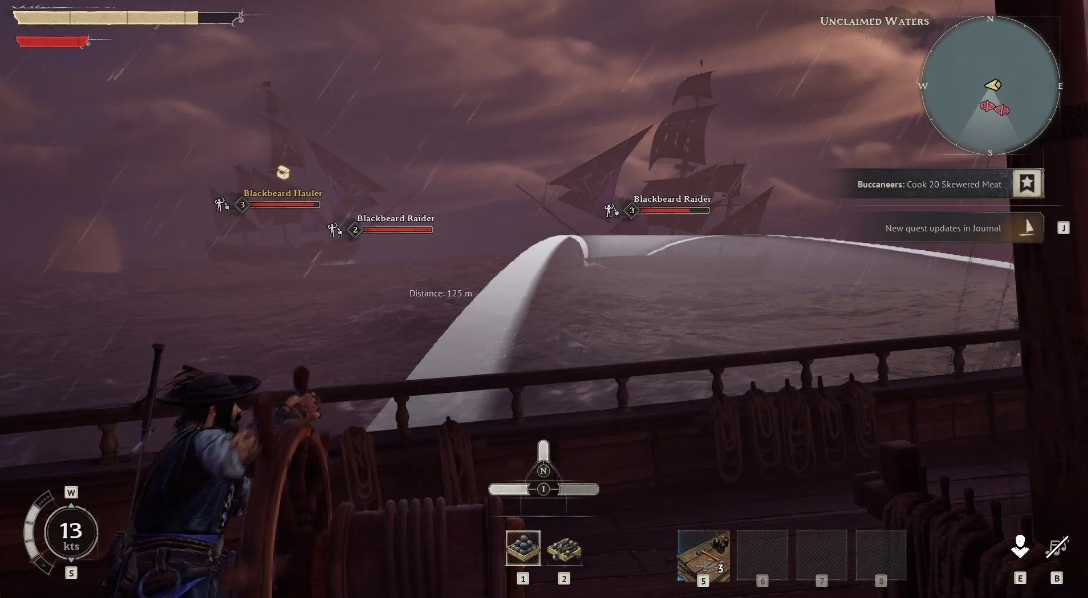
Boarding: Risk and Reward in a Bottle
When an enemy vessel is reduced to a sieve and its health drops to critical levels, boarding gear comes into play. Locked together, you and your crew (yes, the guys will fight too) are transported to the enemy’s deck for a hand-to-hand cleanup. Sounds epic. Looks epic, too. But there are nuances.
Fighting in enemy territory is a nerve-wracking experience. Especially if you’re boarding a small ketch: there’s little room to maneuver, and enemies will surround you from all sides. Even with the support of your pirates, it’s easy to get a blade in the back. We recommend the “sniper from a safe distance” tactic. If your ship has enough gunpowder and cannonballs, snipe the enemy from afar, avoiding knife fights. Boarding also serves another important function: when an enemy’s health drops to the “red zone,” the ship is immobilized. Completely. It stops firing, maneuvering, and generally posing a threat.
This technique is a real lifesaver when you’re outnumbered or facing a ship a class higher than yours. Immobilize a frigate with a boarding grapple—and then finish it off comfortably.
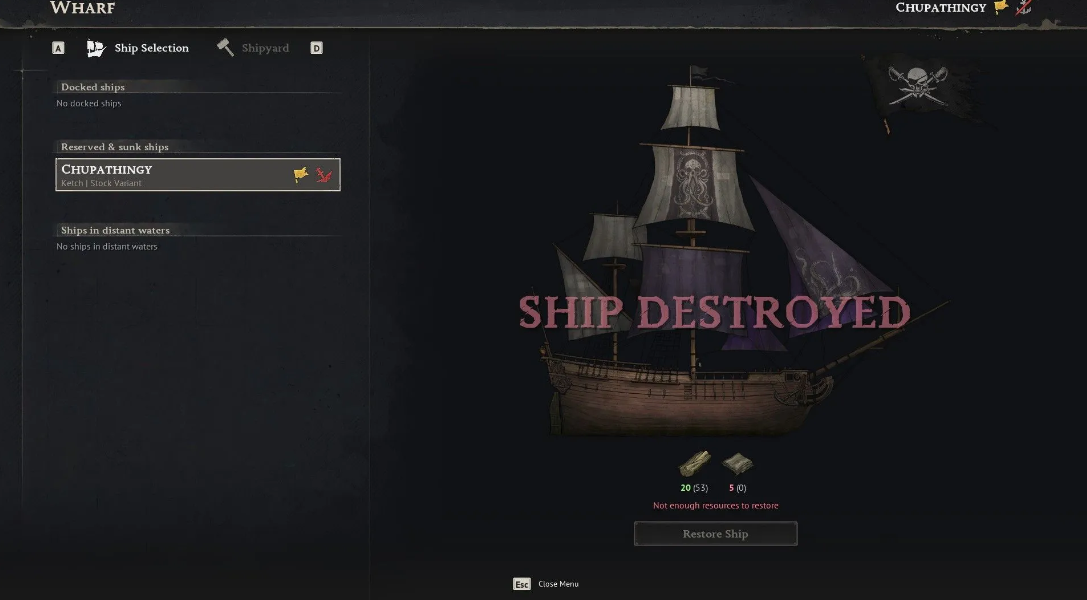
Even the best-laid battle plan can sometimes go down the drain, along with your ship. In Windrose, losing your flagship isn’t the end of an adventure, but rather an annoying delay in the schedule. The ship recovery mechanics here are more humane than you might expect from the harsh pirate world: all cargo remains yours, and the vessel itself is subject to repair. However, there are some nuances.
How to raise a ship from the seabed without losing your loot
As soon as the deck gives way and the hold fills with water, your main task is to call a boat and make a run for it. Yes, it doesn’t sound very heroic. But trying to pretend you’re an unsinkable battleship when enemy frigates are circling will end in a second sinking. And then the consequences will be far more serious. If you’re shot while in a boat, you’ll lose all your inventory contents—resources, valuables, and rare artifacts. All of these will drop at the point of your death, just like with a normal death on land. You’ll have to return and retrieve your items, praying that someone faster doesn’t pick them up.
If you managed to evade pursuit and reach base, the process for resurrecting your flagship is simple. Head straight to the Shipyard. Yes, the very same one we built at the water’s edge in the first part of the guide. Restoring the ship will require materials. The type and quantity directly depend on how sophisticated your sunken ship was: raising a modest ketch will be much cheaper than reviving a frigate bristling with cannons. Fortunately, all the resources stored in the hold before the crash will remain and will be available after repairs. However, you won’t be able to retrieve the loot hidden on board until the ship is afloat again.
This brings us to the simple truth of sailing in Windrose: aggressive tactics and risk are good, but knowing when to retreat saves not only your skin but also your wallet. This concludes our brief primer on naval combat. In future articles, we’ll likely discuss how to stay sane during a storm and use the weather as an ally. But that’s a whole other story.