The base in the cubic world is a rebirth point, a warehouse, a workshop, and the very place where you finally exhale after running away from creepers. When everything is thought out, you run around less at night with a torch in your hand, craft tools faster, roast food calmly and do not lose valuable loot somewhere in the chest of a “temporary” shelter. And then there’s the very impulse to develop: you go in for 12 minutes, attach a piece of the facade, put up a fence, sort out the junk — and you already feel that the world is changing for you. Therefore, let’s figure out how to build not just how, but wisely.
Table of Contents
Choosing a base location in Minecraft by biome
It’s more complicated than just “I looked around and OK.” Each biome has its own character.
The plain provides a flat surface and plenty of space for farms. The forest is an endless tree at your side and a cozy village spirit. Shore or island — fishing is within walking distance and enemies are easier to control: the water itself is a barrier. The mountains offer a panorama, a stone with coal directly in the wall and excellent opportunities for balconies and underground floors. Jungles, taiga, swamp — it’s all about atmosphere and more greenery; jungles, by the way, are ideal for a tree house.
Think beyond just the view from the window. There should be a village within a radius of two or four hundred blocks – trade and ready—made beds solve a lot of problems. There’s a cave nearby, which means iron and coal are at hand. Water is needed not only for beauty: reeds, farms, fishing and boating routes. And a place for a portal to the Lower World — it is better to put it a little away from the main courtyard, but in direct line of sight so as not to run with a compass.
House layout in Minecraft before construction
Chaotic construction is a sure way to fix crooked corners and rearrange chests for a week. It is better to sketch the outline right away.
Take the earth or a boulder and mark the boundaries. Odd sizes like 7×9, 9×11, or 11×13 are the most convenient: they make it easier to make symmetrical facades and roofs. Then spread out the zones: an entrance with an entrance hall, a workshop with a workbench and stoves, a kitchen where a smokehouse adjoins a regular oven, a separate warehouse and a bedroom. Let the door look in the center of the long side, and from it there is already a path to the mine and the garden.
Keep the height of at least four blocks up to the ceiling inside. It is better to make the ceiling out of semi—blocks – this way the lamps are hidden more carefully. Assemble the house itself from 5×5 or 5×7 “cubes” modules: then it will be easier to complete new rooms without demolishing half the walls. And one more thing: if you are planning serious farms, align the facade along the boundaries of the chunks (these are 16×16 squares). It sounds boring, but then you’ll say thank you when everything gets straight.
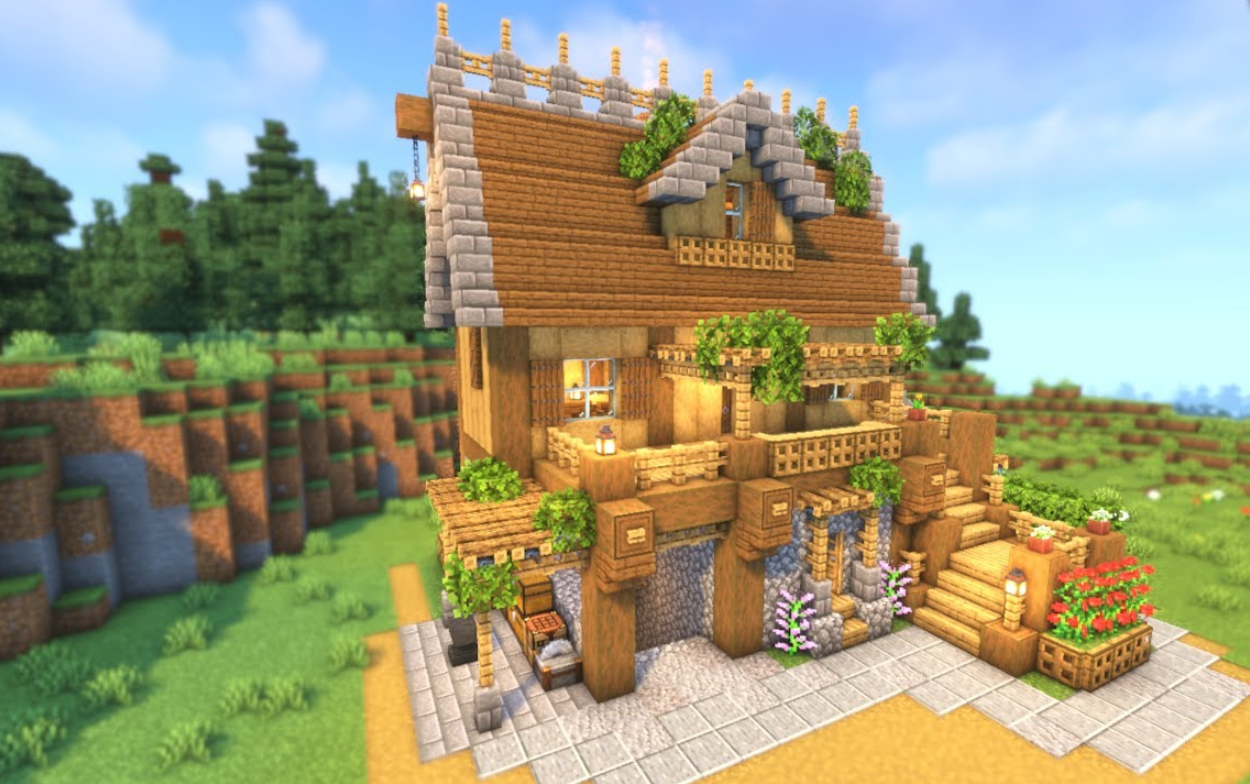
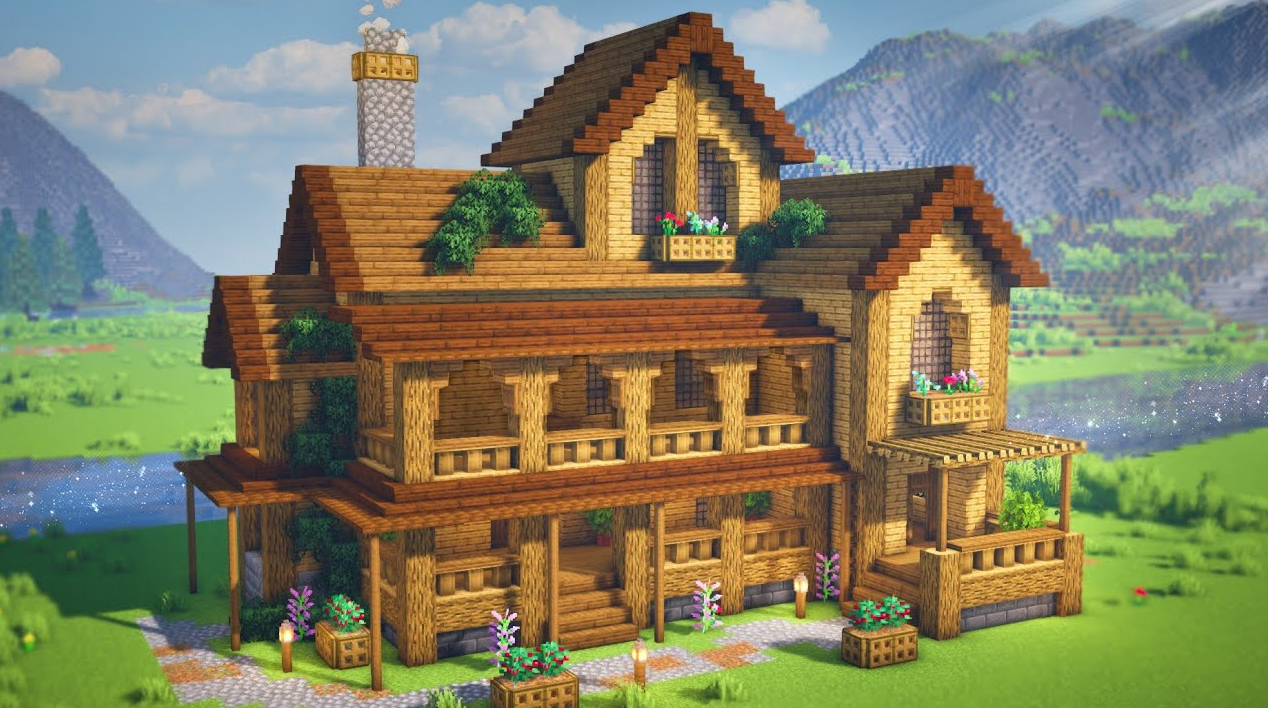
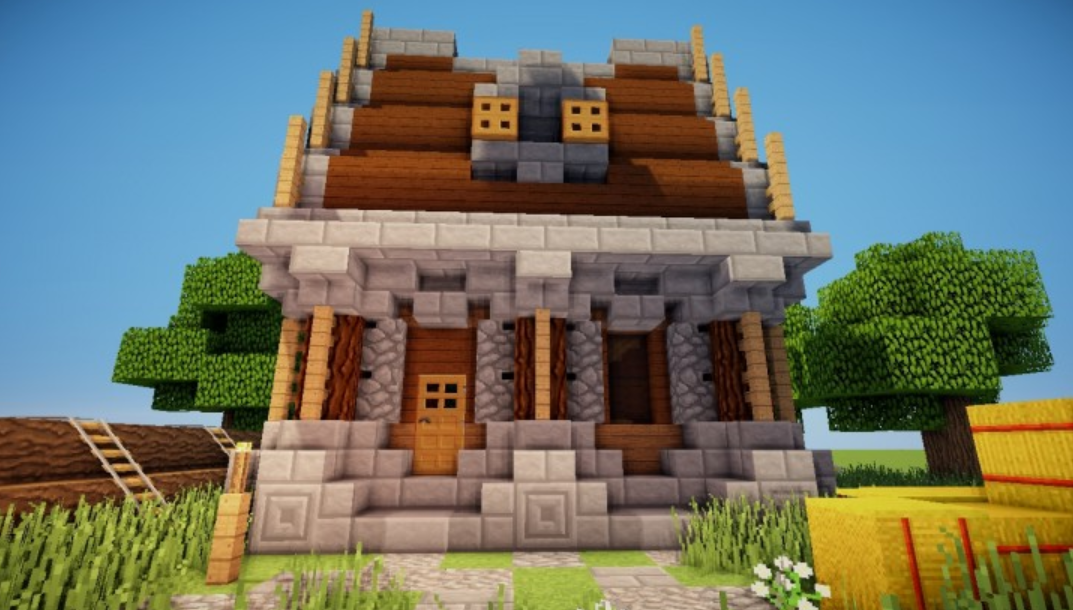
For example, let’s take a 16×12 base. We make the porch a “frame” of planks. The corners of the frame are logs. The floor inside is combined from boards and wool so that there is no feeling of a barracks. The windows are two or three blocks high made of glass panels, the window sills are semi-blocks. The columns are made of stone bricks, the fence is wooden, and the roof is laid out with steps: wood for ramps and stone bricks for the roof.
The foundation and walls of a house in Minecraft with volume
The foundation, even one block up, already rips the house out of the ground and makes it a building, not a temporary canopy. The classic is a cobblestone base, we highlight the corners with stone bricks, and in some places we intersperse moss options for the “age”. If you have a wooden style, the corners are made of logs, a “belt” of stone fencing at the bottom, and a half—block cornice at the top. The modern version is smooth stone or concrete with protruding ribs-pylons.
Walls should not be flat like a phone screen. We give the corners forward with logs for half a block. We set up vertical racks every three or four blocks – this creates a rhythm. There are boards between the posts, and around the windows we put hatches as platbands and plaques for a thin frame. Simple and tasteful.
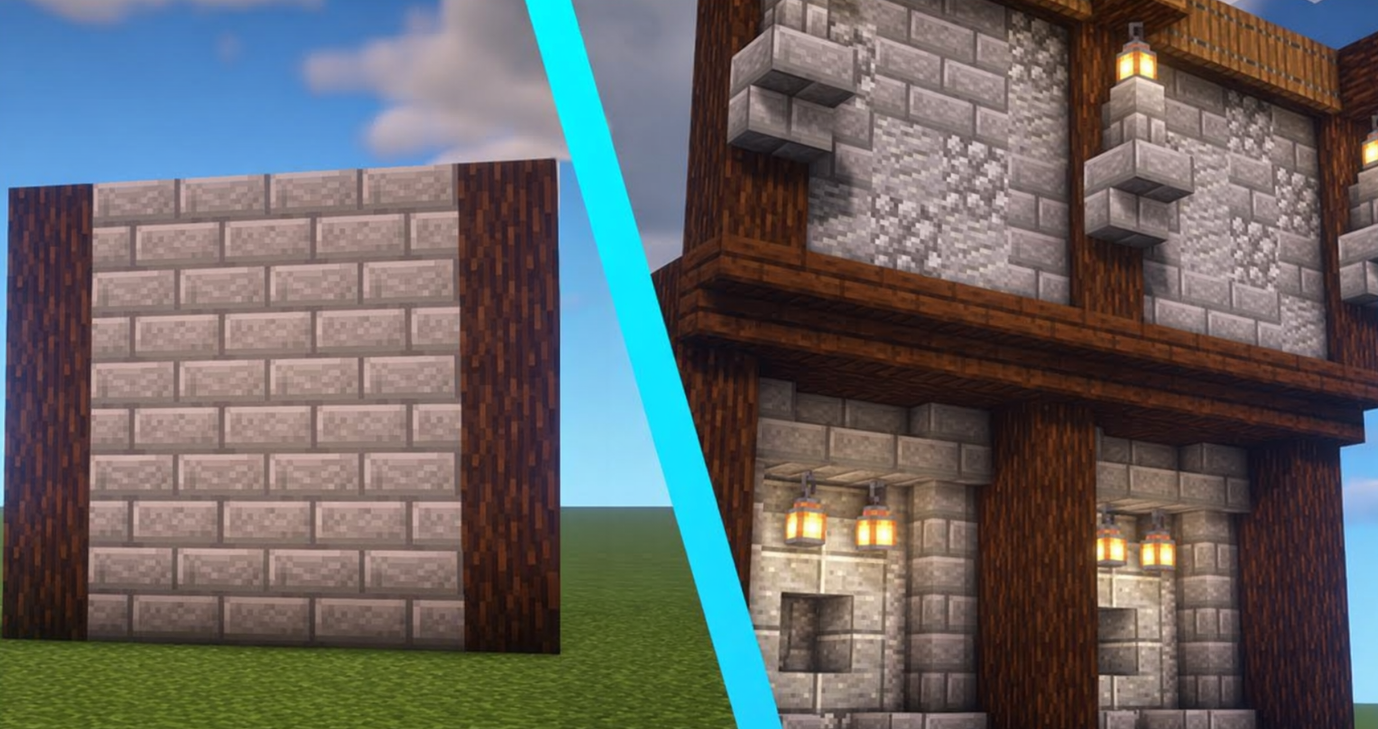
And yes, texture is important. It is not necessary to sculpt one type of boards on the entire wall. Take a mix of about 80% of the base boards and 20% of related shades — this gives depth. Steps and semi-blocks create “shadows” on cornices, in niches, under canopies and shelves for pots. And a couple of random “aged” blocks — dark boards or a battered cobblestone — will make it look like the house stood here long before you. And it’s always nice.
Types of roofs in Minecraft and how to build them
The roof solves a lot, if not everything. Even a simple cube with a well-made top ceases to be a boring box and acquires character. Let’s look at the main options — from those that are built on the first day to more complicated structures.
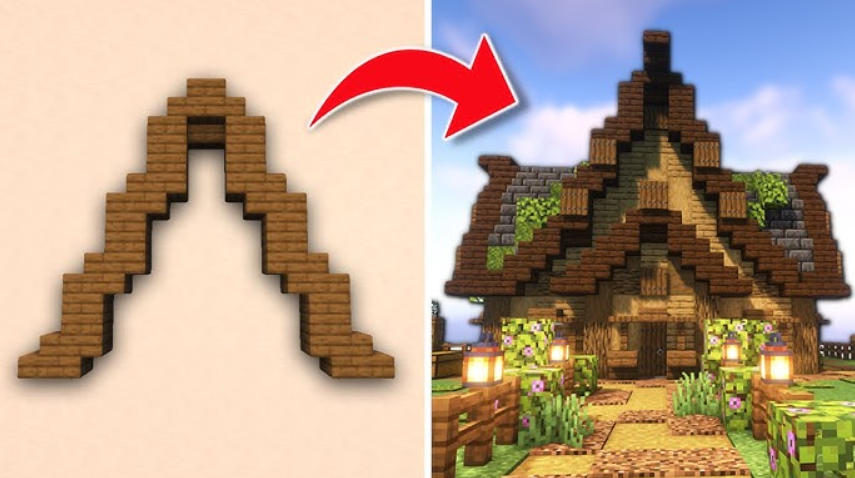
Dvuskatnaya is a base tested by millions of players. It is done elementary: we let the steps and half-blocks go downhill, leave an overhang in one block on the sides, and sew the gables with boards. To avoid looking too simple, decorate the gables with hatches or plaques — the texture will immediately appear. By the way, this is the case when the classics don’t bother you.
Valmovaya sounds more complicated than it really is. The bottom line is that the ramps come from all four sides, not just two. Using steps, we take out the slope along the perimeter, the overhang is also in one block. It looks more solid than a gable, although there is not much more work. A good compromise between “I want to be beautiful” and “I don’t want to suffer for three hours.”
The parapet is the choice of those who love modern minimalism. A flat roof with sides made of semi-blocks at the edges. No ramps, no messing with corners. Add a couple of ventilation pipes from a stone fence or hatches, install solar panels from daytime sensors — and now you are an architect from the 21st century in the world of blocks.
An attic is when the slope is broken. At first there is a steep climb, then a more gentle one. It looks very European and provides useful space in the attic. If you want a bedroom with a view of the stars or a cozy room under the roof, this is your option. However, you’ll have to tinker with the geometry a little longer.
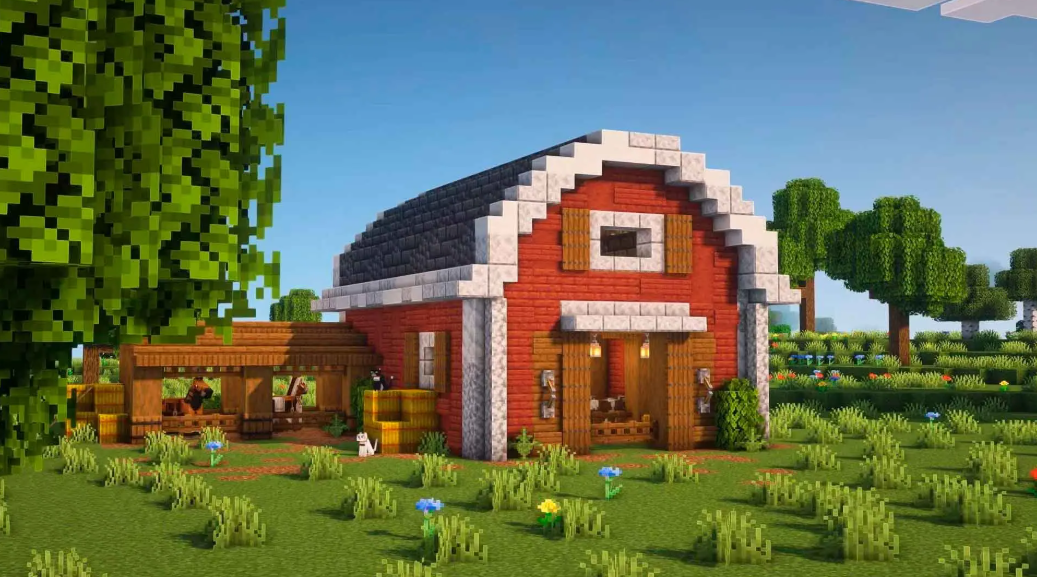
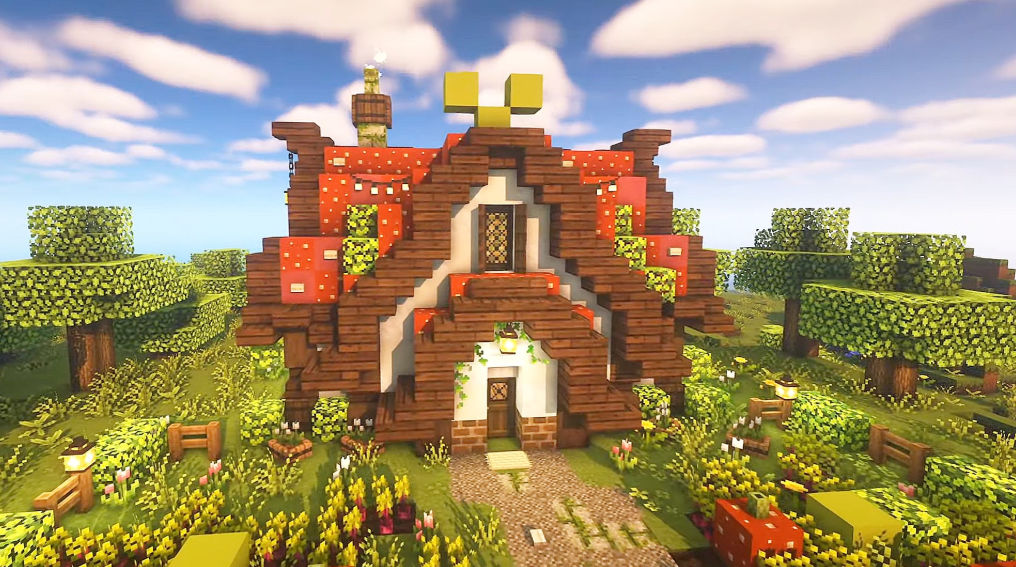
Solomennaya is an unexpected but extremely atmospheric move. Instead of wood or stone, you put blocks of hay. Yes, they are burning, so lightning and lava nearby are prohibited. But the visual is amazing, especially for rustic buildings, farmhouses or medieval taverns. And no, this is not a “collective farm”, this is a conscious design technique.
A couple of assembly tips
Do not try to lay out each ramp one block at a time with a painful angle selection. First make a “frame” around the perimeter of the steps, outline the outline of the roof, and then calmly fill in the middle. So it’s easier to keep the symmetry, and you save resources.
Emphasize the canopies and canopies with a stone fence or copper blocks — the latter oxidizes over time and gives a pleasant greenish tint, which looks unexpectedly good for the roof.
Dormer windows are small gables with a window directly in the roof slope. They add liveliness to the facade and at the same time let the light into the attic. They can be made from literally three or four blocks, and the effect is like a full-fledged architectural detail.
A chimney made of stone bricks, topped with hatches and a fire hidden inside, gives off a light smoke. A small thing? Yes. But it’s these little things that make you believe that someone is living in the house, and not just storing cobblestones.
Base lighting in Minecraft to protect against mobs
The light in Minecraft solves two tasks simultaneously: it prevents hostile mobs from spawning and creates a mood. And if the first is a matter of survival, then the second is a matter of aesthetics, which is often overlooked.
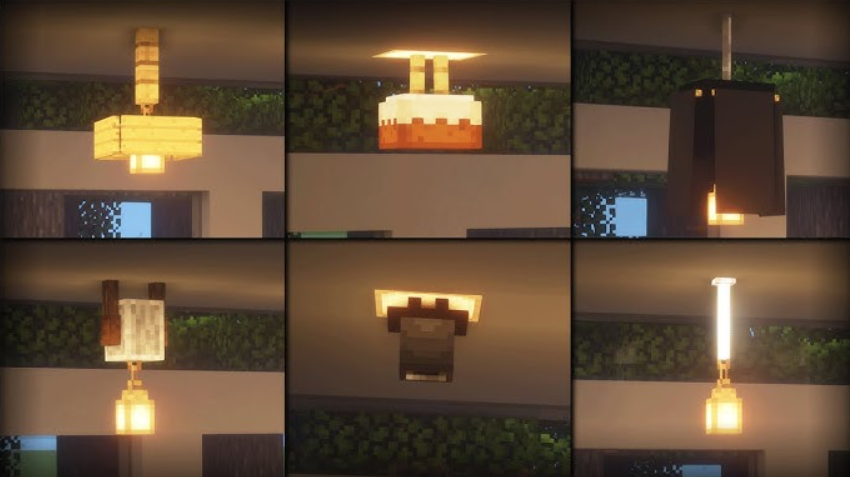
In principle, there should be no dark corners inside the house. But this does not mean that it is necessary to cover all the walls with torches, as in the mine. We hide torches behind paintings or in niches behind half-blocks. We hang lanterns on chains — they look much more noble and give a steady warm light. A lightstone or sea lanterns can be sunk into the floor and covered with a carpet: it’s light and you can’t cling to your feet.
The same rule applies from the outside, but adjusted for scale. We put lampposts every eight to ten blocks along the paths. There is a mandatory lantern above the entrance door, which is both a landmark and protection from intruders. The beds and paddocks should also be lit, otherwise one morning you’ll go out for carrots and there’s a zombie hanging out.
And yes, the bed. I set it up, clicked it, and the respawn point is fixed. A banality that is forgotten exactly until the first night death somewhere in the woods three hundred blocks from the base. Don’t be that guy.
Combine light sources wisely. Lanterns for beauty and formal areas. Torches for technical rooms and temporary solutions. A lightstone or marine lantern under the floor or in the ceiling — when you need a lot of light without visible sources. All together, it provides both security and a screenshot-level image.
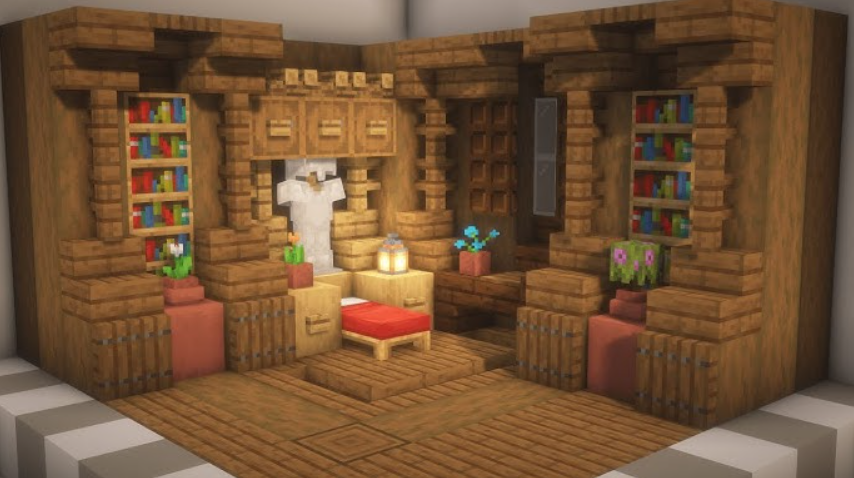
Minecraft interior and furniture for a cozy home
Minecraft interiors often suffer from the “put chests in a row and you’re done” syndrome. But in vain. Because even a basic environment can turn an empty cube into a place where you want to return after a long day in the mines.
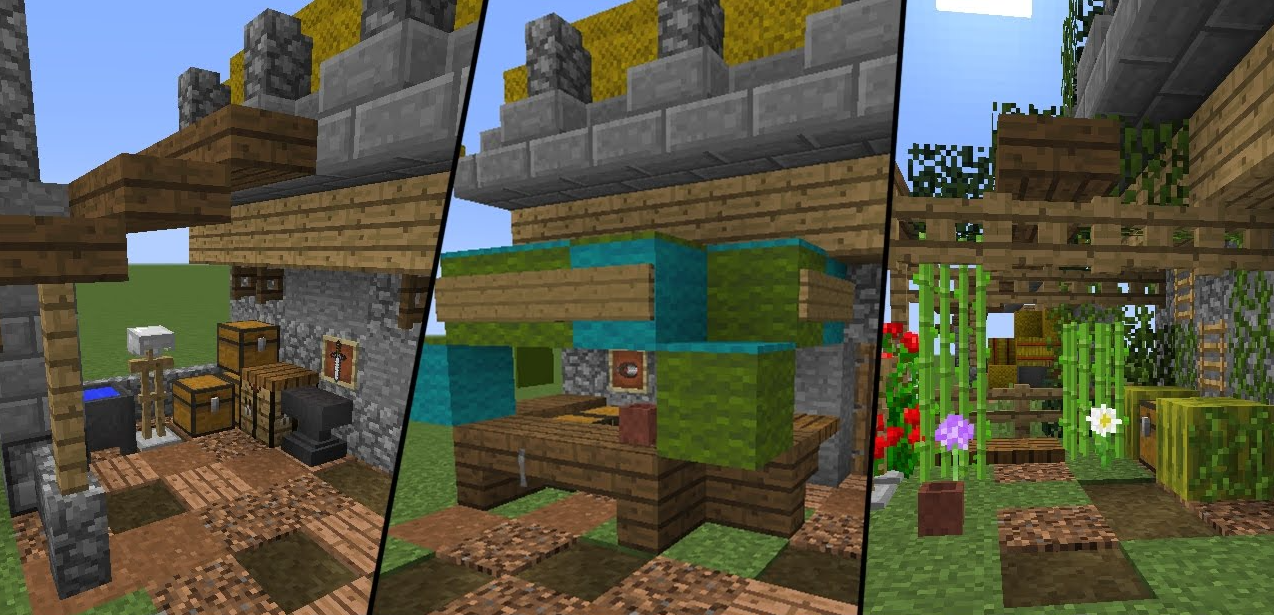
A beginner’s base is a necessary minimum, but even it can be served carefully. A workbench, a pair of furnaces, a smokehouse for cooking and a smelting furnace for ore. The stone cutter is stuck somewhere on the side, it saves a lot of resources when creating decorative blocks. Chests do not have to be molded close to the wall, but rather: make a niche or stack them at intervals. A bed, bookshelves, and a couple of paintings on the walls are no longer a barn, but a living space.
The middle stage implies that you already have the resources to fully customize. The enchantment table is surrounded by fifteen bookshelves (a classic 5×5 square with an aisle). We put the anvil next to it so as not to run between floors. We design the kitchen corner as a full-fledged cooking area: a cauldron for potions, a campfire covered with a grate imitates a stove, a smokehouse is built into a “countertop” of semi-blocks. Stairs to the attic or basement, and the space below it is an ideal place for a pantry or a small warehouse.
The furniture in the game is always an illusion, but it works. The chair is made elementary: a semi-block for the seat, two plaques on the sides as armrests, and an iron door behind the back instead of the backrest. The table can be assembled from a semi-block and a fence from below, or use an inverted ladder as a tabletop on fence legs. Cabinets and shelves are imitated by hatches and real bookshelves. Curtains are just banners around the edges of a window opening, but how they transform a room.
The floors also deserve attention. The herringbone laying of alternating oak and birch planks gives the feeling of parquet. The combination of stone slabs and dark oak planks creates an industrial loft vibe. A carpet made of colored wool in the living room adds comfort in just a couple of minutes of work.
A separate theme is seasonal decor. For Christmas, we add a fir tree with lights and colored wool blocks for gifts. Halloween pumpkins with candles inside and cobwebs in the corners. Yes, it’s pure pampering, but it’s these things that make a house alive, not just a functional box.
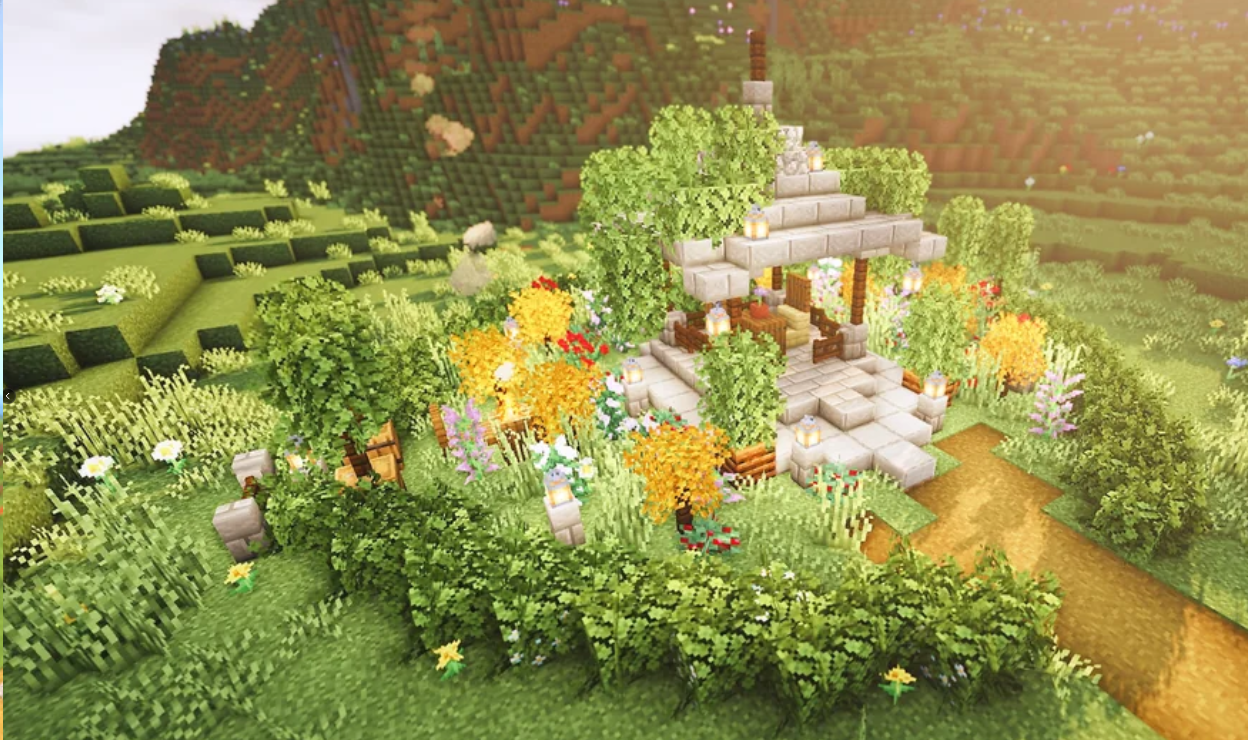
The yard and buildings around the house in Minecraft
A house without a yard is like a skin without a cape — everything seems to be in place, but something is missing. A couple of simple elements from the outside instantly enliven the space and make the base a full-fledged estate.
Lift the porch onto the half-blocks so that the entrance is not flush with the ground. Manhole railings or stone fences will add volume. Divide the garden according to the classic 9×9 scheme with water in the center — it has been tested for generations. For the entourage, put a scarecrow: a fence as a base, a pumpkin or a head on top, and now the beds look like real ones.
The well is not necessary from a practical point of view, but visually gathers the yard into a single composition. A round base of stone bricks, a roof of steps, a hanging chain with a bucket — five minutes of work, and the feeling that Hobbits live here.
Make a cattle pen not just a fence in a square. A gate with a canopy, a composter feeder inside, a couple of bales of hay for decoration. Assemble the horse shed from logs as uprights and a semi-block roof. A wood—burning warehouse – a pile of logs under a canopy with a nameplate — adds household authenticity.
Make paths between buildings not just any way, but in a meaningful way. Trampled earth or gravel gives a visual difference from grass. Place stone slabs as steps at different heights. All together, it forms routes that are pleasant to walk along, and not just fly elites past all this beauty.
How to expand the base in Minecraft without demolishing the walls?
Sooner or later, there is not enough space in the main house. Either the chests are bursting at the seams, or you want a separate workshop, or you just decided that a bedroom on the ground floor is not comme il faut. There are three expansion options, and all are good in their own way.
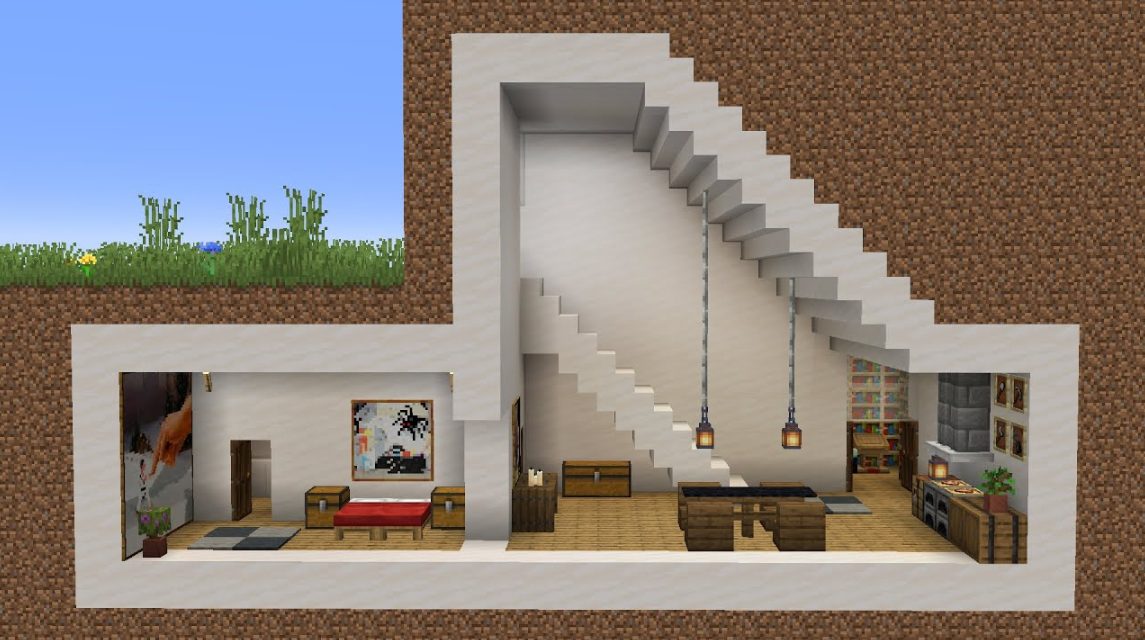
We dig the basement immediately with a ladder at least two blocks wide, so as not to squeeze sideways. We strengthen the walls with stone bricks, arches made of semi-blocks add strength to the appearance. The lighting is built directly into the floor so as not to clutter up the low ceilings. An ore warehouse, automatic furnaces and everything that requires coolness and silence are ideally placed here.
The attic is always about comfort. The bedroom under the roof slopes with a pair of windows right in the roof looks like a shot from a Scandinavian movie. Chests can be built into niches under the slants, the bed can be placed in the center, and a chandelier can be hung on a chain above it. If the height allows, add a small balcony through the dormer window.
It is better to make extensions either symmetrical to the main house, or consciously asymmetrical, but with the repetition of materials and the rhythm of the facade. A 5×7 workshop with a separate entrance, a 5×5 turret for an observatory, a winter garden with a glass wall and plant tubs. The main rule is that the new part should look like it was conceived from the very beginning, and not stuck in at the last moment because the chests overflowed.
Minecraft House Design and Style Tips
There are several universal principles that work flawlessly in Minecraft.
Depth. A flat wall of one type of blocks is boring. Add at least one block of ledge around the corners or use steps and half-blocks to create a relief. Even minimal detail transforms the “box” into architecture.
Contrast. A dark roof requires light walls. Or vice versa, if you’re building a gloomy castle. Oak plus spruce, birch plus stone, white concrete against a dark wood background — these pairs work flawlessly. Don’t be afraid to mix textures, but keep your palette within two or three basic materials.
Rhythm. Place the windows at regular intervals. Keep a uniform level of window sills and canopies above them. Repeat the decorative elements — columns, pilasters, cornices — with the same step. It gives you a sense of thoughtfulness, even if you improvised along the way.
Details. Pots of flowers at the entrance. Creepers or foliage climbing on the wall. The plates are like platbands. The lantern above the door. Banners on the facade. All this takes seconds, but it’s these touches that distinguish the house they live in from the house they just store things in.
Environment. The path leading to the porch. A vegetable garden behind the house. A tree with a bench under it. The house does not exist in a vacuum, it is part of the landscape. And when there is life around, the building automatically looks twice as cool.
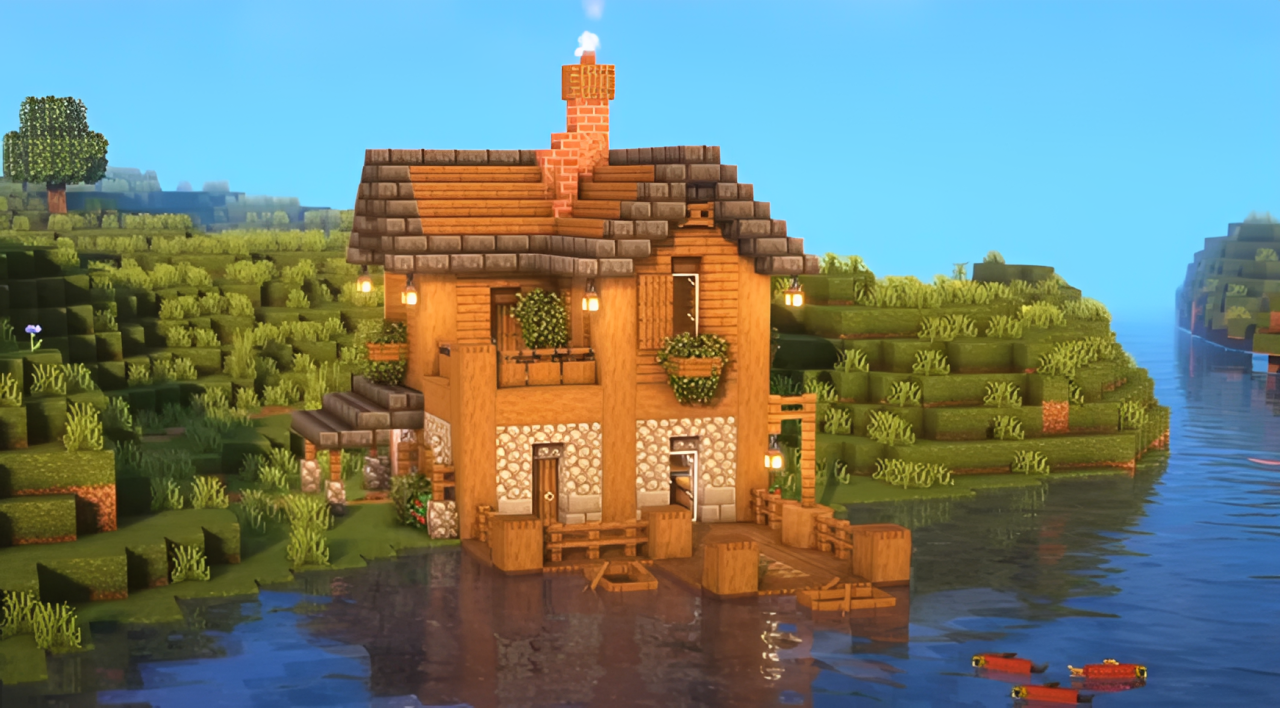
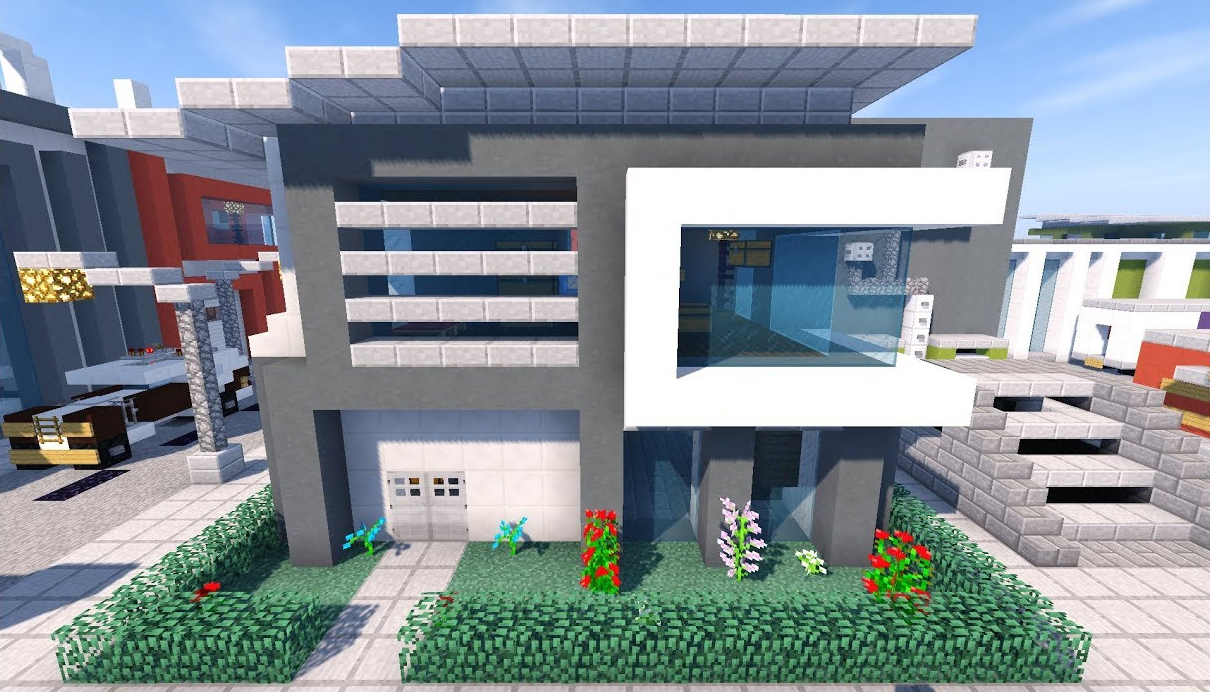
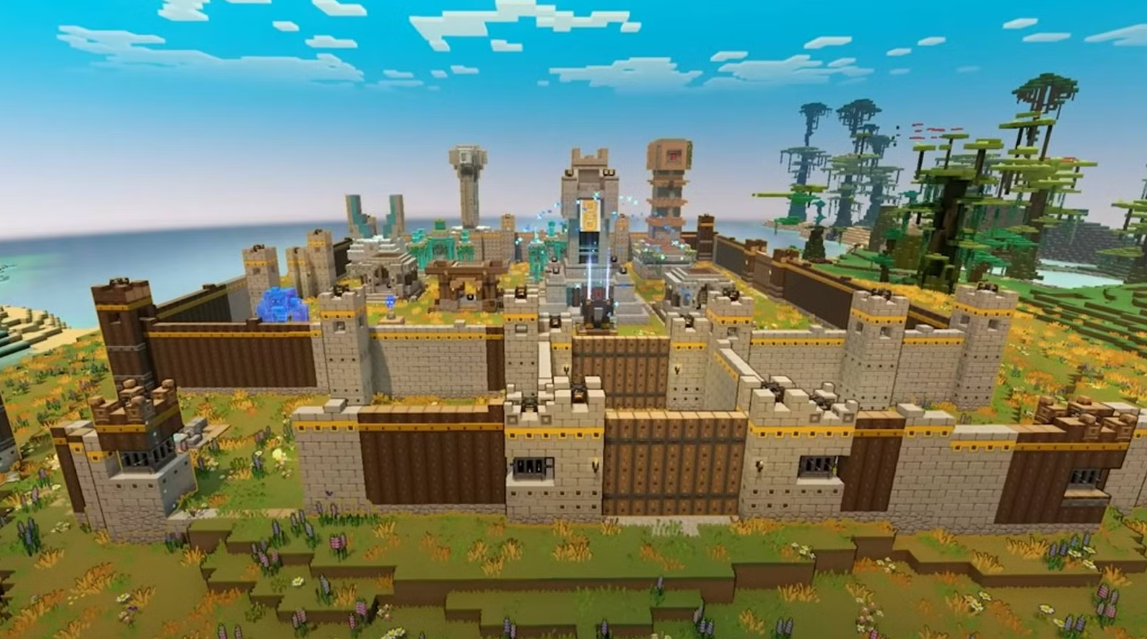
Style. Choose a design code and don’t change it. Rustic comfort — logs, oak planks, hay in the attic, lanterns instead of torches. Modern minimalism — white and grey concrete, panoramic windows, flat roof with garden above. Castle aesthetics — stone bricks, 5×5 towers, battlements on the walls, banners with the coat of arms. Treehouse — a platform made of dark oak, bridges on chains, vines, lanterns under the canopy. The underground shelter consists of semi—block arches, a light in the floor, and a glass wall facing a natural grotto.
Stick to the chosen direction and the house will look solid, and not as the result of a creative dispute between five architects with different tastes.
Mistakes when building a house in Minecraft
You start building, and everything seems to be Feng shui, but the result is flat and boring. Is this a familiar situation? Most often, the problem is in typical jambs, which allow almost everything.
Flat walls without a frame. One plane of planks or stone — and the house looks like a box. You need a frame made of logs in the corners and frames around the windows — volume immediately appears.
Overkill with materials. Visual noise kills character. Two or three types of blocks are the gold standard. The fourth one is for accents only.
The windows are “random”. You put them at different heights, and it turns out to be chaos. Make a deal with yourself: all windows are at the character’s eye level and with a single topline.
The roof — how they forget it. Half of the style goes down the drain if there’s just a flat roof on top. Overhangs, ridge, pediments are a must.
There is no light in the yard. Mobs ruin the evening and the lawn. Torches or lanterns around the perimeter — and you can safely go out at night.
A hodgepodge of styles. Modern minimalism + medieval half-timbered in one facade look alien. Choose one thing.
Cramped passageways. Inside, the corridors are one block wide — it’s hell. Make at least two blocks, and at least three blocks high.
The door has no track. It looks like the house is unfinished. A path made of gravel, rainforest, or steps is already in order.
Minecraft Construction Life Hacks from Experienced Players
In short, the point is that it changes the game.
The template is 9×11. The golden mean. There is enough space for everything — a bedroom, a storage room, a workbench area, even a small hall. It looks neat, not like a barn.
Triple layer on the facade. Frame (logs) → plane (planks, stone) → details (hatches, steps, plates). Without it, the facade is flat as a board.
The gradient of the stone. The ground has a cobblestone (rough, heavy). Above— there are stone bricks (quieter). On the eaves there is a smooth stone or slab (light, clean). Magic works.
Hidden light. Lanterns under the hatches, a lightstone behind the foliage, torches behind the paintings. There is light, but there are no visible sources.
Secret entrance. Sticky pistons + moss wall, lever under carpet or behind painting. Or a button in an unexpected place. My friends will be shocked.
Scaffolding. Quickly climb up and down. And don’t break your neck removing the roof. Forget about waterfalls and sand towers.
Copper parts. Copper ages beautifully over time, from orange to green. Waxed, it stays as new. Keep that in mind.
Underground “modern”. White concrete + black glass + water behind the glass. The effect of the laboratory or bunker of the future. It looks expensive.
Ready-made house designs in Minecraft for all occasions
Here are ready-made schemes so as not to suffer from scratch.
Hut “from scratch” — 15-20 minutes
The area is 7×9. Logs in the corners, oak planks on the walls. The roof is gable-roofed with spruce steps, with an overhang in one block. A small porch with a lantern. Inside there is a workbench, stoves, a wall of chests, a bed. Everything.
Village house
The frame is made of logs, the walls are made of planks, the roof is made of dark spruce. A porch on half-blocks, a lantern above the entrance, a 5×5 vegetable garden on the side. Barrels and a composter for the mood are not the same without them.
The castle is a mini fortress
The tower is 5×5, nine blocks high. The teeth of the steps around the perimeter. The walls are made of stone bricks, the corners are carved (steps or whole blocks). Wooden floors inside, torches on the fences, a banner with the coat of arms at the entrance.
The modern cube
White or grey concrete, lots of glass panels. It has a flat roof with a parapet and a garden of foliage. The floor is smooth stone or quartz. Minimum decor, maximum space.
A house on a tree
A 9×9 platform on a thick trunk. Suspension bridges on chains to neighboring trees. Manhole handrails, ceiling lights, elevator vines or a water column. Foliage is like walls — beautiful, easy to expand, mobs won’t get stuck.
Underground bunker
The entrance is a trapdoor in a gazebo on the surface. The shaft is 3×3 down, with waterfalls or stairs in the corners. The main hall is 11×11, with semi-block arches, and the light is built into the floor. The glass wall to the next cave is a panorama of stalactites.
Minecraft House Check Checklist before the Finish Line
Go through the list and you’ll save hours of rework.
-
Is there a foundation? The house does not “float” in the grass. At least one layer of another block at the base.
-
A roof with an overhang? The gables are closed, the ridge is neat, there are no holes.
-
Are the windows on the same level? Are there window sills (steps) and architraves (hatches or frames)?
-
A door with a walkway? A lantern above the entrance, a step in front of the threshold.
-
Is it light inside? Are there any dark spots in the yard where mobs can spawn?
-
Is the warehouse marked? Frames with objects above the chests or colored carpets by department. Are the aisles wider than one block?
-
Is there a place for an upgrade? An attic, a basement, or an extension — so as not to destroy everything at the root later.
Base protection in Minecraft on a multiplayer server
Building a beautiful house is half the battle. It still needs to be retained on the multiplayer server. In solitary, the maximum trouble is a creeper on the doorstep and a skeleton on the roof. People are added to this on the server, and they are much more inventive than any mob. Someone will “accidentally” look into the chest, someone will forget to close the gate, and someone will just decide to check what your walls are made of. Spoiler alert: if it’s made of wood, the check will be quick.
How to build a perimeter so that mobs don’t walk around the yard?
The working scheme is simplified: two circuits. The exterior is a fence, stone fence, or wall with a single controlled entrance. The inner one is a living area with doors, hatches and everything else. Between them is a buffer yard, where nothing spawns anymore and no outsider wanders.
Next— basic hygiene from mobs. Place lighting around the entire perimeter, without dark corners and “blind” areas near the fence. Make the floor at the threshold solid, without height differences: zombies and creepers love to cling to steps and half-blocks. Cover the roof and canopies completely, because mobs find loopholes where you don’t expect them (and this is no exaggeration).
Automatic doors and piston entrances also work, but the main thing here is not to overdo it. If the mechanism breaks navigation inside the database, it’s useless. Water, elevation changes, and narrow corridors gently cut mob routes: it’s harder for them to get to you when the yard doesn’t look like a level parking lot.
A separate point is farms. Do not mold them close to the residential building. Divide the utility part and the house at least by a path or a mini-yard. Visually, the farm eats up the facade, and on the server it is also a security hole: having gained access to the garden, the guest finds himself one step away from the warehouse.
Griefers: what really saves the database on the server
The first and obvious one is private. Take the plot right away, don’t build on trust. On servers with role-based access, configure rights in a granular manner: who comes in, who opens the doors, who touches the containers. Without this, any wall is decorative.
The layout also decides. Let the entrance be read from the outside, but it does not provide an overview of valuable rooms. Hide rare resources deeper: basement, secret room, double storage. The facade of glass and wood looks impressive, but on a server without block protection, this is an invitation for anyone with a pickaxe.
The best architecture for multiplayer is the onion. Outside there is a public area: terrace, vegetable garden, decor. Next is a semi-private courtyard. And in the core there is a workshop, an ender chest, an enchantment table and a main warehouse. This way, the base retains both atmosphere and vitality.
Quick scheme: what protects and from whom
Base Layout & Security Guide
Lighting, a solid floor and a closed roof close the issue with mobs. Private plot, role—based access and competent layout – with grippers. And if the server has GriefPrevention or an equivalent, the claim model will fine-tune the rights to doors, containers, and territory. On a normal server, this is not a bonus, but a necessary minimum for any serious construction.
The order of building a house in Minecraft by steps
First, choose a place and mentally mark the plan. Then the frame, the walls, the roof, in that order. Then there’s the light, the yard, and the small details. Without haste, step by step. As a result, the house turns out not to be a “chest barn”, but a point on the map where you want to click “Save and exit”.
And then there is a style to suit the mood: rustic comfort, strict modern, fortress, tree house or underground “laboratory” version. Choose, build, make it your own and properly defend the bases in multiplayer.