Stellar Glimmer is the collective name for a group of enhanced Cryo Reactions introduced in version 7.0. It includes Stellar Conduct (Cryo + Electro) and Stellar Swirl (Cryo + Anemo). When a character activates any of these reactions, they enter the “Shine: Stellar Glimmer” state—a special status that can be used by certain talents and constellations. Only three characters can activate these reactions: Sandrona, Cryo Traveler, and Odette. Without them, the same elemental combinations produce the standard Superconductor and Dispersion.
Table of Contents
What is Stellar Glimmer in Genshin Impact?
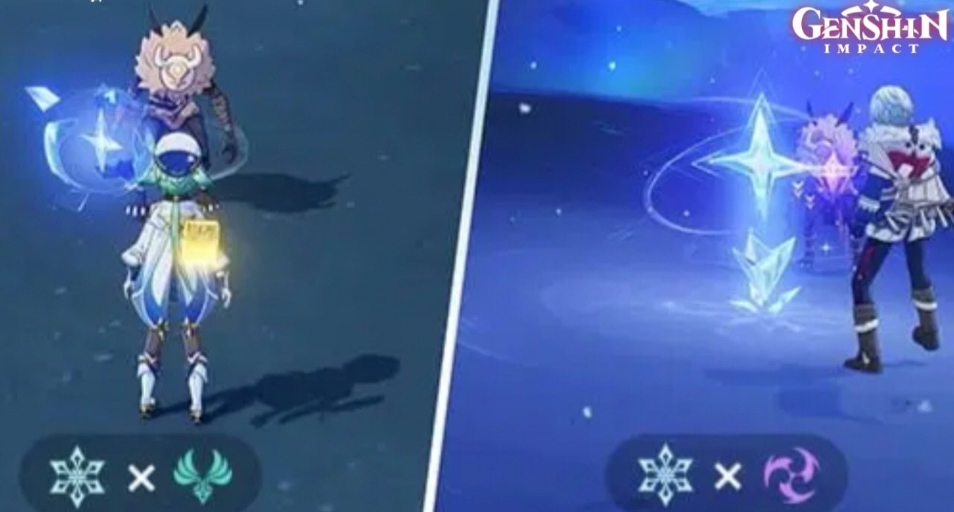
Stellar Glimmer is not a single reaction, but a whole group. Currently, it consists of two reactions:
-
Stellar Conduct—an enhanced version of Superconductor (Cryo + Electro).
-
Stellar Swirl is an improved version of Cryo Dispersion (Cryo + Anemo).
In future updates, when new Cryo characters are added to Snezhnaya, other improved Cryo reactions may be added to the group.
Why did the developers introduce a generic name? To simplify the description in the game text. Instead of listing each reaction, they write “Stellar Glimmer damage”—and this automatically applies to all reactions in the group. For example, Odette’s passive talent “Ascension” increases Stellar Glimmer’s damage by 1.5% for every 100 attack power above 1000 (maximum +30%). Thanks to this generalization, the talent works with Stellar Conduct, Stellar Swirl, and any future reactions of this type.
Stellar-Conduct — Cryo + Electro
To activate Stellar Conduct, you will need a team with Cryo and Electro characters, as well as one of the triggers—Sandrona, Cryo Traveler, or Odette. As soon as you cast Cryo and Electro on an enemy with the trigger, Stellar Conduct is activated instead of the regular Superconductor.
What happens in battle:
-
A Polestar Field appears on the field—a visible area within which allies gain a bonus to Cryo and Electro damage, and enemies gain a reduction in physical resistance.
-
The reaction itself does not deal direct damage—its value lies in the buffs and weakening of enemies.
-
You cannot have Polestar Field and Stellar Vortex (the area created by Stellar Swirl) at the same time—when one reaction activates, the other’s field disappears.
Stellar Conduct is especially effective in teams where Cryo or Electro damage dealers primarily deal damage, as well as physical units that benefit from the physical defense reduction.
Stellar Swirl – Cryo + Anemo
This reaction is activated by combining Cryo and Anemo with a trigger (Cryo Traveler or Odette – Sandrona does not work here). Instead of a regular Dispersion, Stellar Swirl is created.
Features:
-
Creates a Stellar Vortex on the field – a rotating sphere that explodes after a delay, dealing Cryo damage.
-
If the reaction is reactivated before the explosion, the vortex’s level increases, increasing the damage upon explosion.
-
Unlike Stellar Conduct, this vortex can deal critical damage – critical chance and damage are fully effective.
-
Cannot coexist with Polestar Field.
Stellar Swirl fits perfectly into teams with Anemo supports and gives more control over the battlefield due to the ability to amplify the explosion with repeated triggers.
What is the “Stellar Glimmer” state?
It is important not to confuse the reaction (Stellar Glimmer itself) with the state the character enters.
When a character activates Stellar Conduct or Stellar Swirl, they gain the corresponding status:
-
when activating Stellar Conduct — “Stellar Conduct”;
-
when activating Stellar Swirl — “Stellar Swirl”.

Either of these statuses is considered the “Stellar Glimmer” state. This means that if a skill or constellation specifically mentions “Stellar Glimmer,” it will trigger in both cases.
A classic example is the second Qi Qi constellation. Its description reads: “Stellar Glimmer: Qi Qi’s attack power is increased by 50%.” This means that when Qi Qi is in the “Glow: Stellar Conduct” or “Glow: Stellar Swirl” state (she does not need to be the trigger, just be in the party), her attack increases by 50%. Simple and effective.
How to see the “Glow” state in the interface
In-game, the state is displayed in several ways:
-
Visual effects on the field – if you see a shimmering purple-blue area (Polestar Field) or a rotating vortex (Stellar Vortex), it means the reaction has triggered, and characters within the area of effect are affected.
-
Status icon above the character – at the top of the screen, next to other active effects (buffs, shields), the “Glow: Stellar Glimmer” icon (or one of its subtypes) appears.
-
Skill highlighting – if a character has a talent or constellation that is enhanced by the state, the corresponding skill icon will sometimes light up or change color.
These tips will help you know exactly when the state is active and when you can use buffs.
Who can activate Stellar Glimmer
Only characters with the Stellar Linchpin ability can activate Stellar reactions. As of version 7.0, there are three such characters:
Important: If none of these characters are in your party, normal elemental combinations (Cryo + Electro, Cryo + Anemo) will produce the standard reactions—Superconductor and Dispersion. It is the trigger that transforms them into an enhanced version.
-
Sandrona is a highly specialized trigger for Stellar Conduct. Suitable for teams that emphasize this reaction.
-
Cryo Traveler – After activating Resonance with the Snow Statue, he can activate both reactions. A flexible option available to all players.
-
Odette – The most versatile trigger, as it works with both reactions and has a passive talent that increases Stellar Glimmer’s damage through ATK.
Damage Scaling: Why ATK is More Important than Elemental Mastery
This is the most important point that radically changes the approach to character builds. Unlike all other Elemental Reactions in Genshin Impact, Stellar Glimmer’s damage scales not with Elemental Mastery, but with Total Attack Power (ATK).
In normal Reactions (Steam, Melt, Superconductor, Disperse, etc.), EM is responsible for damage. But Stellar Reactions are designed differently: the higher your Attack Power, the more powerful Polestar Field and Stellar Vortex are. This makes builds that rely heavily on Elemental Mastery useless for Stellar characters. Stat priority for Stellar triggers:
-
Critical Damage / Critical Chance (as usual for damage dealers)
-
Attack Power (ATK%)
-
Elemental Mastery – far behind, has almost no impact
The example with Odette clearly demonstrates this: her passive talent grants up to 30% bonus damage to Stellar Glimmer if her attack power exceeds 1000 (1.5% for every 100 ATK). No mention of EM – only pure attack.
This means that for teams using Stellar reactions, attack power buffers like Bennett, Sarah, or other characters with high ATK buffs are especially valuable. Ignore EM in builds – it will not help.
Can Stellar Conduct and Stellar Swirl be used together?
No. Polestar Field and Stellar Vortex cannot coexist. If you activate Stellar Swirl while the Stellar Conduct field is active, the field will disappear and a vortex will appear in its place. And vice versa.
Therefore, in each battle, you should choose only one of the reactions depending on your team composition and the enemies.
When to choose Stellar Conduct:
-
In teams with strong Cryo and Electro damage dealers.
-
If your team includes physical units (the field reduces the enemies’ physical defense).
-
Against enemies with high elemental resistances, the Cryo/Electro damage buff will help break through their defenses.
When to choose Stellar Swirl:
-
In teams with Anemo characters (Kazuha, Venti, Sucrose, etc.).
-
If you need explosive damage, the vortex can be charged multiple times, increasing its total damage.
-
Against groups of enemies, the vortex deals area-of-effect damage and is easy to reactivate.
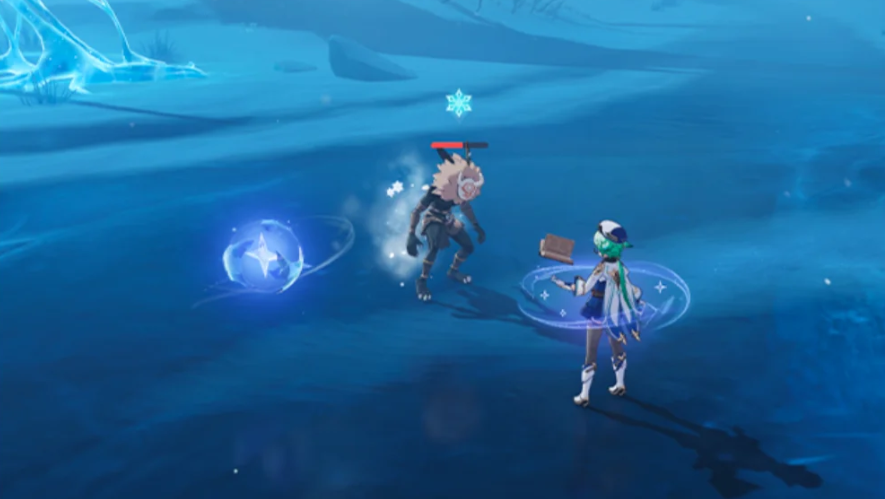
In practice, the choice is dictated by your team. If you already have Anemo, feel free to use Stellar Swirl; if you have Electro, then use Stellar Conduct.
How to activate Stellar Glimmer — step-by-step instructions
For Stellar Conduct (Cryo + Electro):
-
Make sure your party has one of the triggers: Sandrona, Cryo Traveler, or Odette.
-
Apply the Cryo status to an enemy.
-
Apply the Electro status to the same enemy. If the trigger is present, Stellar Conduct will activate, and a Polestar Field will appear.
-
The field is active for a short time, providing buffs and debuffs. Maintain your reactions to keep the field from disappearing.
For Stellar Swirl (Cryo + Anemo):
-
The party must have a trigger—Cryo Traveler or Odette.
-
Apply Cryo status to an enemy.
-
Apply Anemo to the same enemy—Stellar Swirl will activate, and Stellar Vortex will appear.
-
Until the vortex explodes, repeat Cryo + Anemo to increase the vortex’s level—this will increase the explosion’s damage.
-
The vortex will explode automatically after a few seconds or after reaching the maximum level.
Important: Cryo Traveler gains the ability to activate the Stellar Reaction only after resonating with the Snowy Statue in the Snowy region. Make sure you have completed the corresponding quest and activated the resonance, otherwise the reaction will not work.
Key points to remember:
-
Stellar Glimmer is a combination of two upgraded Cryo Reactions: Stellar Conduct and Stellar Swirl.
-
They require one of three triggers to activate: Sandrona, Cryo Traveler, or Odette.
-
The “Shine: Stellar Glimmer” state is activated by any of these Reactions and can enhance talents and constellations (like Qi Qi).
-
Stellar Reactions’ damage is based on Attack Power, not Elemental Mastery—forget about EM, focus on ATK and Crit.
-
Polestar Field and Stellar Vortex cannot exist simultaneously—choose one Reaction to suit your team.
-
Use the step-by-step instructions above to confidently activate the desired Reaction in battle.
Now you know everything you need to know about Stellar Glimmer—all that’s left is to try it out in game and build a team that suits your style. Good luck!