Over the years, Fortnite has transformed from an ordinary “royal battle” into a real training ground for strategists. And if you want to not just survive, but regularly take out rivals and aim at the competitive scene, you can’t go anywhere without the right settings on your PC. We have collected optimized parameters that actually give an increase in FPS and visibility. Go.
Table of Contents
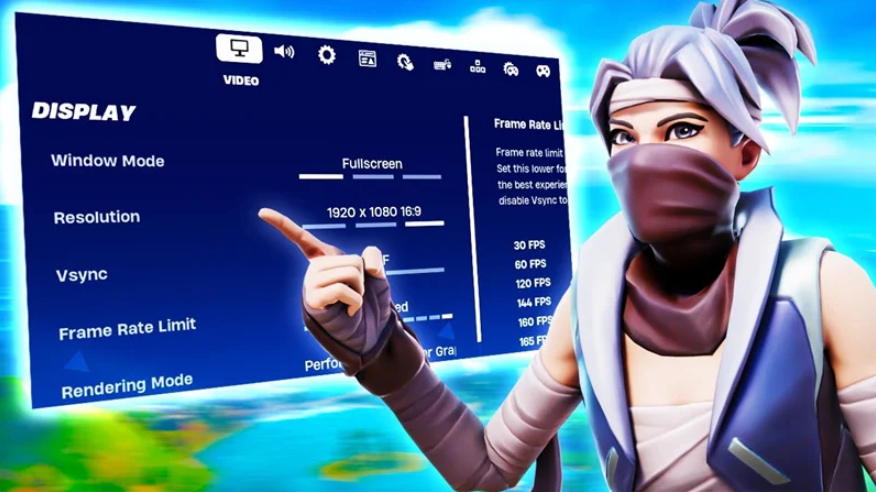
Optimal screen and video mode settings in Fortnite
Let’s start with the base. Full—screen mode is the choice of esports players: it provides the best performance. Although, if you are constantly shuffling windows (chats, stream, browser), you can turn on the window without a frame — switch faster. The main monitor is set by default, the resolution is native to your matrix.
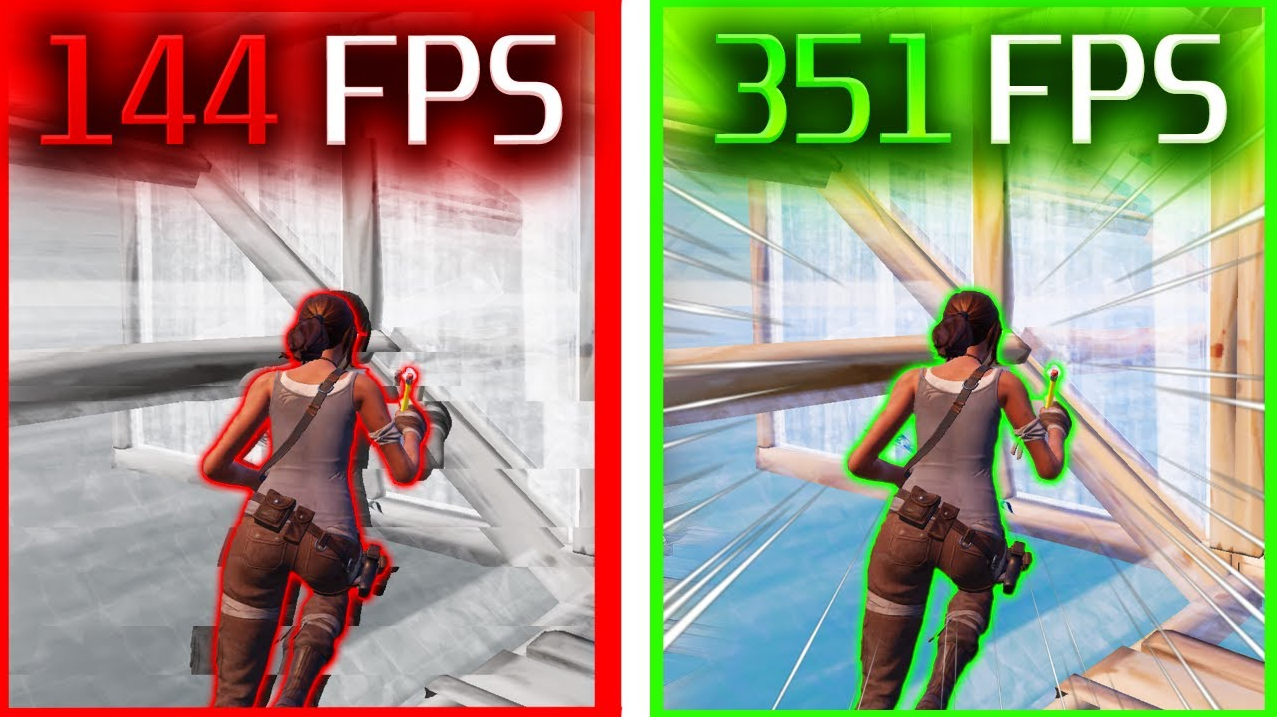
V sync? Keep it turned off to lower the input delay and higher FPS. But when you see horizontal breaks in the picture, you’ll have to turn it on. Limit the frame rate to the monitor’s edge: 60 FPS for 60 Hz, 120 FPS for 120 Hz. There are no surprises here.
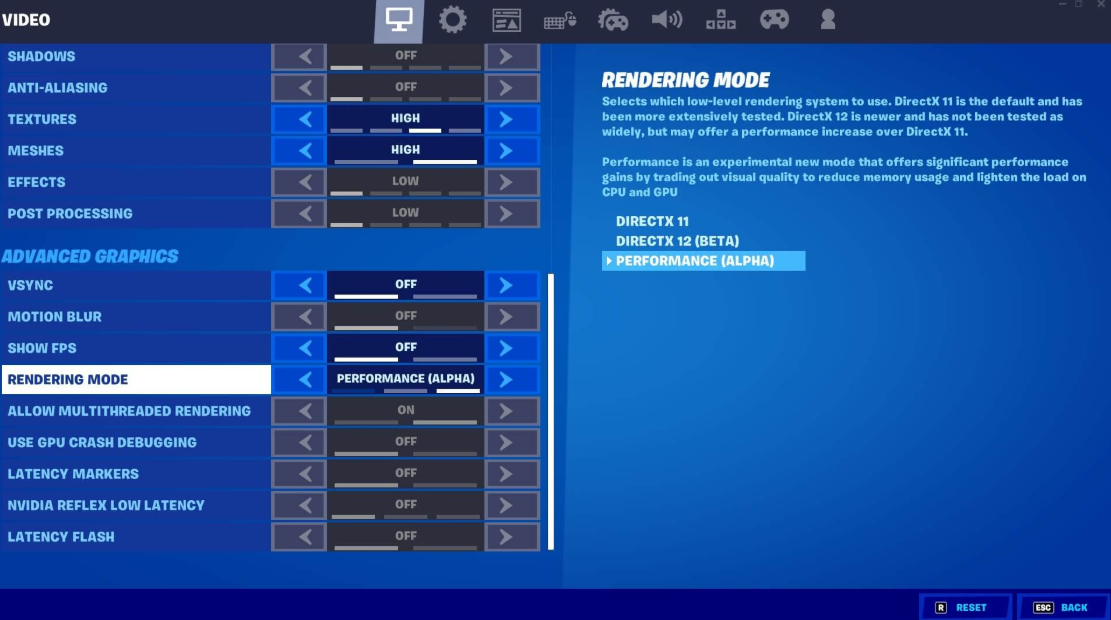
How to choose the rendering mode for high FPS
Now the main choice. DirectX 12 is for powerful systems: the graphics are great, but performance may sag on weak hardware. The alternative is Performance mode: you sacrifice a picture, you get a bunch of frames. By the way, Epic themselves recommend it for weak PCs.
We set the brightness from 100 to 125% — this makes it easier to see the enemy in the shadows. The contrast of the interface is 1x, motion blur is definitely off (you need a clear image). The parallax of the interface should remain turned on — a nice little thing.
Fortnite Graphics Quality Settings for Weak PCs
Anti-aliasing and super resolution are disabled if you need maximum FPS. NVIDIA RTX owners can activate DLSS — the picture will become more beautiful, the price is a couple of frames.
Additional graphics options and NVIDIA Reflex
We set the Temporary Super Resolution to “Performance” for FPS or “Balance/Quality” on top-end PCs. The 3D resolution is 50-100%, the dynamics are turned off.
Virtualized Nanite geometry? Off is an FPS killer. Global lighting is also off, or we set Ambient Occlusion (background shading), it is less voracious. Reflections are off, they devour frames unnecessarily.
It’s interesting with shadows. On weak PCs, they are “Average”: both performance and shadows remain. On powerful ones — “High” or “Epic”, the eye rejoices. The drawing range must be “Far away” or “Epic” in order to see buildings and players from afar. Cut textures and effects for FPS to “Low” or “Medium”, although you can turn them to the maximum on flagship builds. Post-processing is the same.
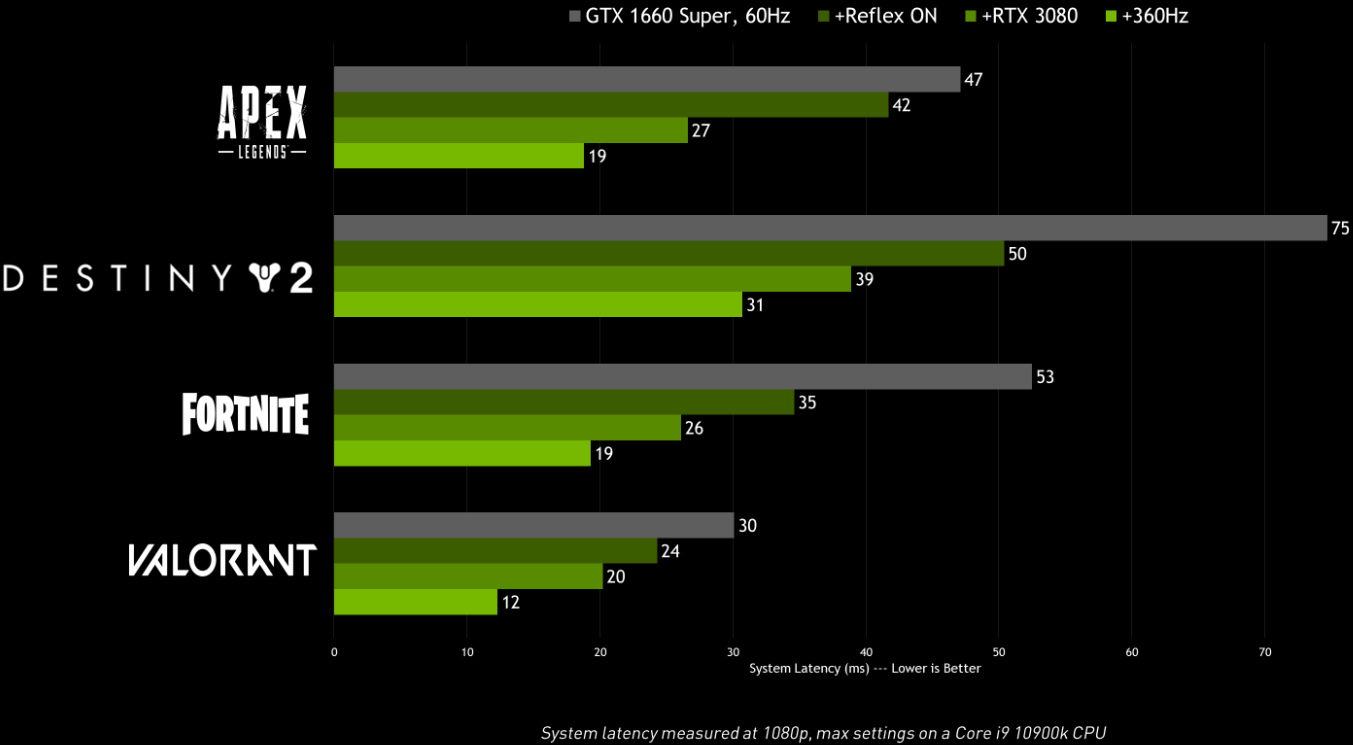
You can turn on FPS at will. NVIDIA Reflex Low Latency (for NVIDIA cards) set “On” or “On. + Boost” — really reduces latency. Everything else — GPU crash debugging, delay markers, performance report — feel free to turn it off. You don’t need them.
Fortnite Sound Settings for Competitive play
With Fortnite audio, everything is simpler: it has almost no effect on performance, so the main thing here is personal comfort. But a couple of things for competitive gaming (and streaming) it’s worth setting it correctly.
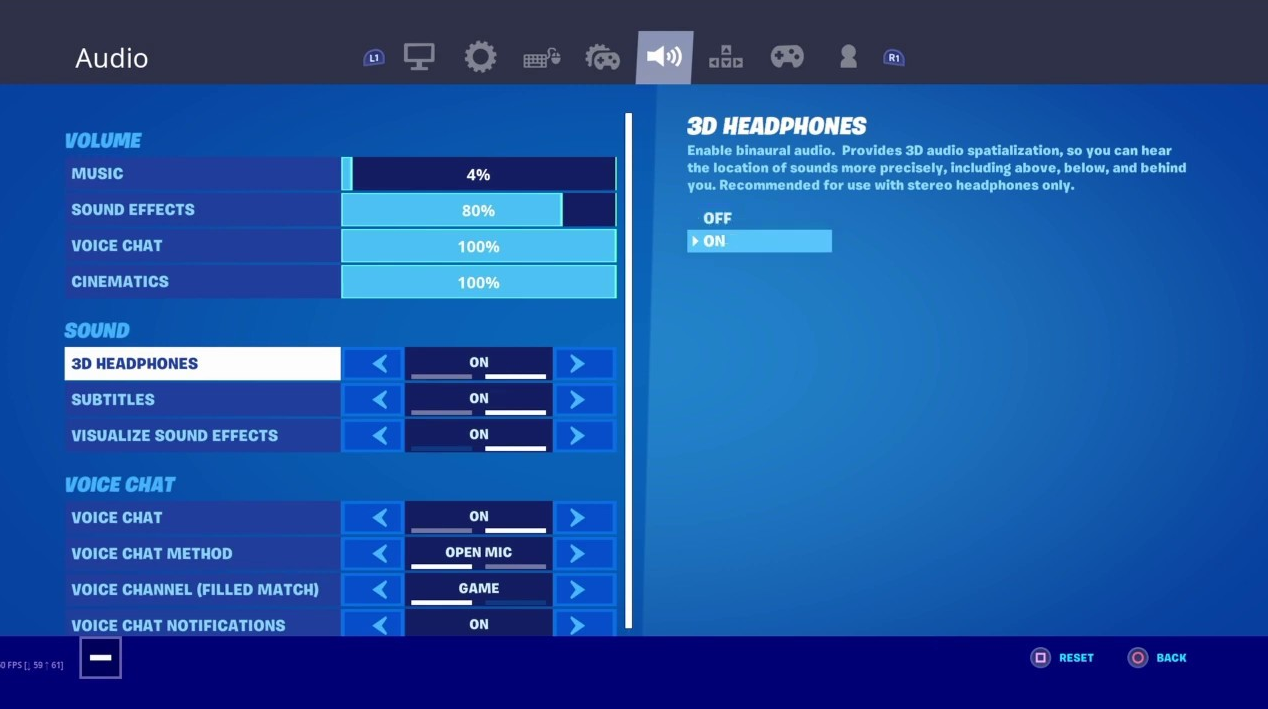
Feel free to leave the sound quality “High”. Turn on the 3D headphones if you use a regular stereo headset. But when you have surround sound from the manufacturer, turn it off, don’t duplicate it.
Now the main cheating tool is the visualization of sound effects. This is an imba, seriously. Turn it on and you can see the directions of steps, treatment, shots, even enemy plans (yes, planning is also displayed). One disadvantage: sneaking players are not highlighted, so quiet mice will have to be tracked by ear.
An important point for content creators is that it is better to turn off licensed audio so as not to get a copyright strike. Regular players don’t have to worry — turn on the best game movement and combat settings in Fortnite.
The game engine starts with the region. Choose the one where the ping is minimal. This is usually your region of residence. Put your native language, there are no options here.
Movement. The running switch is “On” so that the finger does not get tired. We turn off the auto—opening of the doors – the doors will open anyway if you run into them or roll in. It is better to separate the activation of climbing and jumping into different actions: climbing — holding the jump, jumping — holding “Forward”. Otherwise, you’ll always be climbing the wrong way.
Combat is a zone of fine—tuning. A hold to replace an item? Turn it on if you want to change an equipped item to one lifted from the ground, even when the inventory is not full. Keep aiming (ADS) on hold. Note the danger in the scope — be sure to “Turn On”, save a lot of extra clicks.
We categorically turn off automatic weapon collection, otherwise grab any garbage instead of the necessary cannon. The firing buttons for Pump & Dump are not important here, these weapons are not in the loot now anyway. Customize your preferred item slots to fit your keys. Auto—sorting consumables to the right is a useful thing so that first-aid kits and shields do not hang out on the left.
Customize construction and editing for pro players
We turn off simple construction — we need full control. Beginners can include it for simplification, but it limits. We leave the reset of the building selection turned off so that the last element is always used. Turbo building is definitely “On”, hold the button and build like crazy.
Editing is the same: easy editing is off for the pros, on for the novices. Disable pre—editing – enable it so as not to suffer. And most importantly: set auto-confirmation of editing to “Edit” — then you won’t have to press an additional key to confirm. It’s a small thing, but it brings us closer to victory.
Which gameplay features should I disable for the sake of frame gain
The remaining gameplay settings have almost no effect on performance, but a couple of points still deserve attention.
NVIDIA Highlights — if this feature is available, feel free to turn it off. Otherwise, the video card will record your kills in the background, and this is an extra burden. Clicking to search / interact is necessarily “On”, it’s more convenient this way.
Now about the repetitions. Replay recording, replays of large commands, creative replays, and high—quality replays are all mercilessly disabled. They consume FPS, and you don’t need them in regular matches. We’ll leave it only for esports training, but that’s another story.
System optimization and hidden FPS reserves in Fortnite
The settings of the game itself are just the tip of the iceberg. The real smooth picture is hidden deeper: in the bowels of Windows, fresh drivers and clean background processes. There is no dancing with a tambourine here. Competent tweaks of the operating system confidently add +10-30% to the frame rate on medium and weak builds, and irritating microfreezes are firmly cut off on top hardware.
How to optimize Windows for esports and Fortnite
Microsoft’s out-of-the-box OS doesn’t think about gamers at all. It consumes resources for beautiful effects and unnecessary services. Changing the rules of the game. First, we get into the power supply: turn on the preset “High Performance” (or Ultimate Performance via a hidden console command), then go to the system parameters and twist the visual effects to “Ensure the best performance” in order to relieve the processor of unnecessary work as much as possible. We keep the Windows game mode active. But the Xbox Game Bar is being ruthlessly demolished, as this built-in overlay regularly throws up statters at the most inopportune moment.
The hardware acceleration function (HAGS) is generally a tricky thing. For owners of RTX 20/30 series cards, it often gives a pleasant boost, but on old hardware it can severely break stability, so be sure to test. And don’t forget to log into the graphics scheduler: set a hard priority for Fortnite for high performance.
Configuring NVIDIA and AMD GPU drivers to reduce latency
Sitting on ancient firewood means voluntarily cutting your FPS and breaking your frametime. NVIDIA users need an exceptionally up-to-date Game Ready Driver. We go into the control panel and firmly fix the power supply mode for maximum performance (Prefer Maximum Performance).
Red camp: we are opening AMD Adrenaline. We will definitely activate Anti-Lag, but we can safely turn off all sorts of features like Chill and Boost, because they only undermine the stability of frames.
By the way, you can’t touch the Shader Cache. It must always be turned on, otherwise heavy locations will take forever to load, and the game will start to stutter unbearably. If you notice wild drawdowns after major updates, demolish the firewood through the DDU utility.
How to clean up background processes and remove microfreezes
Even a brutal PC will start to suffocate if the system is full of junk. Kill browsers before rolling (especially if there are heavy tabs with Twitch hanging there). Be sure to disable background auto-updates in all launchers: Steam, Epic, Battle.net . The famous Discord Overlay is also flying into the trash, as it is famous for adding a noticeable input lag.
It is better to calm down the antivirus by throwing Fortnite executable files into exceptions. Don’t be lazy to open the task Manager and sort the processes by CPU and GPU load — you’ll be surprised how much extra garbage is spinning there.
Fast hardware tweaks for instant frame boost
Let’s go through the specific actions that give instant profit.:
-
Disabling HPET: Reduces system latency and stabilizes the frame schedule, which is crucial for competitive play at high ranks.
-
0.5 ms Timer Resolution: Perfectly saves weak processors from constant micro-crashes in dynamic scenes.
-
Cleaning the startup: A trivial step that easily brings +5-15 FPS on cluttered systems.
-
Installing SSD instead of HDD: An absolute must-have for old builds so that textures load without jerks.
-
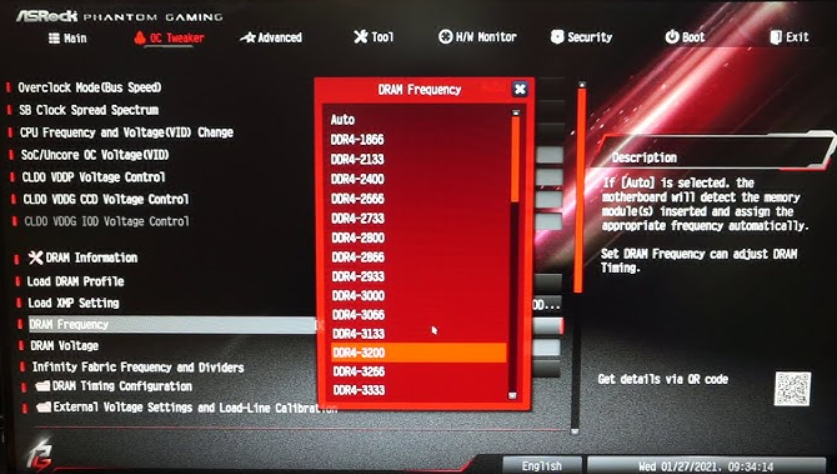
Activation of the XMP RAM profile: Gives a solid increase in frames in processor-dependent mixes, it works especially cool for Ryzen chips.
The HPET timer can be turned off directly in the device manager or via the console — but be careful, sometimes it has the opposite effect on specific motherboards.
Fortnite Processor and RAM requirements
The Battle Royale severely loads the processor, especially when a massive construction of dozens of elements begins in Leitheim. The basic minimum now is a stone for 4 cores and 8 threads, but for adequate gameplay you need at least 6/12. Frequency decides here: proper CPU overclocking often turns out to be much more profitable than buying a new graphics card.
Everything is strict with RAM, too. A volume of 16 GB is considered the minimum subsistence level, and the frequency of the dies should start from 3000-3600 MHz. And most importantly: dual-channel mode is strictly required! Without it, you’re draining up to 20% of your net productivity to nowhere. A living example: if you roll over from a single-channel configuration at 2666 MHz to a normal dual channel at 3200 MHz, you can easily get +15-25 FPS from above in the sweatiest files.
Optimizing the interface and damage display in Fortnite
With the interface, almost everything is at your discretion. But there are exceptions.
Turn it off to show the spread and show the impact from the first person. This reduces the visual impact for first-person weapons. True, this option is less relevant now — Fortnite Ballistic mode has been closed, but the habit remains.
We change the damage numbers to “Total”. This way you can immediately see the total damage done to the enemy, rather than a bunch of small numbers. We set the feedback of the sight on damage to “Hit and icons” — more clearly.
Adjusting mouse sensitivity in Fortnite like a pro
Everything is individual here: DPI, playing style, size of the mat. But there are a couple of absolute recommendations.
Keep the sensitivity on the X and Y axes the same. Choose the value yourself, but if you want to transfer settings from another game, use Kovaak’s Sensitivity Matcher (a serious synchronization tool).
It is better to reduce the sensitivity of the sight (ADS) and optics to about 75-80% of the main one. But keep the sensitivity of construction and editing at 100% so that it coincides with movement along the X/Y axes. And the main advice from professionals: zoom zoom, choose Legacy. This is the preferred option for esports players.
The best binds and keyboard layouts for players
There is no universal recipe here, and there never will be. Each pro player adjusts the controls to suit himself: it is more convenient for someone to squat on Ctrl, someone puts the run on Shift, and some unique people manage to play on the same keyboard without a mouse. But the backbone of the settings, around which all the building and editing revolves, still exists.
Basic control keys from movement to weapon selection
Let’s start with the movement. Sitting down is most often hung on Shift, Ctrl or C — everything depends on the size of the palm. Running, attention, can be duplicated — some put on Shift, others on the same Ctrl, but with a pinch. Personally, I’ve seen an option with running on Shift, and squatting on C — not the most obvious choice, but it works.
It is convenient to throw the pickaxe (pressing) on F or the middle mouse button (wheel). But the main tool (the gadget you’re pinching) is in the same place, holding the same key. Or by one, but then the finger runs far.
Weapon slots is a separate song. Numbers from 2 to 5, Q, E, X, plus up/down scroll. Pros often leave 1 for the first slot, and put the rest in convenient letters. I advise you not to put everything on Q and E, otherwise switch the wrong gun in the heat of battle.
Use (open a chest, pick up an item) — classic F or E. There are no surprises here.
Optimal bindings for fast wall and floor construction
The wall and stairs are ideally placed on the side mouse buttons (M4 and M5). One for each. Then the fingers of the right hand are not distracted from the sight at all. The floor and the pyramid are on Q, E, B or N. Someone puts the floor on Q, the pyramid on E, and then gets confused. VPEsports advises you to fix the floor on one side mouse button (if there are more than two) or on B, and the pyramid on N, so that the thumb of your left hand works.
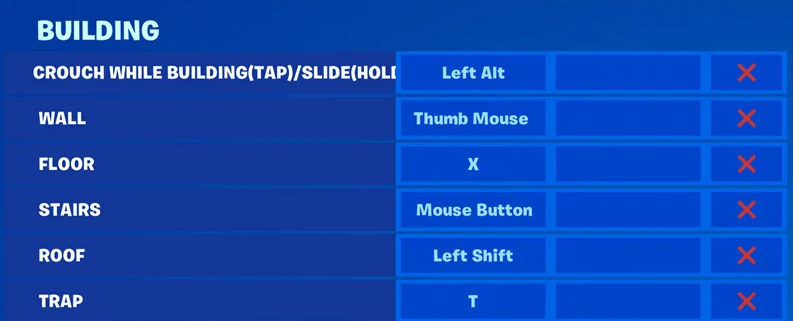
Repair / improvement — usually H. They rarely change it, but if your H is far away, transfer it to G.
Keys to rotate buildings and quickly change materials
Rotating the building and changing the material is convenient on R or T. It is better to hang the rotation on R (intuitively understandable), and the material change on T. But you can do the opposite — you’ll get used to it in a couple of days.
Setting up quick editing keys for buildings
Entering the editing mode is a critical key. Pros use Caps Lock, the middle mouse button, or even scroll. Caps Lock is a controversial option: if you accidentally click in the chat, you will start yelling with caps. The mouse is more convenient, but then the finger is busy. Personally, I’m in favor of the middle button. The fragment is selected after logging in with the left mouse button. Reset is the right one. Classic, don’t change it.
Mode change (for zero altitude when carrying a jetpack or other pocket items) — Caps Lock or X. But be careful: X may conflict with weapon slots or buildings. Check in the creative before entering the rating.
Configuring the gamepad in Fortnite and eliminating drift sticks
It’s the same story with the gamepad — there is no universal solution, but there are parameters that need to be adjusted to zero or almost zero.
Edit hold time — set the minimum value at which editing is not triggered by accidental touching. This is usually 0.05–0.10 seconds. Less — you will open the mode every time you look at the wall.
The time to hold the slide (and for the keyboard too) is the same. At least, so that the slide does not turn on when the stick is jerked sharply.
Vibration — turn it off completely. It only makes it difficult to aim and knocks down the rhythm of the building.
The sensitivity of construction and editing is set to 1x. It must be tied to the primary sensitivity of the scope, otherwise the brain will go crazy.
The dead zones of the left and right sticks are where the really important setting is. Set the minimum value at which the stick does not drift by itself (that is, the character does not move forward without your touch). If there is a drift, increase it slightly. 0.05–0.08 is often enough for new controllers. For those killed over the years — 0.12 and above.
Releasing the left and right triggers is also minimal, so that the trigger does not trigger at the slightest touch. This is critical for sniper shooting: you need a clear tap, not a rattle.
Selecting the control scheme on the controller for the PC version
Yes, it’s basically more difficult to build on a controller than on a keyboard with a mouse. But this does not mean that you cannot become a monster — the set of buttons here is more tightly limited, and there is less freedom. Epic, by the way, allows you to reassign individual keys, but this is a personal story. For those who don’t want to bother with manual setup from scratch, there are three ready-made options.
Builder Pro scheme for fast construction of buildings
The most popular option. Hundreds of thousands of public players and dozens of professionals have grown up on it. The logic is simple: each building is tied to its own trigger or bumper — you get used to it quickly, the building comes out fast. A minus sign? In close combat, fingers get tangled if they are not trained.
Combat Pro Scheme for Fortnite Zero Build mode
It’s worth taking a closer look at this mode if you don’t build in principle and only play Zero Build. It’s tailored for battles: switching weapons is more convenient, editing is not necessary, and there is surprisingly enough reaction time. But if you suddenly want to switch to the normal mode with builds, you will have to retrain. Not the most pleasant experience.
User manual adjustment of the controller buttons
The most flexible, but also the most hemorrhoid option. Epic allows you to assign each button manually, from squatting to rotating buildings. Plus: you customize the controls to fit the anatomy of your fingers. Minus: to set up everything adequately, you will have to sit in the creavite for a couple of evenings. Is it worth it? Judging by the pro players, yes. But get ready to experiment.
Short tip: Start with Builder Pro, play for a week. If you feel that something is wrong, go into the user settings. Take Combat Pro only for Zero Build, otherwise you will waste your time.