
In Subnautica 2, almost every useful tool—from the scanner to the aquaglider and the builder—requires energy. They are powered by simple batteries. A tool comes fully charged immediately after crafting, but the charge drains as it’s used. Eventually, it stops working.
Some players habitually craft a new tool to replace a dead one. This is expensive and pointless—it’s a waste of resources. It’s much easier to recharge. Replace the old battery with a full one, and you’re good to go. And empty batteries don’t go to waste: they can be recharged over and over again at a special terminal. It’s economical and a survival tool.
Table of Contents
How to recharge tools in Subnautica 2?
The most straightforward way is to take a charged simple battery and insert it into the discharged device. It looks like this:
-
Place the full battery in your inventory.
-
Select the desired tool on the quick access bar.
-
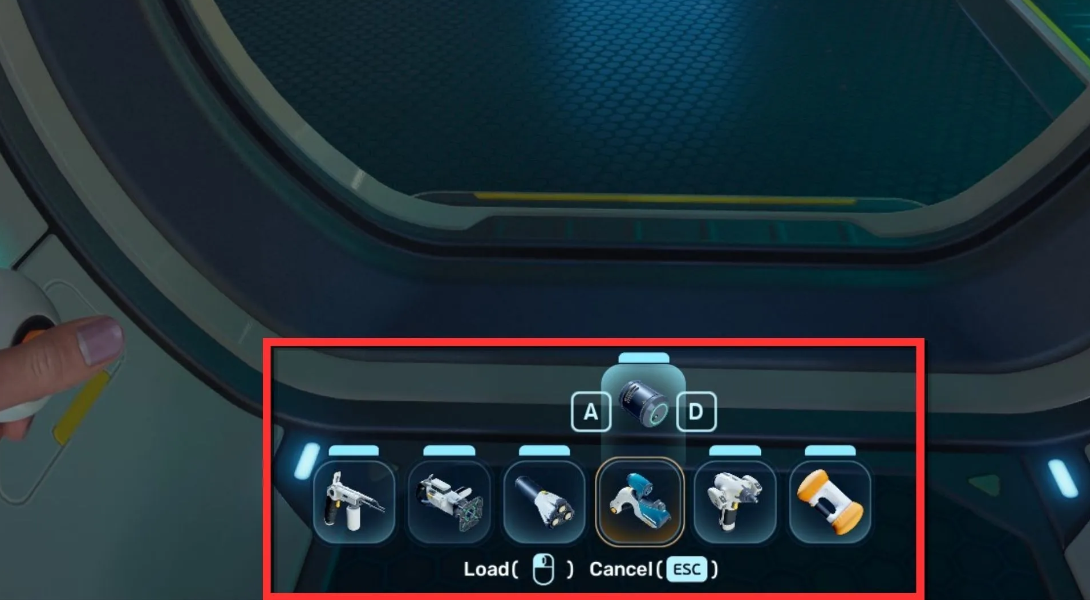
Press “R” to open the recharge menu.
-
Select the charged battery from the list.
-
Click the “Load” button on the screen.
That’s it. The charged battery is transferred to the tool, and the empty one goes to your backpack. If you have multiple batteries in your inventory, their current charge is shown at the bottom of the selection window—you can switch and select the fullest one.
What if you’re in a deep-sea cave, your scanner is dead, and you don’t have a spare battery? Transfer the battery from another tool. It works like this:

-
Select a tool that still has energy (for example, a builder).
-
Press “R” to open the recharge menu.
-
Click “Unload”—the battery is transferred from it to your inventory.
-
Now this battery can be used to charge the scanner, as described above.
It’s worth noting that the “Tadpole” (underwater vehicle) is powered not by regular batteries, but by energy cells. They are also charged at a special terminal—but that’s a slightly different story.
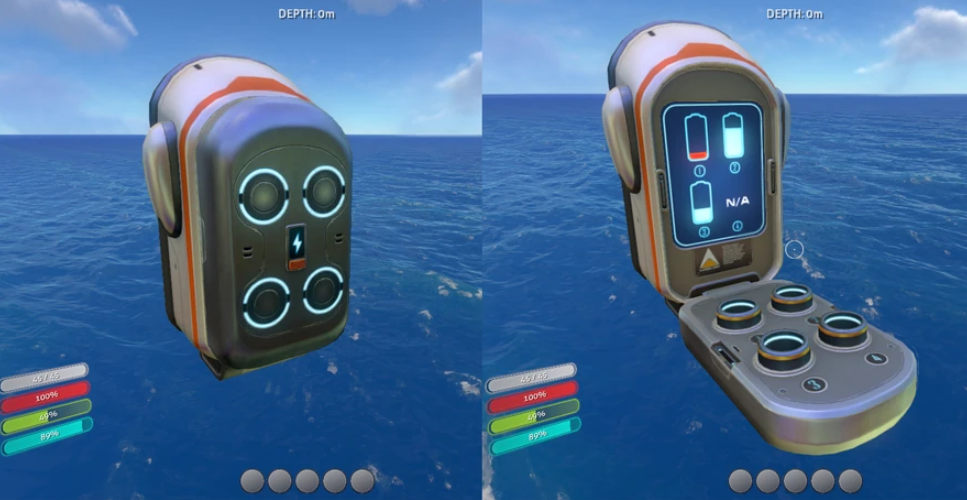
How to charge a simple battery in Subnautica 2?
Don’t throw away empty batteries—you can refill them at a special terminal. This is a separate module for the base that runs on its power and charges up to six batteries simultaneously. It’s a handy feature, especially when you’re using a scanner, a builder, and a hydroglider.
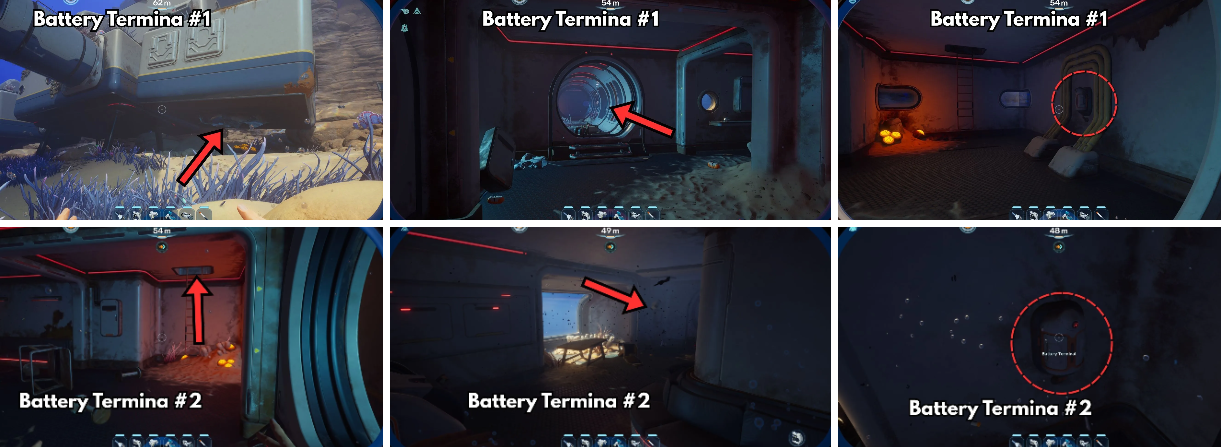
Where to find battery terminal fragments?
The terminal blueprint doesn’t unlock right away. You need to find and scan two fragments. Both are located in the old residential base—it’s approximately 220 meters southeast of the escape pod.
-
Fragment #1 is on the wall, directly under the signal from that very base. You can’t miss it.
-
Fragment #2 is also on the wall, but next to the Quaker’s black box. The second floor is available if you get lost.
Battery terminal usage rules
Once you have the blueprint, you can build. The recipe isn’t the most stingy:
-
Titanium x2
-
Quartz x2
-
Copper Wire x1
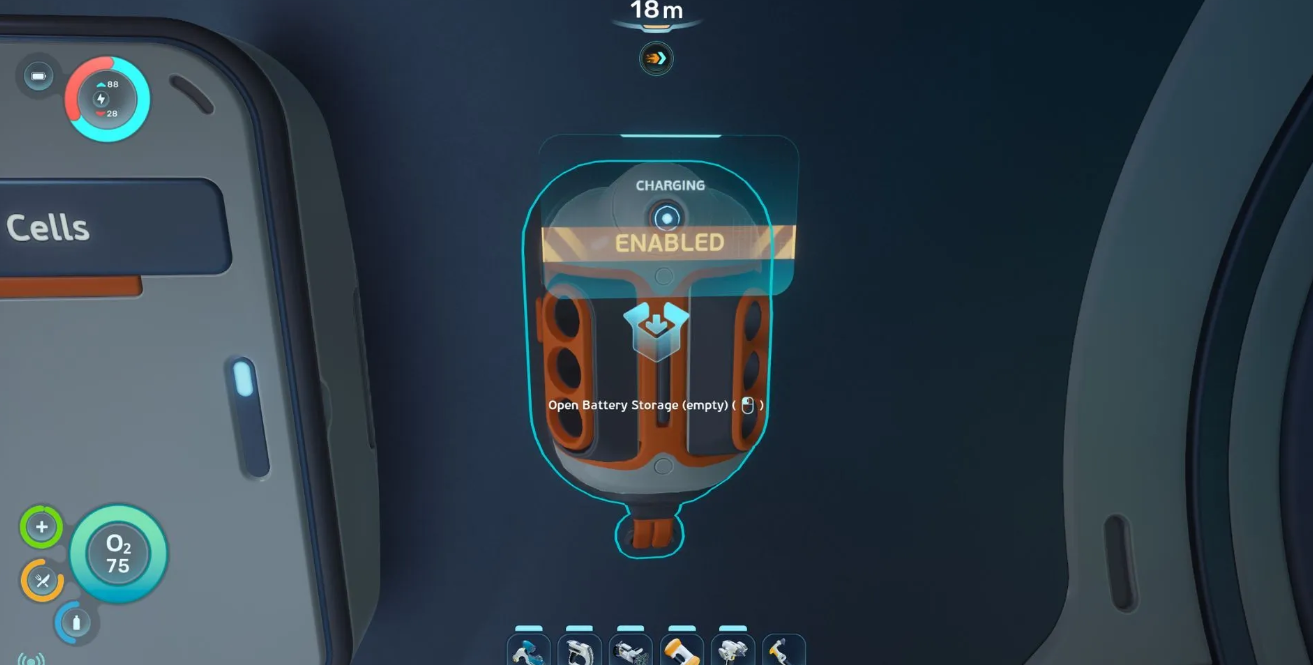
Place a terminal in your base—throw in discharged regular batteries. Then everything’s automatic: the terminal draws power from the base and charges them. The process is fast—from zero to 100% in just a minute. Seriously, one minute.
There’s one catch. Each charging battery consumes 1 unit of energy per second from the base’s reserves. Charge one—you spend 1 unit per second. Place six at once—minus 6 units every second. The base must handle this, otherwise charging will stall.
Crafting batteries without a terminal at the start of the game
Before the terminal is even built, you have exactly one working tool—crafting supplies. Until you have a full-fledged base, your only option is to stockpile. One battery reliably goes into the scanner, the second (or better yet, a couple) is kept in your pocket as insurance against unforeseen situations in the depths. The survival recipe is simple: 2× Copper + 1× Acidic Raion Pouch. The folks at MetaForgeGames advise against being stingy. Up to five sacs can easily be cut from a single Acidic Raion bush at a time—more than enough for a whole pack of batteries.
The best route in the first 20 minutes of survival
You need to act quickly. Here’s the optimal starting plan:
-
Collect the Survival Multitool (3× Titanium). Without it, you won’t be able to hack the local flora.
-
Dive into the cave directly beneath the escape pod. There’s copper there and at least one Raion bush growing. Copper is a key ingredient here—it’s needed for batteries, copper wire, and dozens of other basic recipes (as MetaForge rightly points out). Vacuum up everything you can carry.
-
Craft 3-4 batteries at once. You can’t live on just one. Through trial and error, Video Game Chronicle discovered that it’s optimal to always keep six extra cans charged. Carry this supply with you until the terminal appears.
-
Sail to the Old Base location. Search for terminal fragments—that’s your number one priority once you get your hands on the scanner.
Charging batteries without draining the base’s power supply
Let’s say you’ve assembled the charger, but the power supply is barely holding up. The terminal itself consumes almost nothing—it runs on any positive balance from the base. Even a single dead solar panel on the surface will trigger the process. Problems arise when charging in bulk: each cell draws 1 unit per second. The base can simply shut down.
How to charge efficiently and not slow down progress:
-
Start with the emptiest one. Plug in the dead cell first—it will reach 100% in about a minute and immediately free up the slot.
-
Observe the limits. Inserting 2–3 cells simultaneously is perfectly acceptable for a single-panel network. Trying to charge 6 at once? You’re guaranteed to experience a significant power drain.
-
Change batteries before heading out to sea. Don’t wait for the tool to shut down right in front of a predator. The battery bar is clearly visible on the quick access panel without having to dig through your inventory. This simple rule will save you a ton of stress.