
The Potion of Weakness in Minecraft is the only potion that doesn’t require Nether Wart. You can brew it as soon as you get to a brewing station, or even find it ready in the basement of an igloo. Take a bottle of water, add a fermented spider eye, and in 20 seconds you’ll have a potion that reduces melee damage by 4 (2 hearts) for a minute and a half.
And that’s not all. This same potion is the only way to heal a zombie villager and get a permanent discount on trade. It sounds like a small thing, but in practice, it changes the entire early-game economy.
Most guides write about potion brewing as if you’ve already settled into the Nether. But the Potion of Weakness is a special case. Its recipe bypasses the “Awkward Potion” step, which is usually brewed with Nether Wart. This means: if you have a brewing station and Blaze Powder, you can brew a Potion of Weakness right away. And if you don’t even have that, there’s a loophole. But more on that later.
Table of Contents
What is a Potion of Weakness and what is it for?
“Weakness” is a negative effect, but in skilled hands, it becomes a key tool for two things: healing zombie villagers and weakening mobs in PvP.
In Java Edition, the potion reduces melee damage by exactly 4 points (2 hearts). In Bedrock Edition, the mechanics are more sophisticated: the damage is multiplied by a coefficient, and the average reduction is around 20%. If a zombie charges at you with 3 hearts of damage, in Java it suddenly becomes almost harmless. In Bedrock, it’s still painful, but bearable.

This affects mobs the same way as it does players. Weakness doesn’t affect ranged combat—archers and skeletons simply won’t notice your efforts. But if you’re playing on a PvP server or just want to safely pass through a horde of zombies, a Potion of Weakness works.
Its main use is healing zombie villagers. Without Weakness, it’s impossible to cure them. And a cured villager gives you a discount of up to 70% on all goods. In Bedrock Edition, the discount applies to all villagers within a 16-block radius. So, one potion can turn your trade around.
How to brew a Potion of Weakness – step-by-step recipe
The recipe is ridiculously simple. Unlike all other potions, you don’t need Nether Wart.
Potion Ingredients
-
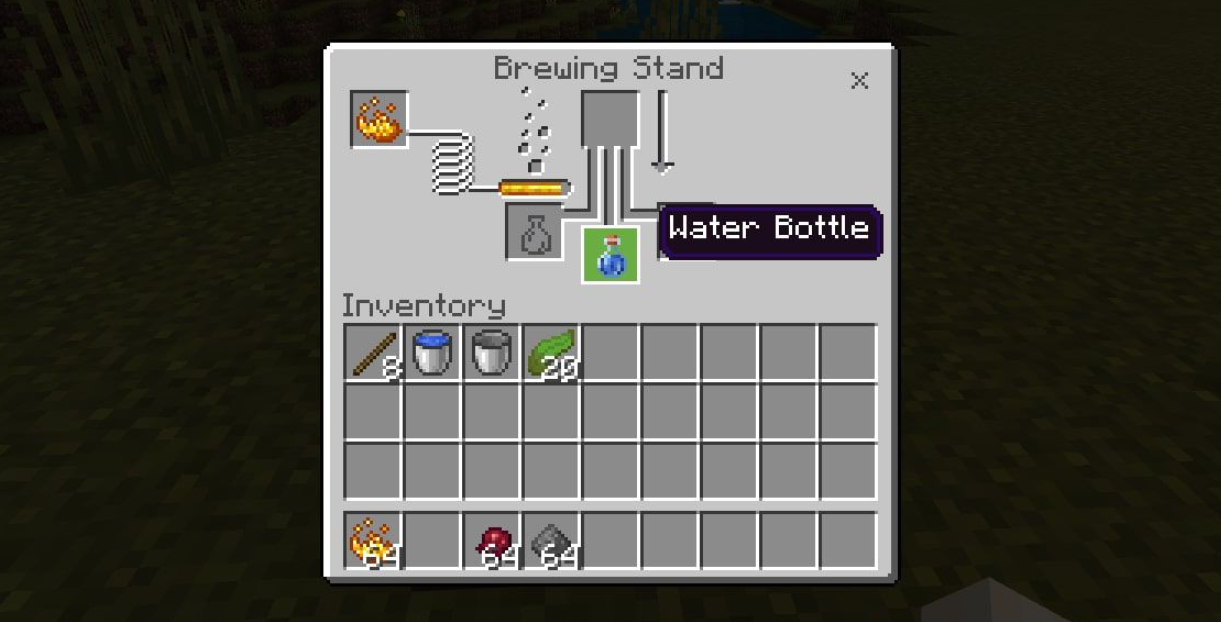
Water Bottle — 3 (placed in the bottom slots of the brewer).
-
Fermented Spider Eye — 1 (placed in the top slot).
-
Blaze Powder — fuel for the brewer (left slot).
A brewing potion is crafted from 1 Blaze Rod and 3 Cobblestones. Blaze Powder is obtained from the rod—one is enough for about 20 brews.
Where to get ingredients in the early stages
-
Spider Eye: Drops from spiders (normal, cave, and web-web). The drop rate is about 33%. Night hunting or the spawner in the mine is your choice.
-
Sugar: From sugarcane. Grows near water in any biome. One cane → one sugar in a crafting table.
-
Brown Mushroom: In dark forests, caves, swamps, or on mushroom islands.
-
Blaze Rod/Powder: From Blazes in the Nether. Yes, this is the only ingredient you’ll have to go to Hell for. But there’s a catch—read on.
Step-by-step brewing
-
Place the brewer and place Blaze Powder in the left slot.
-
Place bottles of water in the lower slots.
-
Place a Fermented Spider Eye in the top slot.
-
After 20 seconds, the potion is ready.
That’s it. No intermediate steps. This is the only potion that is brewed directly from water.
All Weakness Potion variants — table
Important detail: the duration of the splash potion in Bedrock is reduced to 1:07 — this is due to the effect conversion when switching to the splash version. If you’re playing on Java, you don’t have to worry about it. If you’re playing on Bedrock, keep in mind that you have 23 seconds less time to heal a zombie villager.
How to make a Weakness Potion without Nether — earliest access
Remember the loophole I mentioned? Here it is.
A Potion of Weakness doesn’t require Nether Wart, but it does require Blaze Powder for brewing. And Blaze Powder comes from the Nether. It seems like a vicious circle. But there’s a way around it.
Igloo Basement – A Ready-Made Solution for Beginners
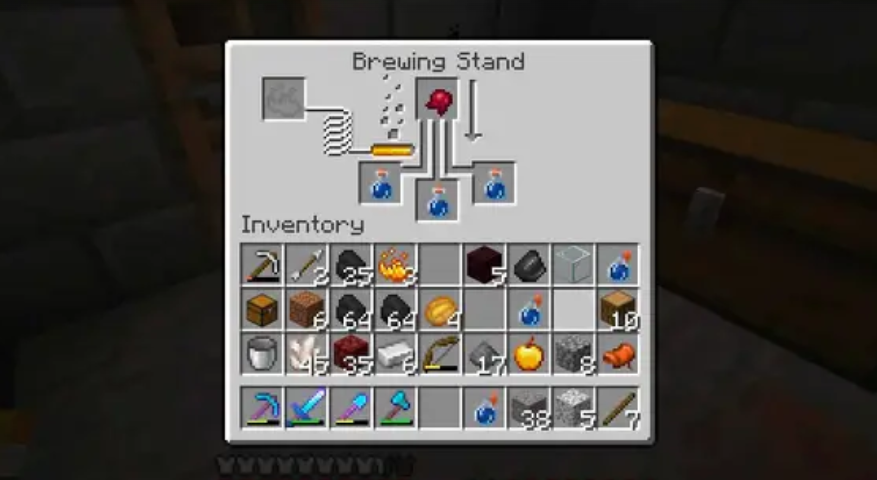
Igloos have a 50% chance of spawning in snowy biomes (taiga, snowy tundra). Every other igloo has a basement underneath it. In this basement, you’ll find:
-
A brewing station with a pre-charged Explosive Potion of Weakness.
-
A chest containing a golden apple.
-
A zombie villager behind bars.
This means you get a ready-made kit for healing a zombie villager, even without your own brewing station or entering the Nether. Find an igloo – consider it almost cured.
The process is simple:
-
Go down to the igloo basement.
-
Take the Explosive Potion of Weakness from the brewer.
-
Take the Golden Apple from the chest.
-
Throw the potion at the zombie villager.
-
Immediately give it the Golden Apple.
-
Wait 2-5 minutes.
Just like that, without a single trip to the Nether, you get a cured villager and discounts on trades. This is the earliest access to the Potion of Weakness in the game.
Healing a Zombie Villager with a Weakness Potion – Step-by-Step
Zombie villagers have a 5% chance of spawning instead of regular zombies. They are guaranteed to be found in the Igloo Basement, but can also be found in the overworld.
Step-by-Step Healing Algorithm
-
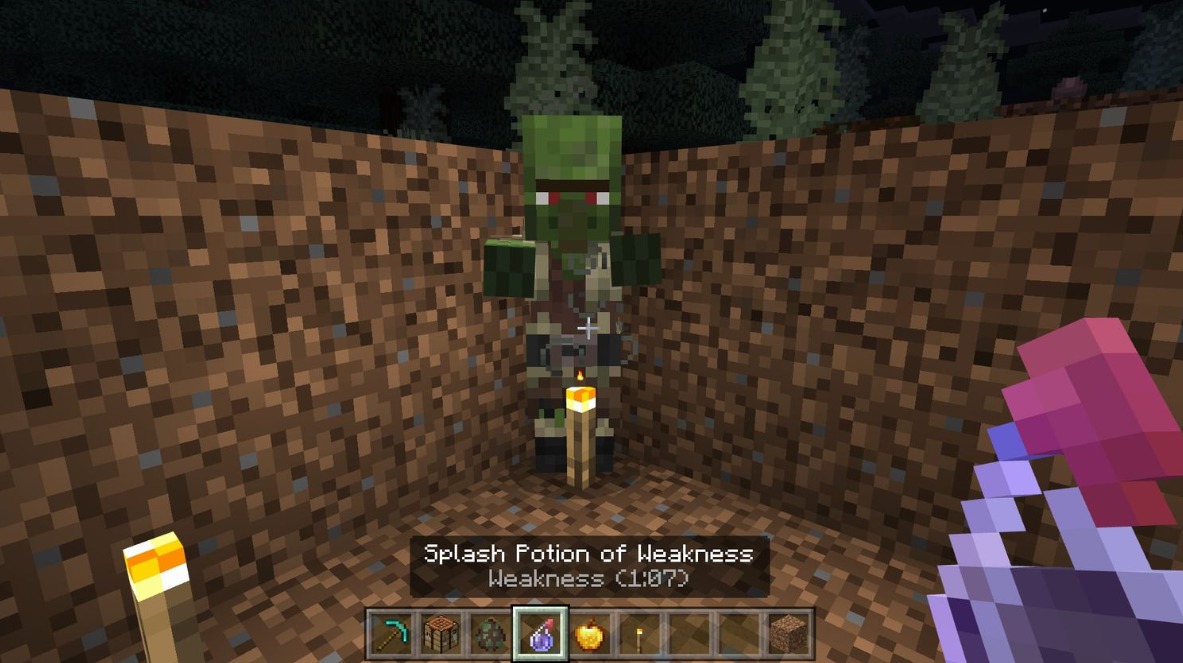
Apply the Weakness effect. A splash potion of Weakness is best. You can use either a lingering potion or a Weakness Arrow, as long as the effect hits the zombie villager.
-
Give the villager a golden apple. While the zombie is weakened, aim the weapon and right-click (or press the use button) with the golden apple in hand.
-
Wait. The zombie villager will begin to shake, and red particles will appear. This process takes 2-5 minutes in Java and about 1 minute 40 seconds in Bedrock.
-
Receive the villager. Once the process is complete, the zombie transforms into a regular villager with the same profession they had before transformation.
Discounts on trade after healing
That’s what all this is about. A healed villager provides a permanent discount on all goods—on average, around 70%. In Bedrock Edition, the discount applies to all villagers within a 16-block radius. Healing the same villager again increases the discount, down to a minimum price of 1 emerald for any book or item.
So, one potion of weakness and one golden apple can turn an expensive merchant into a source of cheap enchanted books. And if you find a needle, you get it all for free, without a single resource.
Simple ingredient farms in the early game
Fermented spider eyes are crafted from spider eyes, sugar, and brown mushrooms. All three ingredients can be automated or at least simplified.
Spider farm
The easiest option is to find a spider spawner in a mine. Fence it in, create a dark room with water that flushes the spiders to a single spot, and kill them with one hit. Alternatively, simply go hunting at night. Spiders crawl out of every crevice, and spider eyes are usually more than enough.
Sugarcane Farm
Plant sugarcane near water—it grows up to 3 blocks. An automatic farm is made with an observer and pistons: the observer is triggered when the sugarcane grows to 3 blocks, a piston knocks down the upper blocks, and they fall into the water, which washes them into a chest. A 5-minute setup gives you infinite sugar.
Where to get brown mushrooms?
Brown mushrooms grow in dark forests, caves, and swamp biomes. They can be propagated: plant a mushroom on a block in a dark place nearby, and it will spread to adjacent blocks. Mushrooms grow on mycelium or in complete darkness even in bright light—you can build an underground mushroom farm and forget about shortages.
Potion of Weakness is the most readily available potion in the game. It doesn’t require Nether Wart, is brewed directly from water, and its main use—healing zombie villagers—more than pays for itself.
If you have a brewing station, brew it. If not, find a needle. In both cases, the result is the same: you gain access to cheap trading, which speeds up progress significantly. And all this without a single trip to the Nether, right from the very beginning of the game.